Launching paper airplanes is a classic pastime, but what if you could significantly boost their range and speed? With a few simple materials and these easy-to-follow instructions, you can build your very own paper airplane launcher. This guide will walk you through each step of the process, from selecting the right materials to mastering the launching technique.
This launcher utilizes the power of elastic tension to propel your paper airplanes farther than you ever thought possible. It's a fun and engaging project for kids and adults alike, combining creativity with basic physics principles. Get ready to unleash your inner engineer and watch your paper airplanes soar!
Let's dive in and learn how to create this exciting device. Prepare to be amazed by the improved performance of your paper aircraft.
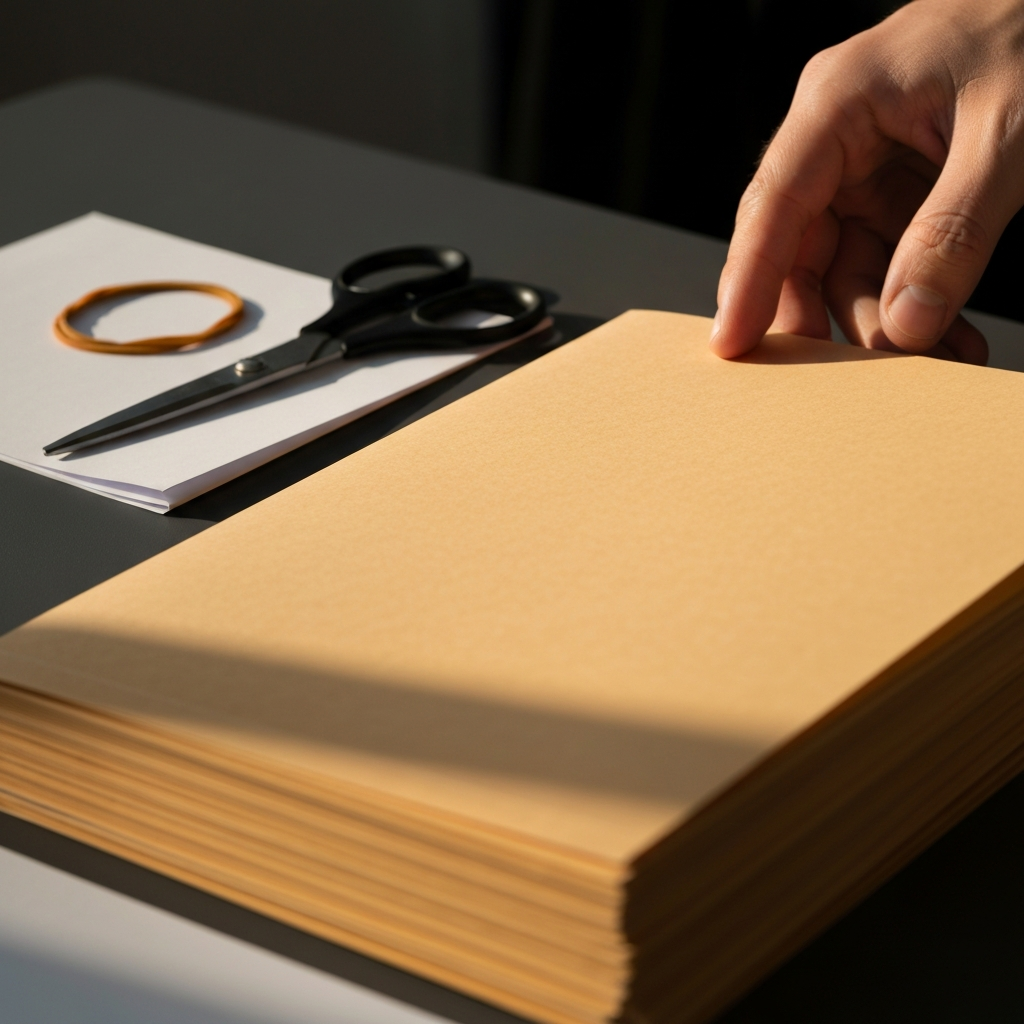
Step 1: Gathering Your Materials
Before you begin, you'll need to gather the necessary materials. These are readily available and inexpensive, making this project accessible to everyone. A sturdy file folder is essential for the launcher's frame. You will also need a standard sheet of paper for practicing your paper airplane designs. Finally, an elastic band provides the launching power. Scissors are crucial for precise cuts.
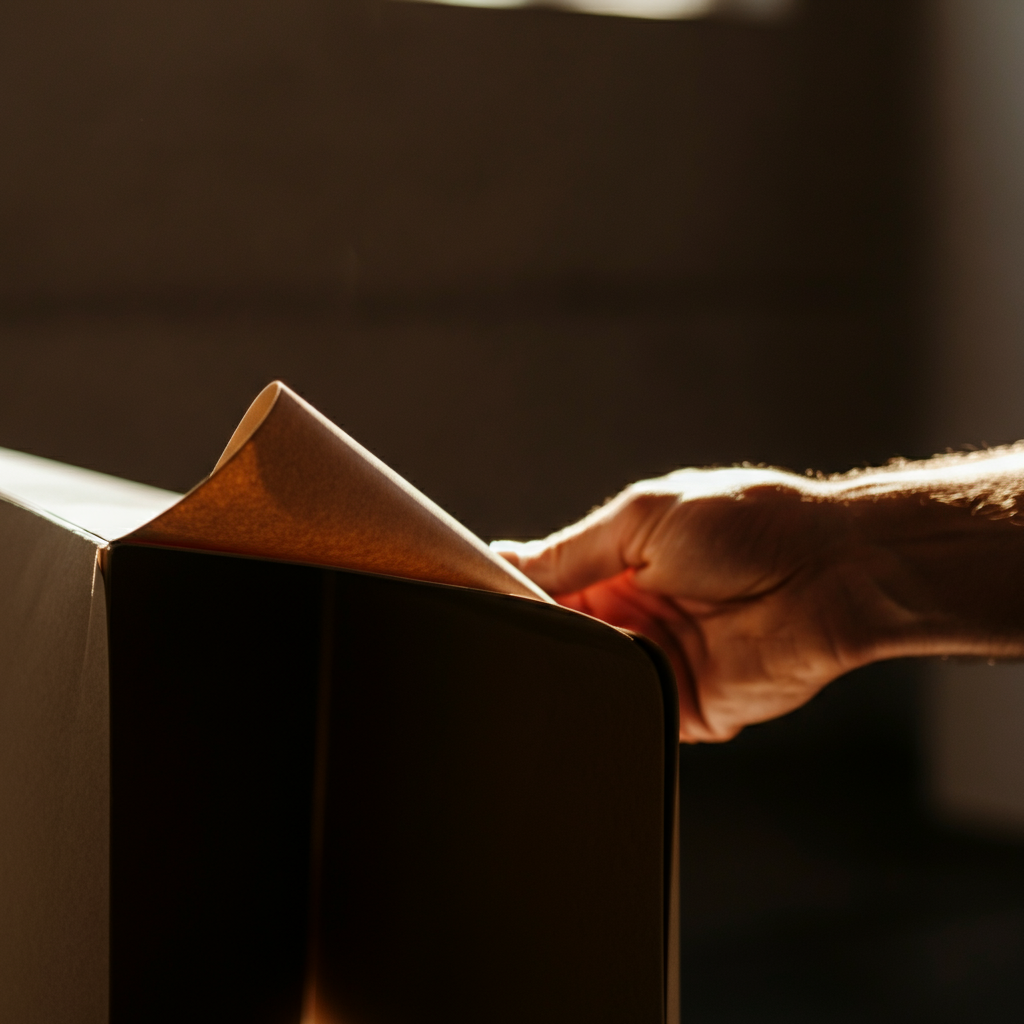
Step 2: Folding the Launcher Base - First Fold
Begin by folding the file folder in half along its longer side. Ensure the fold is crisp and clean. A poorly creased fold can weaken the structure and affect the launcher's performance. Press firmly along the fold line to create a sharp crease. This creates the foundation of the launching mechanism.

Step 3: Creating the First Fold - Towards the Center
Now, take one half of the folded file folder and fold it up towards the center fold. Again, prioritize creating a sharp and clean crease. Aim for the edge of the folder to align precisely with the center fold. Precision is key here; avoid overlapping or leaving gaps. This fold forms part of the channel that will guide the paper airplane.
Step 4: Folding Down to the Created Fold
Fold the newly folded section down again, towards the existing fold you just created. Ensure that the tip of the paper you are now folding is not longer than the folded edge. The end of the paper should be the same as the folded edge for a perfect or almost perfect length. This creates a more secure channel for launching. Precision is paramount to ensure the launcher's efficacy.

Step 5: Repeat Folds on the Other Side
Flip the file folder over and repeat steps 3 and 4 on the other side. This creates a symmetrical structure. Maintaining symmetry is crucial for balanced launching. Carefully align the folds to mirror those on the opposite side. This ensures that your paper airplane will launch straight and true.

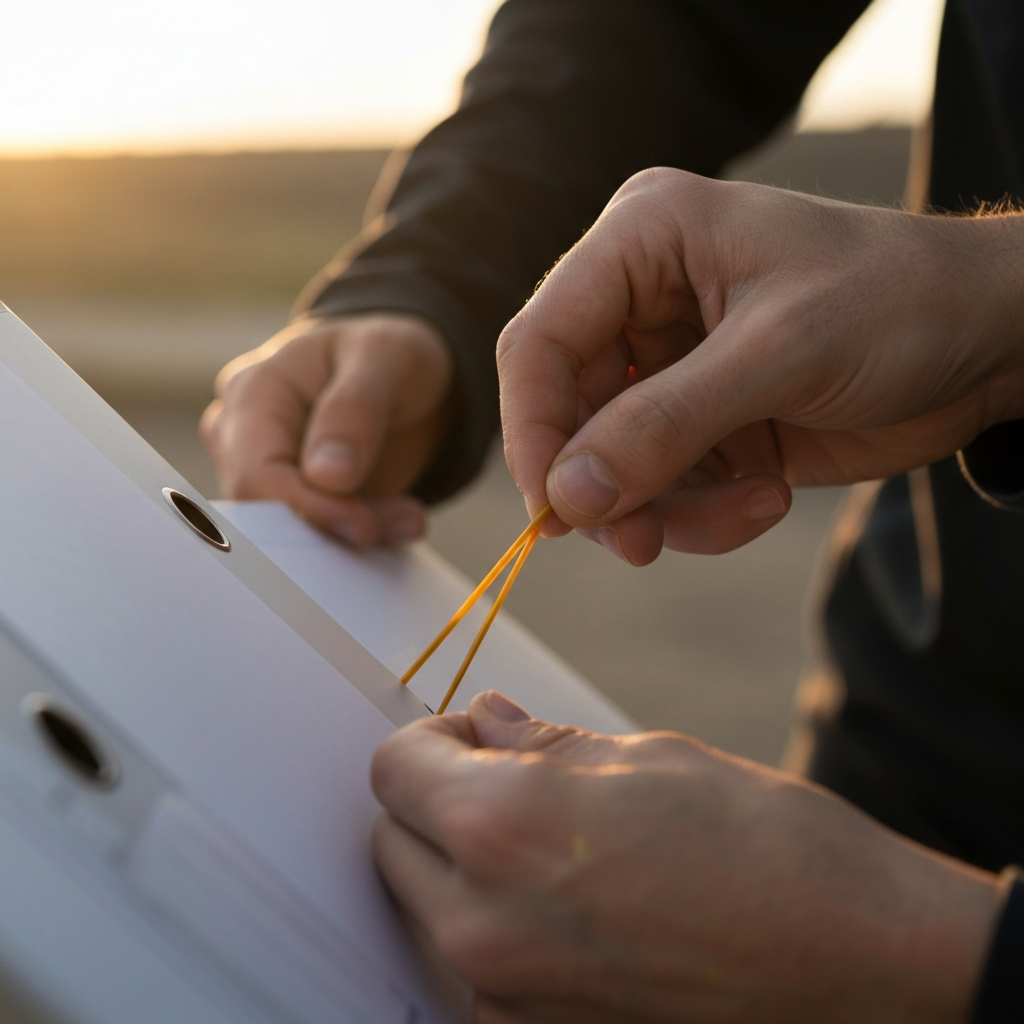
Step 6: Creating the Rubber Band Slot
With the folding complete, create a diagonal cut at the bottom of the launcher. This cut will act as the slot for your rubber band. Be careful not to cut through to the folds you've created. A shallow, angled cut is sufficient. Test-fit the rubber band to ensure it sits securely in the slot.

Step 7: Inserting the Rubber Band
Carefully insert the rubber band into the slot you've created. Stretch the rubber band to the back of the launcher and secure it. Consider reinforcing the slot with tape to prevent tearing, especially with repeated use. The rubber band should be taut but not overly stretched.
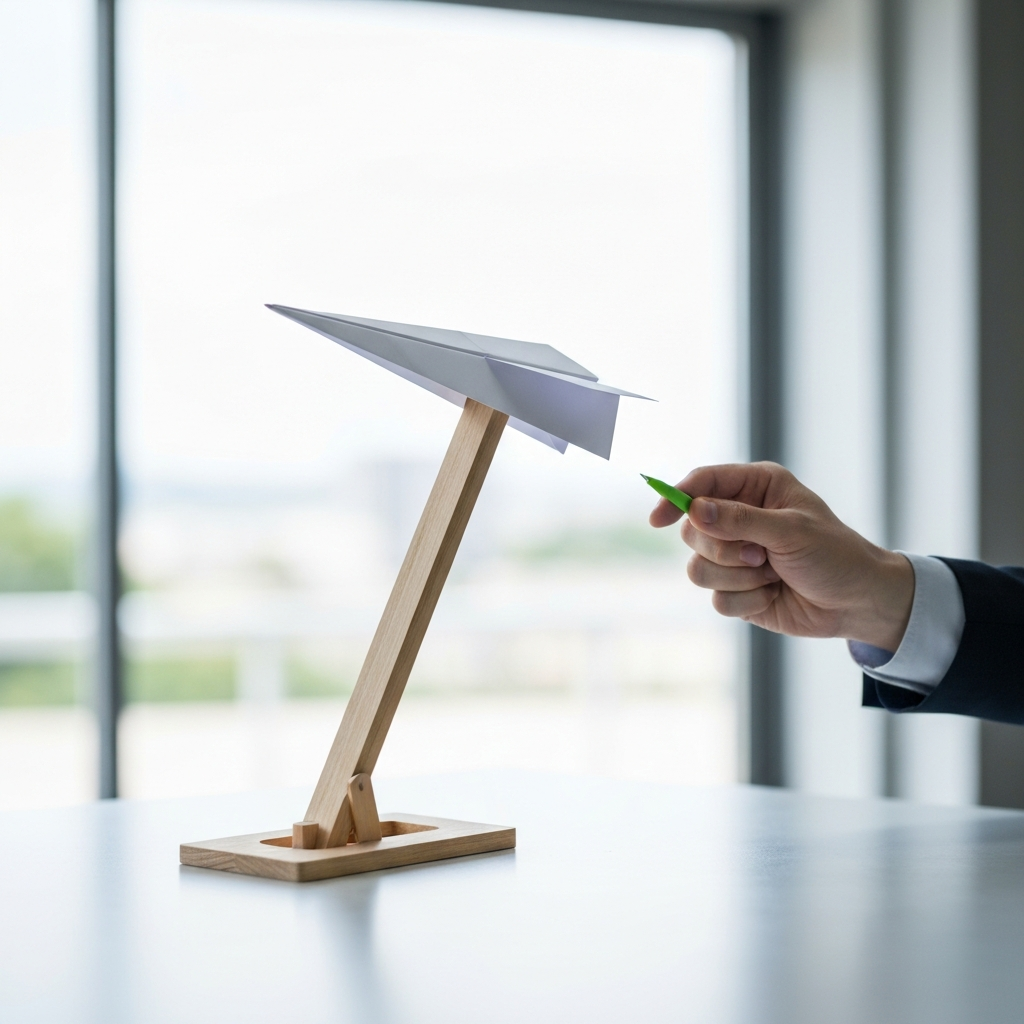
Step 8: Launching Your Paper Airplane
Now for the fun part! Slide your paper airplane into the slot formed at the top edges of the paper folder. Pull outward on the sides of the slot to launch the plane forward. Experiment with different paper airplane designs to optimize your launches. Practice your technique to achieve maximum distance and accuracy.
Safety Considerations
Always aim your paper airplane launcher away from people and fragile objects. Paper airplanes can travel surprisingly far and fast, so it's important to be mindful of your surroundings. Never point the launcher at someone's face, especially their eyes.
Pro Tips
- Experiment with different rubber band sizes and strengths to adjust the launching power.
- Reinforce the file folder with tape for increased durability.
- Try different paper airplane designs to see which ones launch best with your launcher.
FAQ Section
Q: Why isn't my paper airplane launching very far?
A: Ensure that the rubber band is properly tensioned and that your paper airplane is properly balanced. Also, check that the launcher is not damaged or weakened.
Q: The rubber band keeps slipping out of the slot. What can I do?
A: Reinforce the slot with tape, or try using a thicker rubber band.
Q: Can I use a different type of folder?
A: A sturdy file folder is ideal, but you can experiment with other materials such as thin cardboard. However, ensure the material is strong enough to withstand the tension of the rubber band.
Conclusion
Congratulations! You've successfully built your own paper airplane launcher. With a little practice and experimentation, you'll be sending your paper airplanes soaring through the air. Remember to prioritize safety and have fun! This simple device can provide hours of entertainment and is a great way to explore the principles of physics in a hands-on way.