Photography is more than just pointing and shooting; it's about capturing a vision and telling a story. But sometimes, our photos can feel flat or uninspired. This guide offers actionable steps to inject creativity into your photography, helping you move beyond the ordinary and create truly captivating images.
Whether you're a beginner or an experienced photographer, there's always room to explore new techniques and push your creative boundaries. We'll cover practical tips, from using reflections and long exposure to incorporating nature and experimenting with double exposure. Prepare to see your photos in a whole new light.
This isn't just about editing; it's about approaching photography with a fresh perspective and developing your unique artistic voice. Let's dive in!
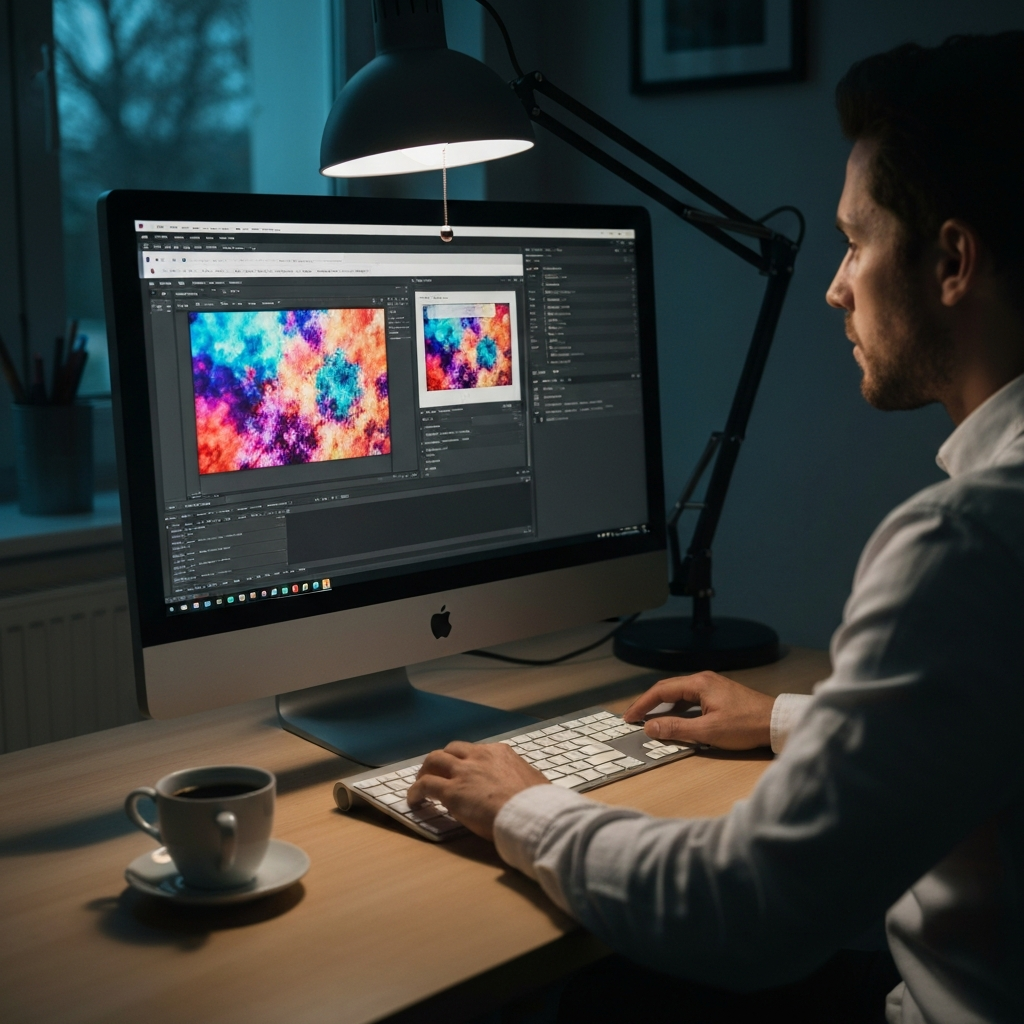
Step 1: Edit Your Photos with Software
Harness the Power of Photo Editing
Post-processing is a crucial step in adding creativity to your photos. Software like Photoshop or GIMP (a free alternative) allows you to manipulate colors, adjust lighting, and add unique effects. While it's possible to be creative without editing, these tools unlock a vast array of possibilities. Experiment with different filters, color grading techniques, and retouching tools to transform your images. Don't be afraid to push the boundaries and try unconventional approaches.
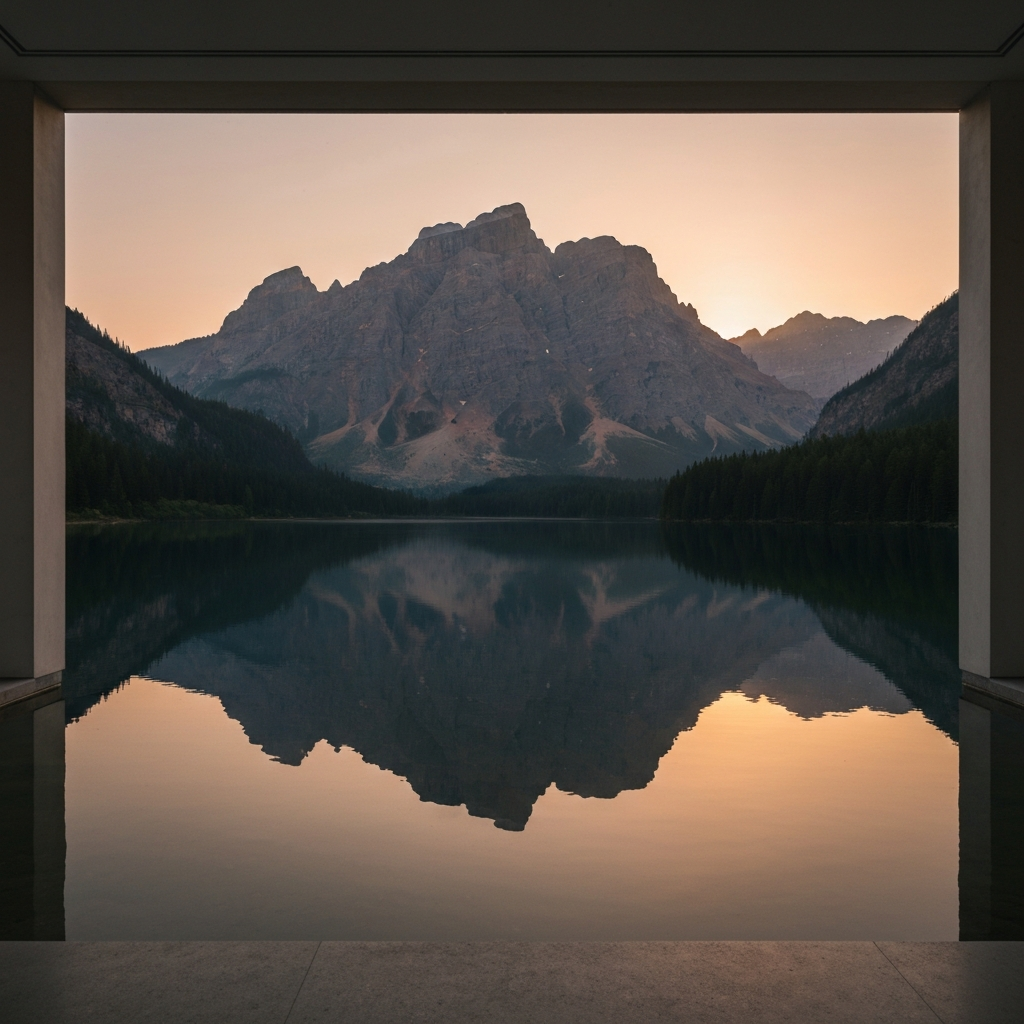
Step 2: Include Reflections
Capture the Magic of Reflections
Reflections add depth, symmetry, and visual interest to your photos. Look for opportunities to incorporate reflective surfaces in your compositions. These can include mirrors, bodies of water, glass windows, or even wet pavements. The reflection can either mirror the subject perfectly, creating a surreal effect, or offer a distorted or abstracted view, adding an element of mystery. Consider the angle and position yourself to capture the most compelling reflection.
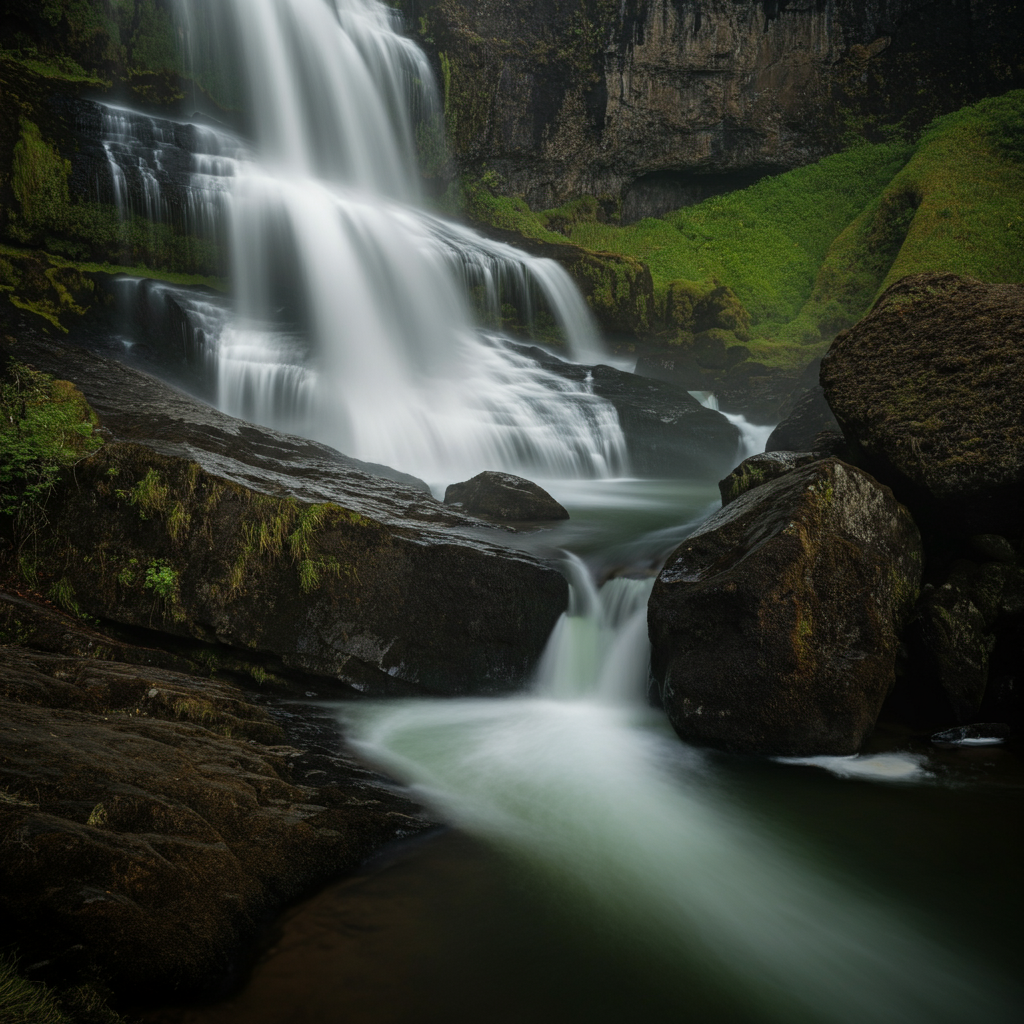
Step 3: Experiment with Long Exposure
Embrace the Art of Motion
Long exposure photography involves using a slow shutter speed to capture movement over time. This technique can create stunning effects, blurring moving objects and creating a sense of ethereal beauty. To achieve long exposures, you'll typically need a tripod to keep your camera steady. You may also need an ND filter to reduce the amount of light entering the lens, allowing for longer shutter speeds in bright conditions. Start with experimenting with shutter speeds between 1-30 seconds and adjust based on the lighting and desired effect.
Step 4: Play with Brightness, Size, or Scale
Challenge Perspective and Perception
Altering the brightness, size, or scale of elements in your photos can drastically change their impact. Experiment with overexposing or underexposing your images to create different moods. Manipulate perspective by using wide-angle lenses or shooting from unusual angles. Consider incorporating objects of contrasting sizes to create a sense of scale and drama. The goal is to challenge the viewer's perception and create a visually compelling image.

Step 5: Incorporate Nature
Find Beauty in the Natural World
Nature offers endless opportunities for creative photography. From landscapes and wildlife to macro shots of flowers and insects, the natural world is a rich source of inspiration. Seek out interesting textures, colors, and patterns in nature. Consider the time of day and the lighting conditions to capture the beauty of nature at its best. Golden hour (the hour after sunrise and the hour before sunset) often provides the most flattering light.

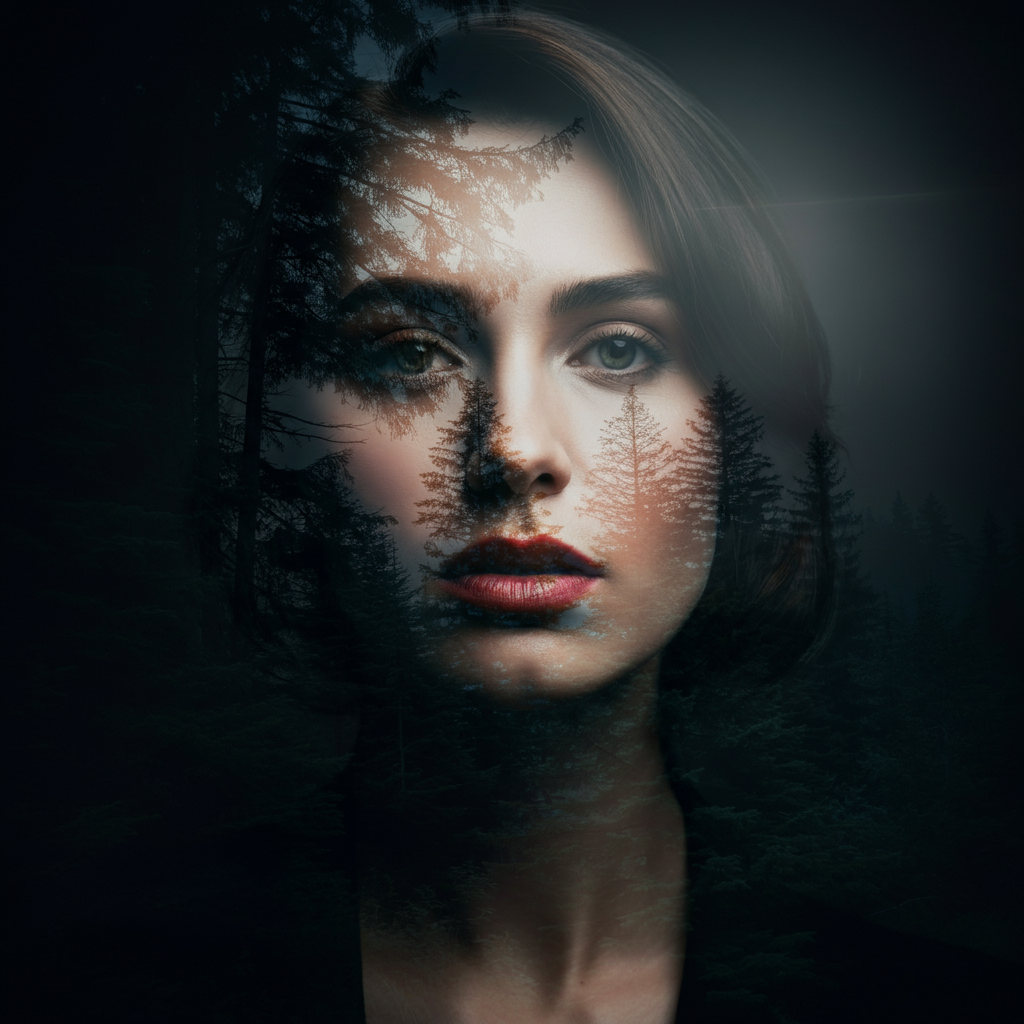
Step 6: Experiment with Double Exposure
Blend Worlds Together
Double exposure involves combining two or more images into a single frame. This technique can create surreal and dreamlike effects. Some cameras have a built-in double exposure mode, while others require you to combine the images in post-processing software. Experiment with different combinations of images to see what works best. Consider using contrasting subjects or textures to create a visually interesting blend.
Common Mistakes to Avoid
- Over-editing: While editing is important, avoid overdoing it. Subtle adjustments are often more effective than drastic changes.
- Ignoring composition: Pay attention to the basic principles of composition, such as the rule of thirds and leading lines.
- Lack of experimentation: Don't be afraid to try new things and push your creative boundaries.
Conclusion
Adding creativity to your photos is a journey of exploration and discovery. By experimenting with different techniques, challenging your perspective, and embracing your unique artistic vision, you can transform ordinary images into extraordinary works of art. Remember to practice, be patient, and most importantly, have fun!