Kool-Aid pickles, also known as Koolickles, are a surprisingly delightful treat that combines the tangy goodness of pickles with the sweet, fruity flavors of Kool-Aid. This quirky snack is popular in the Southern United States, especially among children, but its unique flavor profile makes it a fun and interesting culinary experiment for anyone. The process is simple, requiring only a few ingredients and a little bit of patience. Prepare to be surprised by this sweet, sour, and salty flavor explosion!
Creating Kool-Aid pickles at home allows you to customize the sweetness and flavor to your exact liking. Experiment with different Kool-Aid flavors to discover your personal favorite combination. This guide will walk you through the process step-by-step, ensuring you create a batch of Koolickles that will tantalize your taste buds.
These pickles are a great conversation starter and a fun addition to picnics, parties, or even as a unique after-school snack. So, grab your ingredients and get ready to embark on a delicious adventure!
-
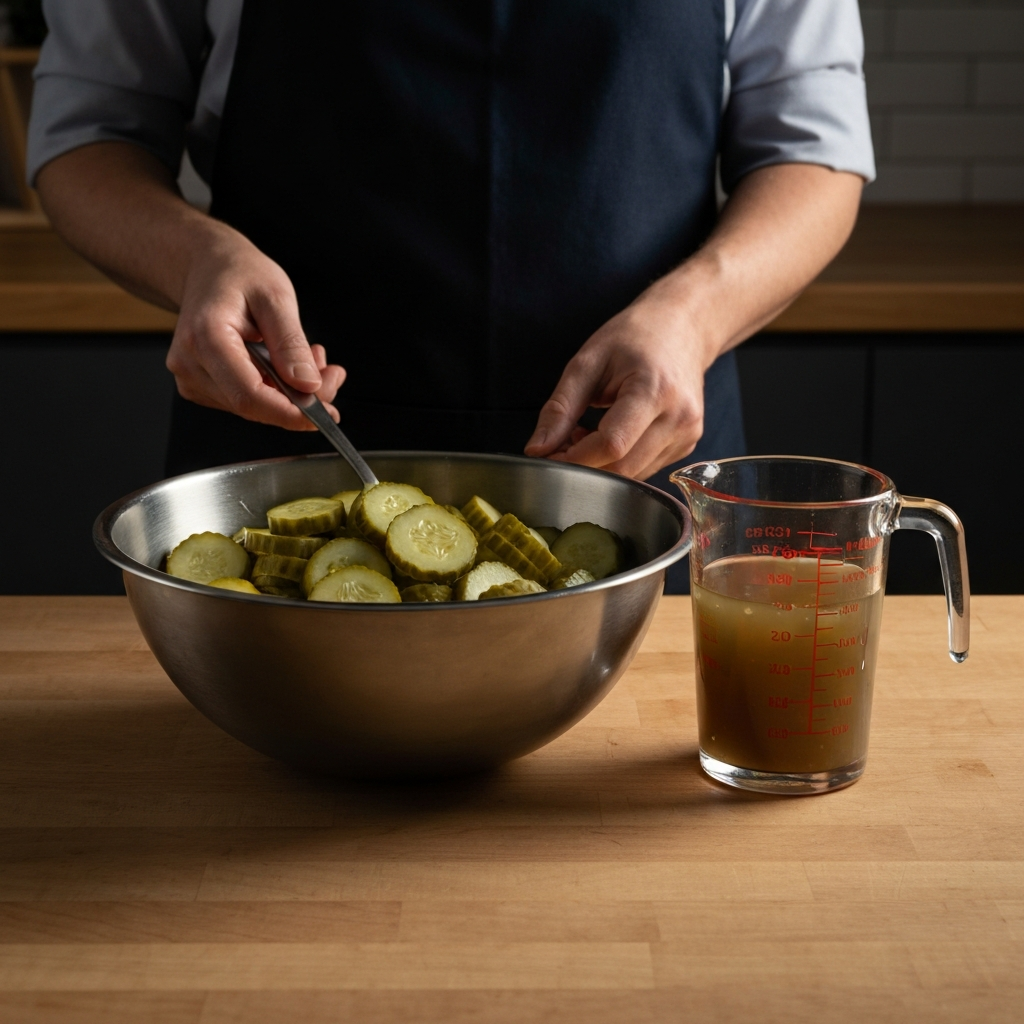
Step 1: Prepare the Pickles and Juice
First, you'll need to separate the pickles from their original brine. Carefully drain the pickle juice into a separate bowl or container. It's important to retain the pickle juice as it forms the base of your Kool-Aid mixture. After separating, slice the pickles into halves or quarters, depending on their size. Smaller pickle pieces will absorb the Kool-Aid flavor more quickly and evenly. If you're using sliced pickles, you can skip this step, but be sure to drain them well.
-
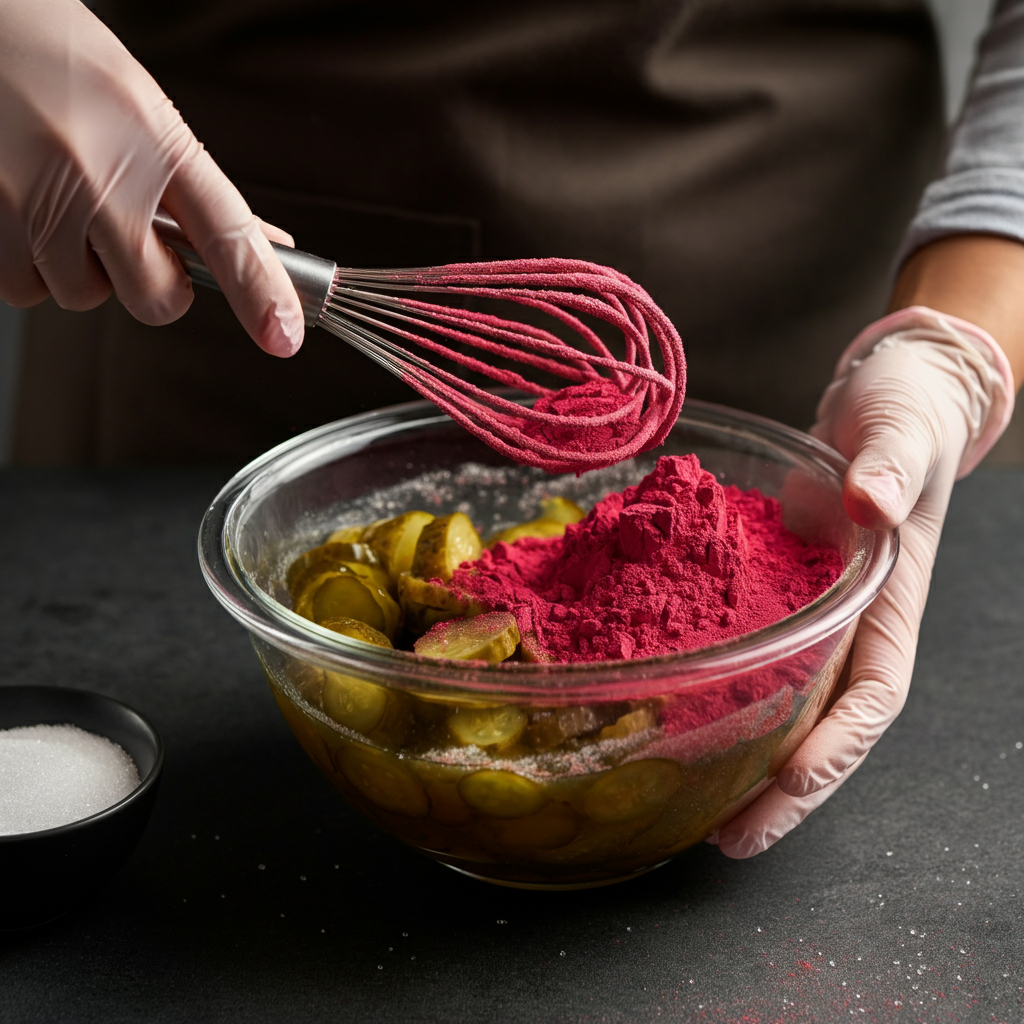
Step 2: Mix the Kool-Aid Solution
In the bowl containing the pickle juice, add your Kool-Aid powder. A classic combination is grape and cherry, but feel free to experiment with other flavors like watermelon, blue raspberry, or even a mix of several different flavors. Add two packets of Kool-Aid powder per 46-oz jar of pickles. Mix the Kool-Aid powder thoroughly into the pickle juice until it is completely dissolved. Proper mixing ensures the flavor is evenly distributed throughout the pickles. You can also add sugar at this point if you prefer a sweeter pickle. Start with about 1 cup of sugar, and adjust to your liking.
-
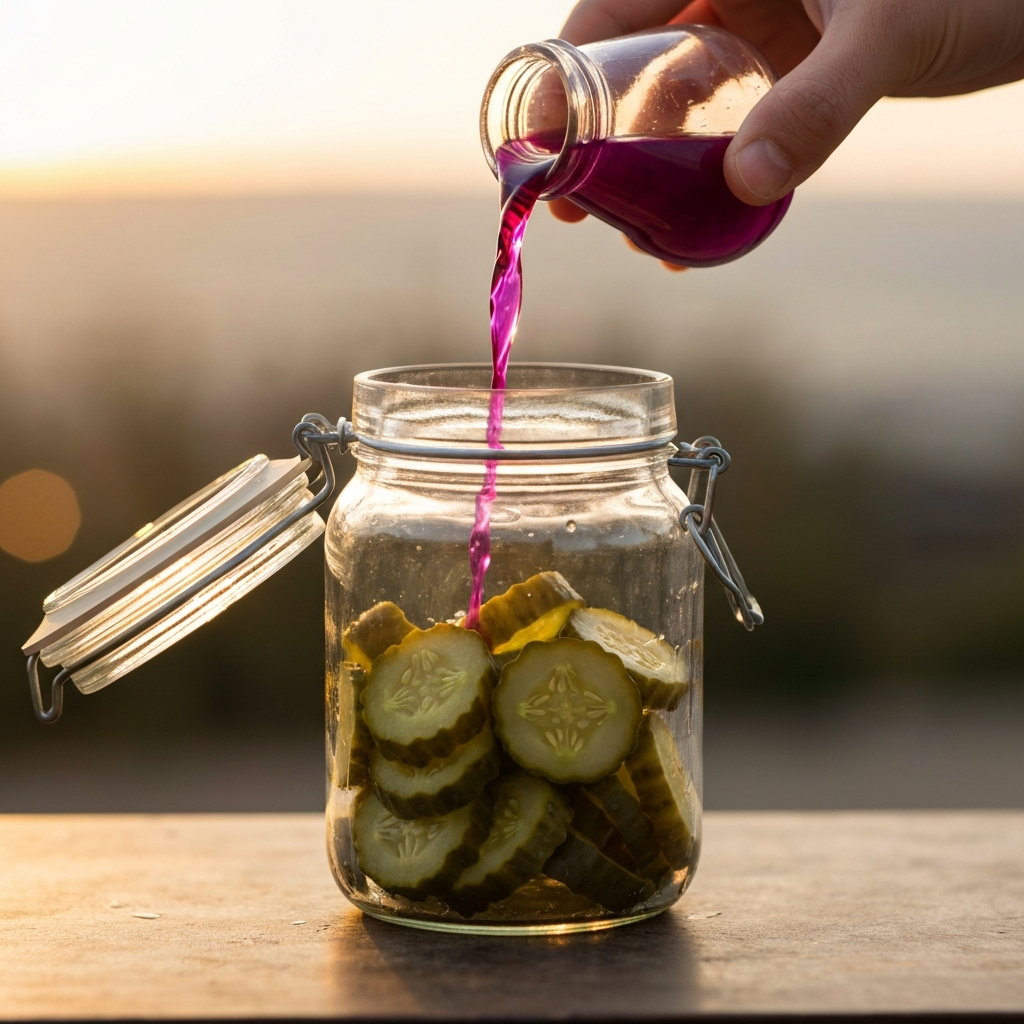
Step 3: Combine Pickles and Kool-Aid Mixture
Once the Kool-Aid powder and sugar (if using) are fully dissolved, return the sliced pickles to the jar or container. Pour the Kool-Aid-infused pickle juice back into the jar, ensuring that all the pickles are submerged. Submerging the pickles completely guarantees even flavor absorption. If necessary, you can add a little bit of water to the mixture if the juice level isn't enough to fully cover all the pickles.
-
Step 4: Refrigerate and Wait
Seal the jar tightly and refrigerate it for at least one week. This allows the pickles to fully absorb the Kool-Aid flavor and develop their signature sweet and tangy taste. Turning the jar upside down periodically during the refrigeration process can help distribute the flavor more evenly. While a week is recommended, you can test them after a few days to see if they've reached your desired level of flavor saturation. However, for the best results, patience is key.
Common Mistakes to Avoid
- Not mixing the Kool-Aid thoroughly: Ensure the Kool-Aid powder is completely dissolved to avoid grainy or unevenly flavored pickles.
- Insufficient refrigeration time: Rushing the refrigeration process will result in weakly flavored pickles. Give them the full week for optimal flavor absorption.
- Using the wrong type of pickles: Dill pickles tend to work best, as the dill flavor complements the sweetness of the Kool-Aid. Sweet pickles may result in an overly sweet flavor.
FAQ Section
- Can I use sugar-free Kool-Aid?
- Yes, you can use sugar-free Kool-Aid, but you may need to add a sweetener like sugar or honey to achieve the desired level of sweetness. Adjust the amount of sweetener to your preference.
- How long do Kool-Aid pickles last?
- Kool-Aid pickles will generally last as long as regular pickles, about 1-2 months in the refrigerator after opening. However, their flavor and texture may degrade over time, so it's best to consume them within a few weeks for optimal quality.
- Can I use different types of pickles, like gherkins or bread and butter pickles?
- While dill pickles are the most common choice, you can experiment with other types of pickles. Keep in mind that the flavor of the pickles will influence the final result. Gherkins will result in smaller, bite-sized treats, while bread and butter pickles might be too sweet and diminish the koolaid flavor.
In conclusion, making Kool-Aid pickles is a fun and easy way to add a unique twist to a classic snack. By following these simple steps and experimenting with different Kool-Aid flavors, you can create a personalized treat that's sure to delight. Remember to be patient during the refrigeration process, as this is crucial for achieving the best flavor. Enjoy your homemade Koolickles!