The humble can opener, a kitchen workhorse often overlooked, plays a crucial role in our daily lives. But think about it: Every time you use it, the blade comes into contact with food residue and potentially harmful bacteria. Over time, this can lead to rust, gunk buildup, and even compromised performance. Regular cleaning is essential to ensure your can opener remains hygienic and functions optimally. Ignoring this vital step can introduce unwanted contaminants into your food and shorten the lifespan of your can opener.
This guide provides you with a step-by-step approach to cleaning both manual and electric can openers. We'll cover everything from removing stubborn rust to preventing future buildup, ensuring your can opener is always ready for its next task. Don't let a dirty can opener compromise your food safety – follow these simple instructions and keep your kitchen tools in top condition.
Whether you're dealing with a simple handheld model or a more complex electric version, the principles of cleaning remain the same: remove debris, sanitize, and prevent future corrosion. Proper cleaning not only extends the life of your can opener but also contributes to a healthier kitchen environment.
-
Step 1: Gather Your Supplies
Before you begin, gather all the necessary cleaning supplies. For both manual and electric can openers, you'll need white vinegar, a small jar or bowl, an old toothbrush (or a dedicated cleaning brush), dish soap, clean water, and a clean, dry cloth. Having everything within reach streamlines the cleaning process and prevents unnecessary interruptions. If you have an electric can opener, be sure to have a screwdriver handy in case you need to disassemble parts for deeper cleaning.

-
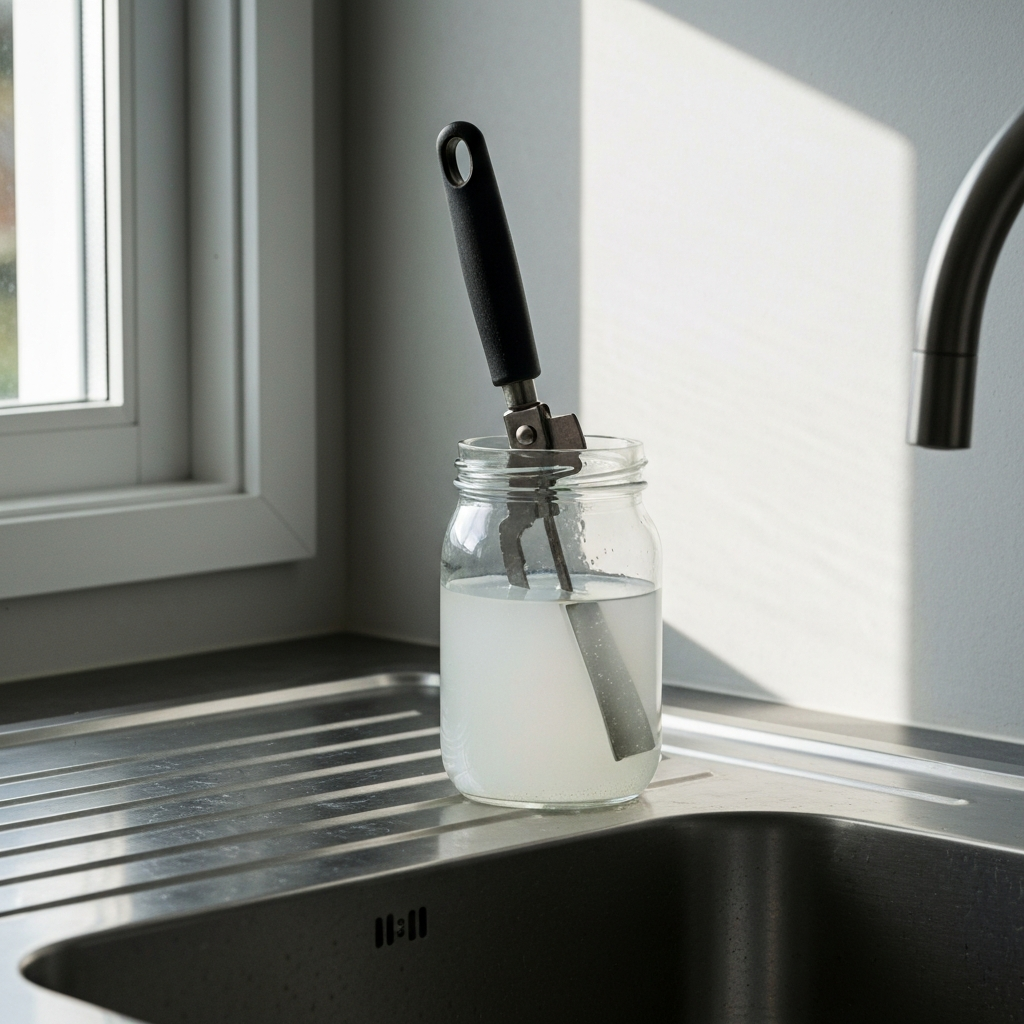
Step 2: Prepare the Vinegar Soak
White vinegar is a natural and effective cleaning agent, especially for removing rust and food residue. For manual can openers, place the can opener in a jar or bowl and pour enough white vinegar to completely submerge the cutting wheel and gears. For electric can openers with removable parts, detach the cutting assembly and submerge only that part in the vinegar. If the cutting assembly isn't removable, you'll need to find another method, outlined in later steps.
-
Step 3: Soak the Can Opener
Allow the can opener to soak in the white vinegar for at least 20-60 minutes. The longer it soaks, the more effectively the vinegar can break down the grime and rust. For heavily soiled or rusty can openers, consider soaking them overnight. Regularly check the progress; you may see residue loosening and floating in the vinegar as it works. Be patient; this step is crucial for loosening stubborn buildup.

-
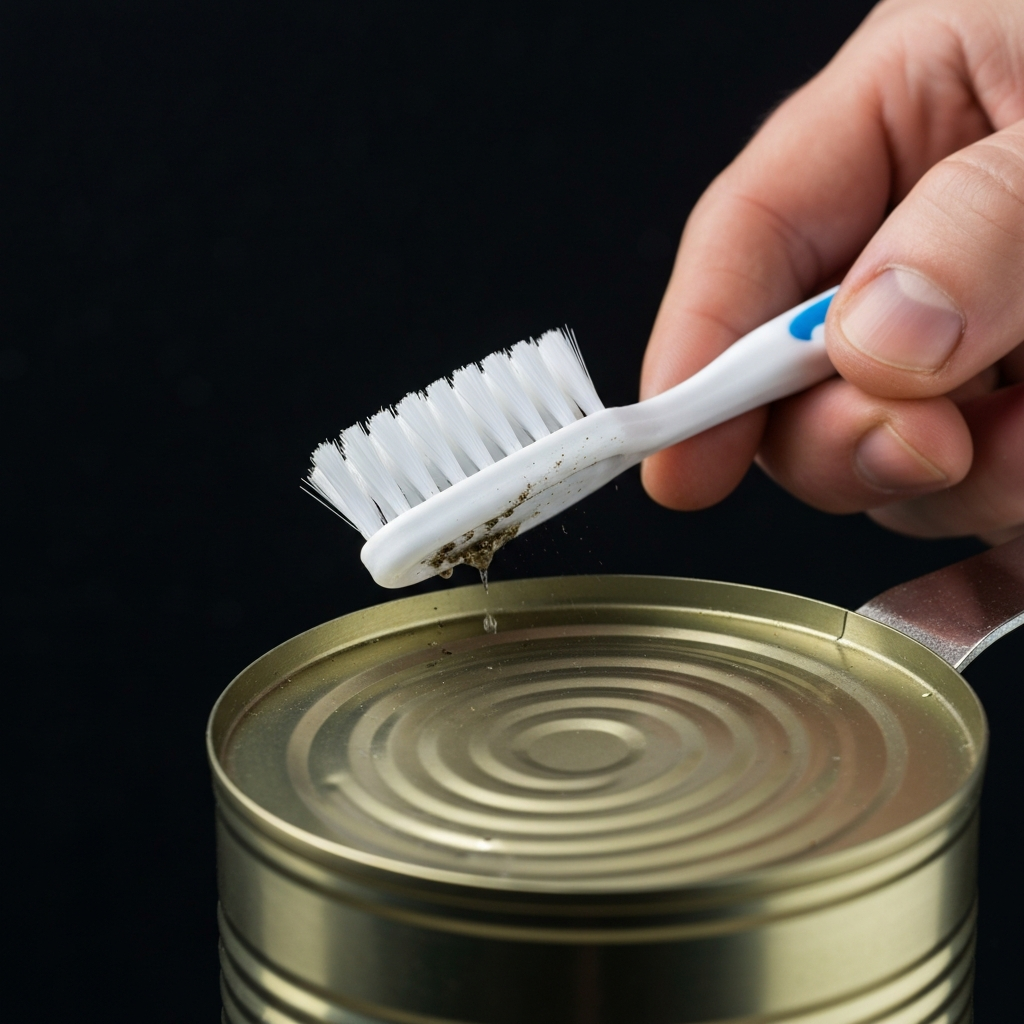
Step 4: Scrub with a Toothbrush
After soaking, remove the can opener from the vinegar (or the removable part of the electric can opener). Dip the toothbrush into the vinegar and begin scrubbing the cutting wheel, gears, and any other areas with visible residue. Pay close attention to the small crevices and hard-to-reach areas where grime tends to accumulate. For manual can openers, rotate the handle while scrubbing to ensure all moving parts are cleaned.
-
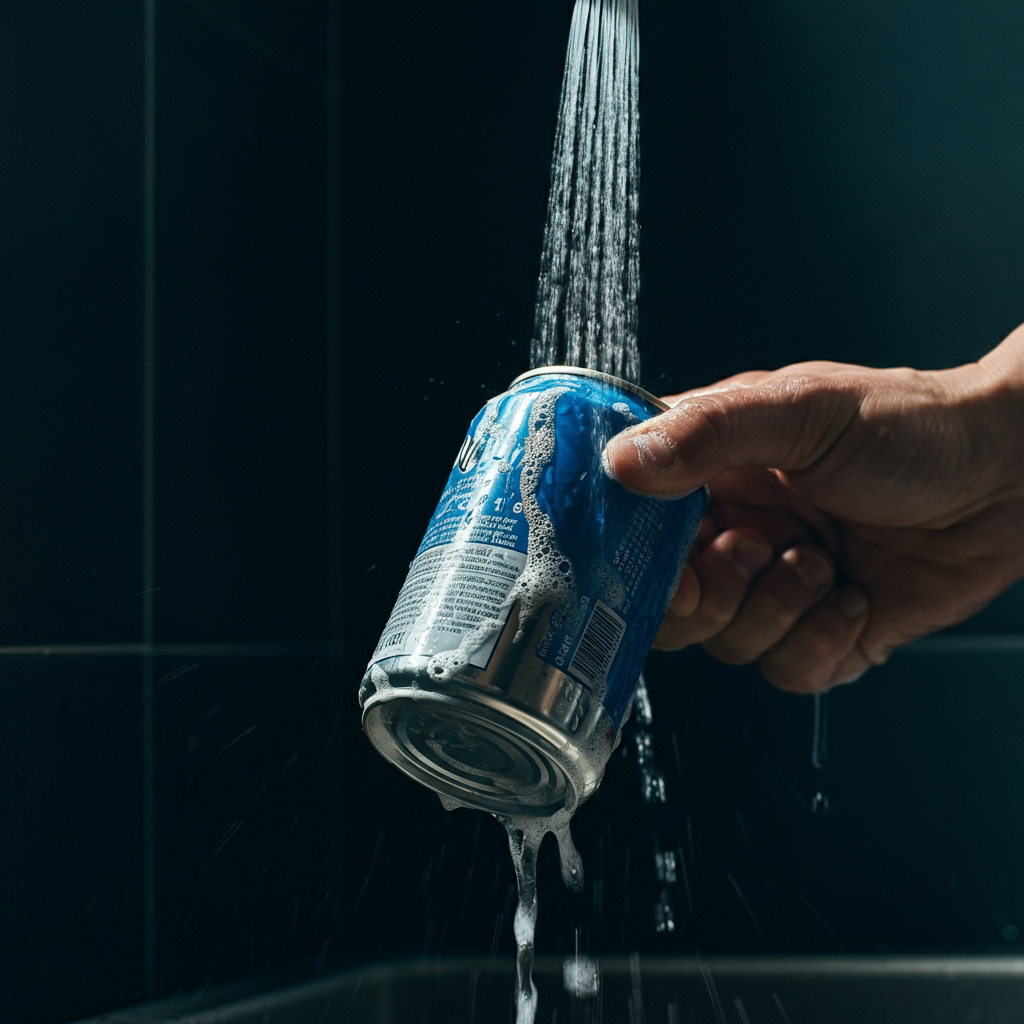
Step 5: Wash with Soap and Water
After scrubbing with vinegar, rinse the can opener thoroughly with clean water to remove any remaining vinegar and loosened debris. Then, apply a small amount of dish soap to the toothbrush and scrub the can opener again. This helps to remove any lingering grease or food particles and leaves the can opener clean and sanitized. Ensure you rinse thoroughly to remove all traces of soap, as soap residue can attract dirt.
-
Step 6: Dry Completely
Drying the can opener thoroughly is essential to prevent rust from forming. Use a clean, dry cloth to wipe away all moisture from the can opener, paying particular attention to the cutting wheel and gears. If possible, leave the can opener out to air dry completely, as this ensures any remaining moisture evaporates. For hard-to-reach areas, consider using compressed air or a hairdryer on a low setting to remove any trapped water.

-
Step 7: Reassemble (Electric Can Openers)
If you disassembled any parts of your electric can opener, carefully reassemble them according to the manufacturer's instructions. Ensure all parts are securely in place before using the can opener. Once reassembled, test the can opener with an empty can to ensure it functions properly. Refer to your can opener's manual for specific reassembly instructions.

Tools or Materials Required
- White Vinegar
- Small Jar or Bowl
- Old Toothbrush (or dedicated cleaning brush)
- Dish Soap
- Clean Water
- Clean, Dry Cloth
- Screwdriver (for electric can openers, if needed)
- Compressed air or hairdryer (optional, for thorough drying)
Common Mistakes to Avoid
- Not unplugging an electric can opener: Always unplug the can opener before cleaning to prevent electric shock.
- Using abrasive cleaners: Avoid using harsh chemicals or abrasive scrubbers, as they can damage the can opener's finish and functionality.
- Failing to dry thoroughly: Moisture is the enemy of metal. Always ensure the can opener is completely dry to prevent rust.
- Neglecting regular cleaning: Waiting until the can opener is heavily soiled makes the cleaning process more difficult. Clean your can opener regularly to prevent buildup.
Safety Considerations
- Always unplug electric can openers before cleaning.
- Be careful when handling sharp blades.
- Wear gloves if you have sensitive skin or are allergic to cleaning products.
Pro Tips
- For heavily rusted can openers, consider using a rust remover specifically designed for kitchen tools.
- To prevent rust, apply a thin layer of food-grade mineral oil to the cutting wheel and gears after drying.
- Store your can opener in a dry place to prevent moisture buildup.
FAQ Section
- How often should I clean my can opener?
- Ideally, clean your can opener after each use. At a minimum, clean it thoroughly once a week.
- Can I use baking soda instead of vinegar?
- Baking soda can be used as a mild abrasive, but vinegar is more effective at removing rust and grime.
- My electric can opener has a lot of stuck-on food. What should I do?
- Try using a toothpick or a small brush to gently dislodge the food particles before soaking.
Cleaning your can opener is a simple yet essential task that contributes to food safety and prolongs the life of your kitchen tool. By following the steps outlined in this guide, you can ensure your can opener remains clean, hygienic, and ready to tackle any can-opening challenge. Remember, regular maintenance is key to a well-functioning and healthy kitchen.