Hand-marbling fabric is a beautiful and surprisingly accessible art form, allowing you to create unique and personalized textiles. The process involves transferring intricate patterns from a liquid surface onto fabric, resulting in a one-of-a-kind design. Whether you're a seasoned crafter or a beginner looking to explore a new artistic medium, marbling offers a rewarding and creative experience.
There are two primary methods for hand-marbling: the traditional approach using carrageenan (a seaweed extract) to create a thickened bath, and a quicker, more accessible method using shaving cream. Both methods yield stunning results, each with its own set of advantages and considerations. This guide will walk you through both processes, providing detailed instructions and expert tips to help you achieve professional-quality marbled fabrics.
Choosing the right method depends on your time constraints, desired level of complexity, and the materials you have readily available. The carrageenan method provides a more refined and controlled marbling experience, while the shaving cream method is perfect for quick projects and experimentation. Let's dive in and explore the fascinating world of fabric marbling!
Tools or Materials Required
- Fabric (cotton, silk, linen, or muslin recommended)
- Alum (for Carrageenan method)
- Carrageenan powder (for Carrageenan method)
- Acrylic paints or fabric paints
- Shaving cream (plain, white, unscented - for Shaving Cream method)
- Water
- Buckets and tubs
- Eye droppers or pipettes
- Toothpicks, skewers, or combs for swirling
- Ruler or scraper (for Shaving Cream method)
- Newspaper or plastic sheeting for drying
- Iron and ironing board
Carrageenan Method
Step 1: Preparing the Fabric with Alum
The first step in the carrageenan method is to prepare your fabric with an alum solution. Alum acts as a mordant, helping the paint adhere to the fabric more effectively. In a bucket, combine 2 tablespoons (26 grams) of alum with 2 gallons (8 liters) of water. Soak your chosen fabric – white, lightweight, and smooth fabrics like muslin, cotton, light linen, or silk work best – in this solution for about 20 minutes. After soaking, wring out any excess water and hang the fabric to dry completely. Do not rinse out the alum; it needs to remain in the fabric.

Step 2: Mixing the Carrageenan Solution
Next, you'll need to create the carrageenan bath, which will act as the base for your marbling patterns. In a large pitcher or container, combine 2 tablespoons (10 grams) of carrageenan powder with 1 gallon (4 liters) of water. To prevent clumping, it’s best to gradually add the carrageenan to the water while mixing constantly. A blender or immersion blender can be helpful for this process. Start by mixing the carrageenan 1 teaspoon at a time into 2 cups (475 milliliters) of water, then add the solution to the rest of the water.

Step 3: Refrigerating the Carrageenan Solution
Once the carrageenan and water are thoroughly mixed, refrigerate the solution for 12 to 24 hours. This allows the carrageenan to fully hydrate and thicken the water. This step is crucial for achieving the right consistency for marbling. You can prepare the carrageenan solution concurrently with the alum soak to save time. After refrigeration, let the solution sit at room temperature for about an hour before using it.

Step 4: Preparing the Marbling Tub
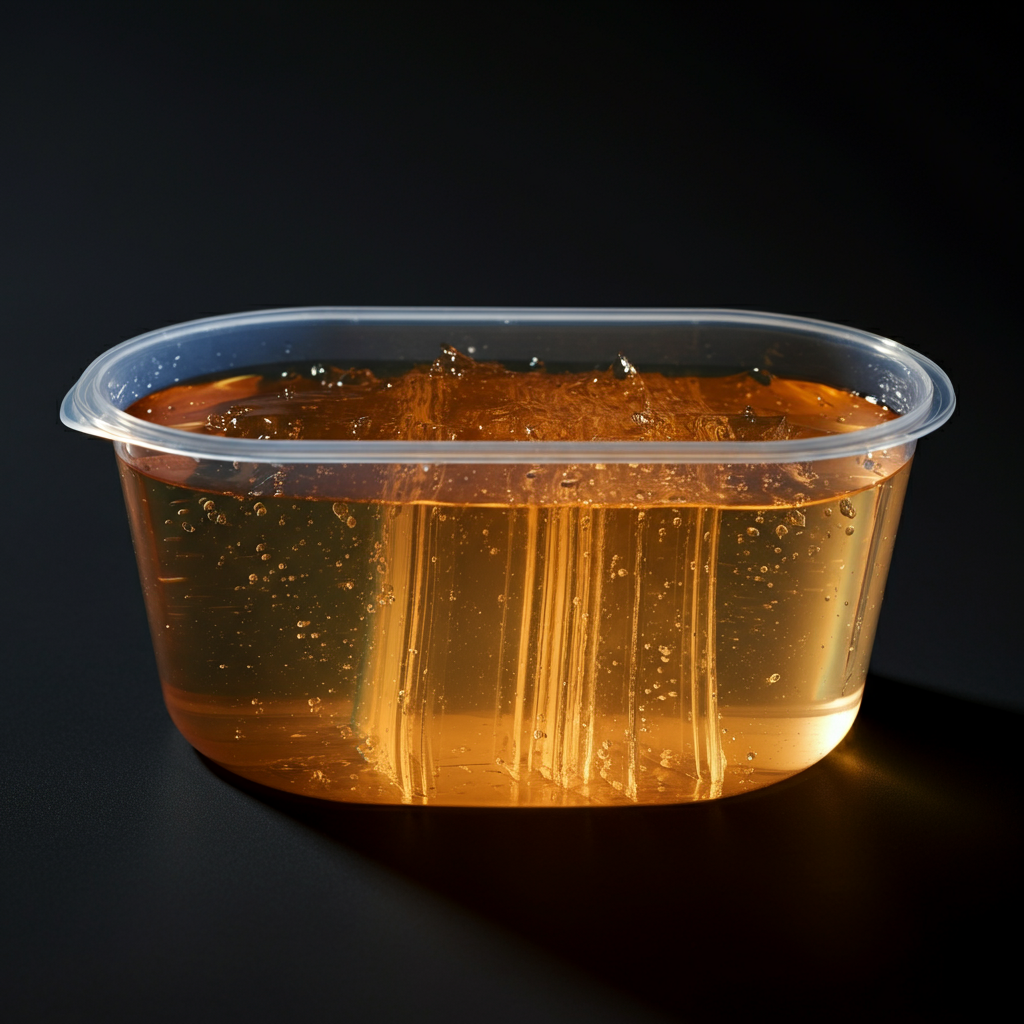
Pour the carrageenan solution into a large, plastic tub. The tub needs to be large enough to accommodate your fabric with at least a 1-inch (2.54-centimeter) border on all sides. The water level should be between 1 and 2 inches (2.54 to 5.08 centimeters) deep. If you don't have enough carrageenan solution, you will need to prepare another batch. Let the solution sit in the tub for at least 3 hours to allow any remaining air bubbles to dissipate and the solution to clarify.
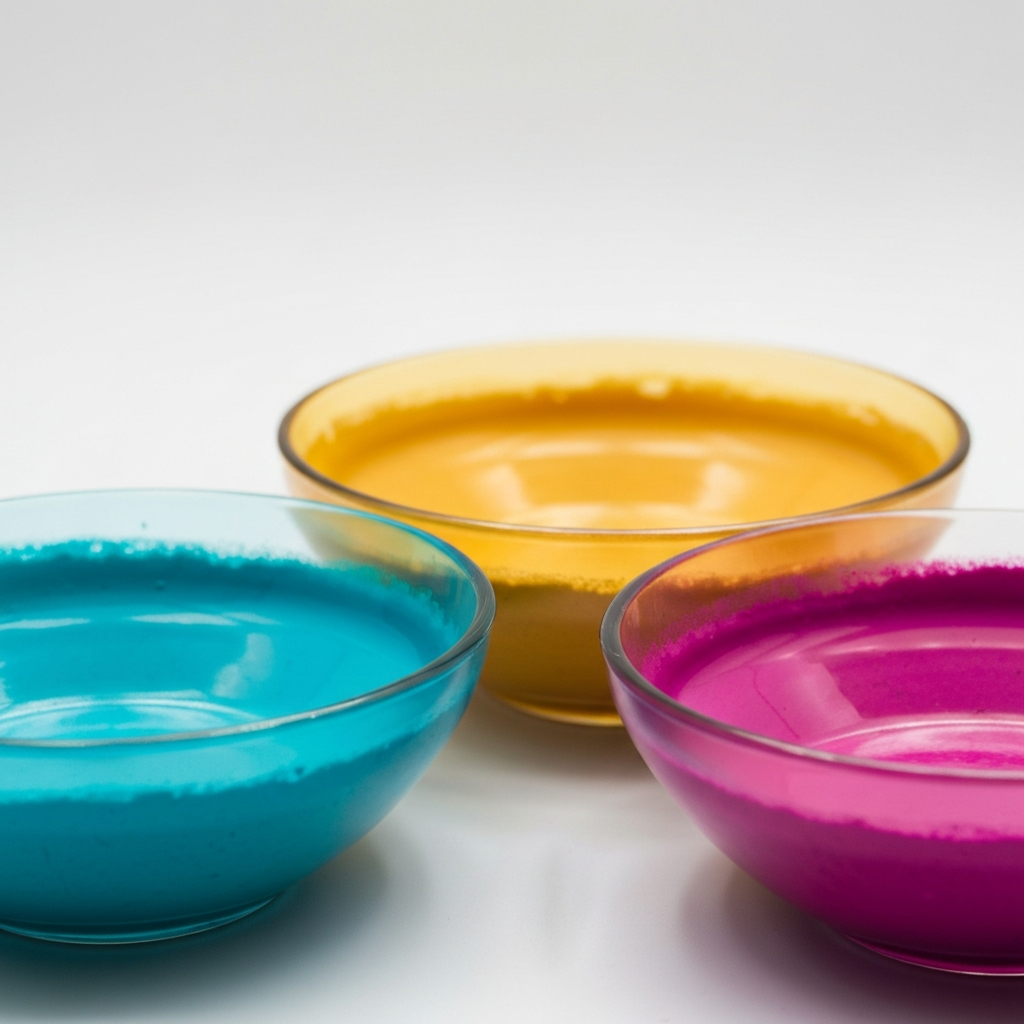
Step 5: Diluting the Acrylic Paints
Prepare your acrylic paints by diluting them with fresh water. Choose 1 to 3 colors that you would like to use, and pour each color into a separate small cup. Gradually add water to each cup, stirring until the paint reaches the consistency of heavy whipping cream. The right consistency is crucial: too thick and the paint will sink; too thin and the colors will blend excessively. Do not use the carrageenan water for diluting the paints.
Step 6: Applying the Paint to the Carrageenan Surface
Using an eyedropper or pipette, gently drop the diluted paints onto the surface of the carrageenan bath. Hold the dropper close to the surface to prevent the paint from sinking. If the paint sinks, it’s either too thick or you’re dropping it from too high. Use a separate dropper or pipette for each color to avoid contamination.

Step 7: Swirling the Paint into Patterns
Now comes the fun part: creating your marbled design! Use a toothpick, skewer, fork, or wide-toothed comb to swirl the paint drops together. Experiment with different techniques – spirals, zigzags, and back-and-forth motions – to achieve your desired effect. Remember, the pattern you create on the surface will be mirrored on the fabric.

Step 8: Laying the Fabric onto the Paint
Carefully lay your prepared fabric onto the surface of the water, starting with the middle and gently lowering the sides. Avoid pressing the fabric into or under the water. You want it to rest lightly on the surface. If you notice any air bubbles, gently poke them until the fabric lays flat. If your fabric has a right and wrong side, make sure you are placing it right-side-down.
Step 9: Lifting and Drying the Fabric
Carefully lift the fabric from one corner and slowly pull it out of the tub. Set it down onto a sheet of newspaper or plastic to dry. You can immediately dip another piece of fabric into the remaining paint, or add more paint to the surface and create a new design. Don’t be afraid to experiment with multiple dips for unique effects.
Step 10: Rinsing and Ironing the Fabric
Allow the fabric to dry completely, preferably in a well-ventilated area. Once dry, rinse the fabric in cold water to remove any excess carrageenan and loose paint. Hang the fabric up to dry again. Finally, iron the fabric on a setting appropriate for the fabric type, using a tea towel or ironing cloth as a protective layer. Ironing helps to set the paint and make the marbled design more permanent.
Shaving Cream Method
Step 1: Preparing the Fabric
Start by washing your fabric using washing soda and hot water. This will remove any finishes that might prevent the paint from adhering, and it will also pre-shrink the fabric. Cotton works best for this method, but other non-synthetic fabrics will also work. Once the fabric is dry, you can press it flat with an iron.
Step 2: Coating the Tray with Shaving Cream
Coat a shallow tray with a thick, even layer of plain, white shaving cream. Make sure the shaving cream is spread from edge-to-edge and corner-to-corner. Avoid using shaving cream with added dyes, oils, or perfumes, as these can interfere with the marbling process. The tray should be large enough to accommodate your fabric.
Step 3: Adding Fabric Paint
Randomly place drops of fabric paint on top of the shaving cream. Fabric paint works best, but acrylic paint can also be used. If using acrylic paint, choose the bottled kind rather than the kind that comes in a tube; it's thinner and easier to drop out. Use one color for a simple effect, or two or three colors for a fancier effect.
Step 4: Swirling the Paint
Use a toothpick, skewer, or pencil to swirl the paint around in the shaving cream. Weave the tool through the shaving cream side-to-side and top-to-bottom, adding spirals for variety. Be careful not to over-stir the paint; you want the shaving cream to look streaky. The pattern you create in the shaving cream will directly translate to your fabric.
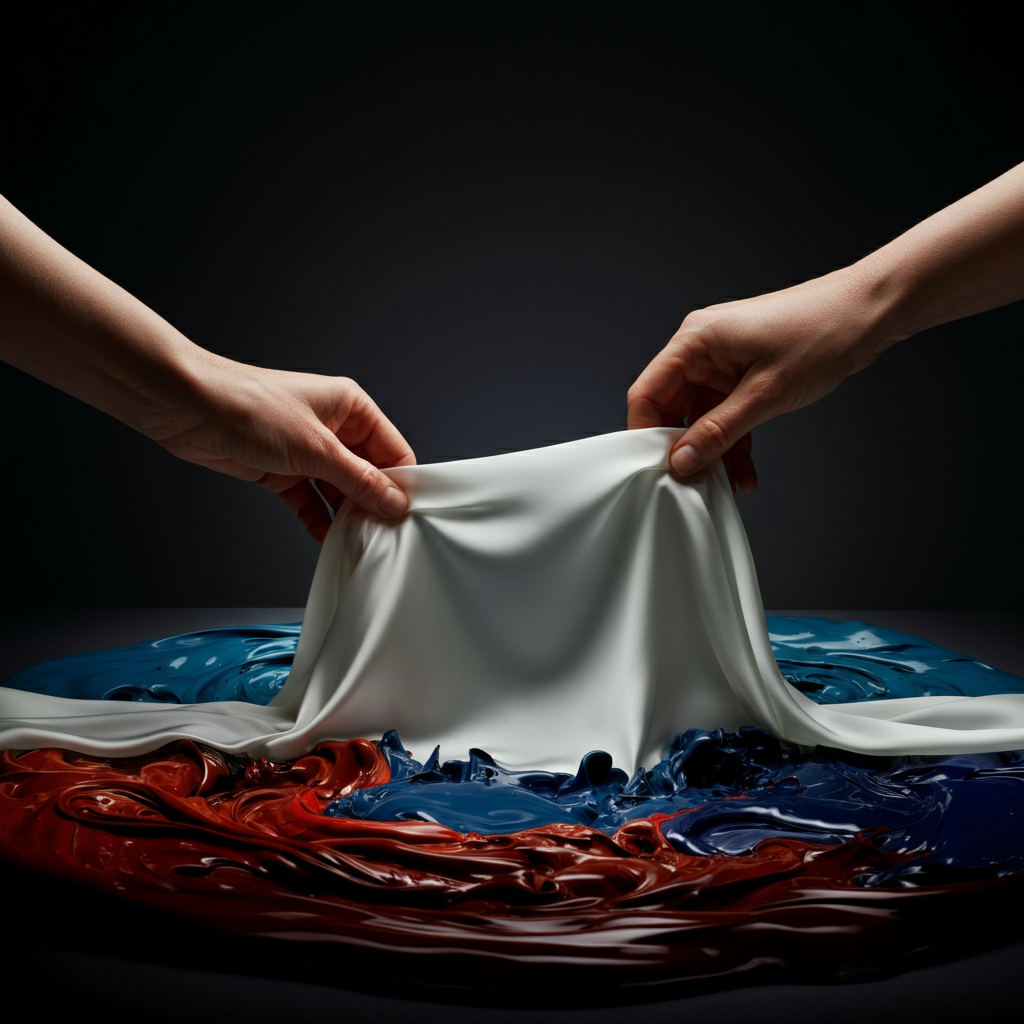
Step 5: Placing the Fabric on the Shaving Cream
Place the fabric on top of the shaving cream, then gently pat it down. Continue patting until you can see the paint patterns appearing on the other side of the fabric. If your fabric has a distinct right and wrong side, set it right-side-down. Ensure the fabric makes full contact with the painted shaving cream for maximum color transfer.
Step 6: Removing the Fabric
Lift the fabric away from the shaving cream and set it down on top of a trash bag or plastic sheet, with the shaving cream side facing up. Pull the fabric away at a slight angle rather than straight up to prevent it from taking too much shaving cream with it.
Step 7: Scraping Off the Shaving Cream
Hold the fabric down firmly by one end. Place a long, metal ruler on top of the fabric, with one of the edges facing down. Run the ruler across the fabric to scrape the shaving cream off. You may have to do a few passes. Wipe the ruler clean after each pass. The goal is to remove the shaving cream while leaving the paint behind.
Step 8: Drying and Heat Setting
Allow the paint to dry completely before heat-setting it with an iron. Let the fabric air dry, preferably in the sun. Once it is dry, place a tea towel or an ironing cloth over it, then iron it. Use a heat setting appropriate for the type of fabric you are working with. This sets the paint and makes it washable. Skipping the heat-setting step will result in the paint washing out.
Common Mistakes to Avoid
- Using the wrong type of paint: Ensure you're using acrylic or fabric paint suitable for textiles.
- Not preparing the fabric properly: Alum treatment (for carrageenan) or washing (for shaving cream) is crucial for paint adhesion.
- Incorrect paint consistency: Diluted paint that's too thick will sink, while paint that's too thin will blend excessively.
- Over-stirring the paint: Avoid over-mixing the paint in the carrageenan bath or shaving cream, as this can create muddy or undefined patterns.
- Not allowing enough drying time: Ensure the fabric is completely dry before rinsing or ironing to prevent smudging.
Safety Considerations
- Ventilation: Work in a well-ventilated area, especially when using paints and chemicals.
- Protective Gear: Wear gloves to protect your skin from alum and paints.
- Eye Protection: Consider wearing eye protection to prevent splashes from paints or chemicals.
- Child Safety: Keep paints, chemicals, and sharp tools out of reach of children.
Pro Tips
- Experiment with different swirling techniques to create unique patterns.
- Use a variety of colors to add depth and dimension to your marbled designs.
- Try marbling different types of fabrics to see how they respond to the process.
- Consider using metallic paints for a touch of shimmer and glamour.
- Keep a notebook to record your techniques, colors, and results for future reference.
FAQ Section
Q: Can I use other types of fabric besides cotton, silk, linen, and muslin?
A: While these fabrics are recommended due to their smooth surfaces and absorbency, you can experiment with other natural fabrics. Synthetic fabrics are generally not recommended as they may not absorb the paint as well.
Q: How do I clean my marbling tools?
A: Wash your tools with soap and water immediately after use to prevent paint from drying and hardening.
Q: Can I reuse the carrageenan solution?
A: The carrageenan solution can be reused for multiple dips, but it will eventually become saturated with paint. You can also refresh the surface by carefully removing the top layer with a sheet of paper.
Q: What if the paint is not adhering to the fabric?
A: Make sure you have properly prepared your fabric with alum (for carrageenan) or washing (for shaving cream). Also, check the consistency of your paint and make sure it is not too thick or too thin.
Conclusion
Hand-marbling fabric is a rewarding and creative process that allows you to transform plain textiles into unique works of art. Whether you choose the traditional carrageenan method or the quick and easy shaving cream method, the possibilities are endless. By following these detailed instructions and expert tips, you can create beautiful marbled fabrics for a variety of projects, from clothing and accessories to home decor and gifts. So gather your materials, unleash your creativity, and start marbling!