Want to add a touch of spooky charm to your home decor? Creating a swinging ghost mobile is a fun and easy project that's perfect for Halloween or any time you want to conjure up a little ghostly spirit. This guide will walk you through the process, step-by-step, allowing you to craft a unique and whimsical mobile that will delight both young and old.
This project is easily customizable to your own style, from the size and shape of the ghosts to the materials used for the hanger and string. Feel free to experiment and let your creativity shine through! Prepare to be amazed at how simple it is to transform ordinary materials into a captivating piece of art that will dance and sway with the slightest breeze. A key to success is patience, allowing glue to fully dry, and ensuring secure knots for a long-lasting mobile.
Get ready to embrace your inner artist and create a ghostly masterpiece. Let's get started!
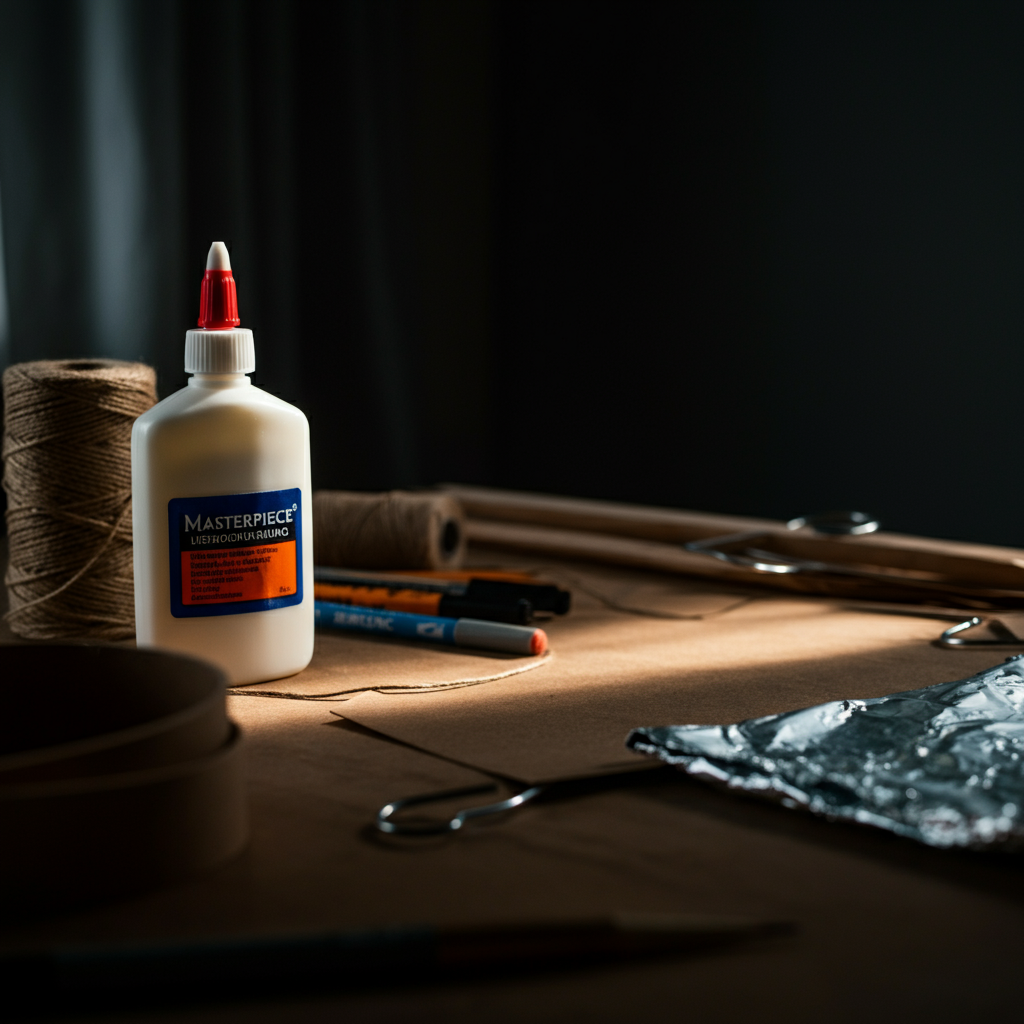
Step 1: Gather Your Ghostly Supplies
Before you begin, it's essential to have all your materials readily available. This will streamline the crafting process and prevent frustrating interruptions later on. Here's a comprehensive list of what you'll need: clear or white glue (craft glue works best), a fine-tipped Sharpie marker, string or fishing line (for hanging the ghosts), a thumbtack or needle (for creating holes), a clothes hanger (wire or plastic), and a sheet of aluminum foil. Consider using different colors of string to add visual interest. Ensure your work surface is protected to prevent glue spills.
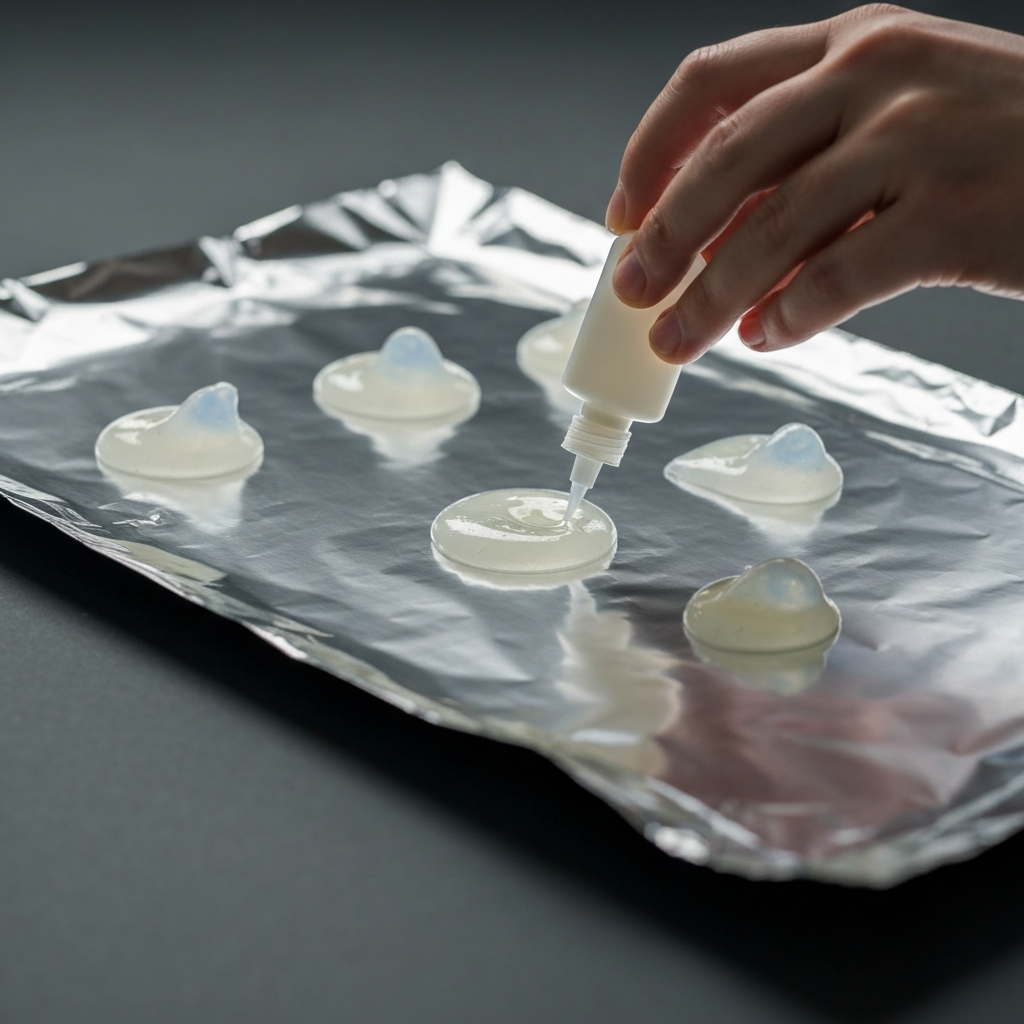
Step 2: Sculpting Your Glue Ghosts
Now, it's time to bring your ghostly visions to life! Take your bottle of glue and carefully squeeze out small, ghost-shaped blobs onto a sheet of aluminum foil. Experiment with different ghost shapes and sizes for a more dynamic mobile. Avoid making them too large, as they may become too heavy and difficult to hang. If the glue is too runny, let it sit uncapped for a few minutes to thicken slightly. Be mindful of creating a smooth surface for easy detail work later.
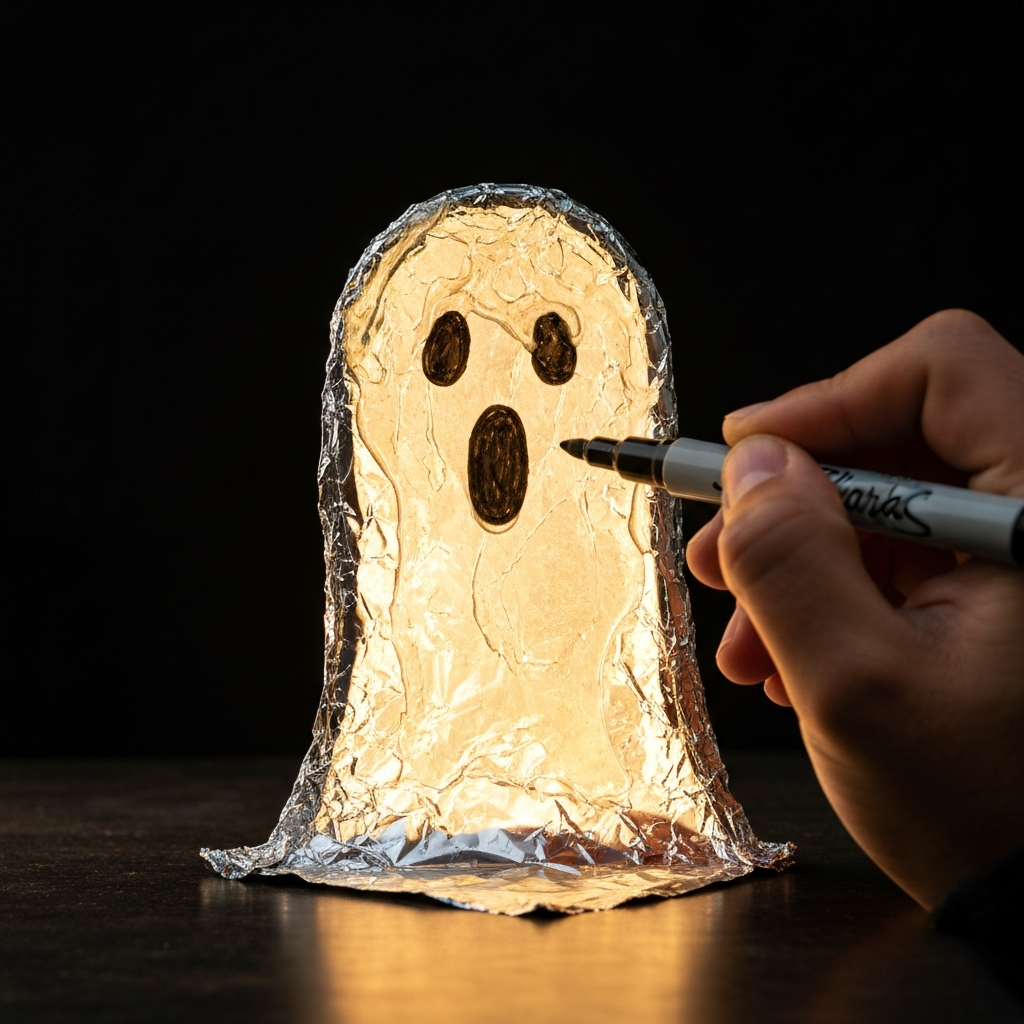
Step 3: Adding Spooky Facial Features
Once the glue ghosts are completely dry – this is crucial to prevent smudging – it's time to add their spooky facial features. Use your fine-tipped Sharpie marker to draw eyes and mouths onto each ghost. You can create a variety of expressions, from friendly and playful to ghoulish and menacing. If you accidentally smudge the ink, use a cotton swab dipped in rubbing alcohol to gently remove it. Consider using different colored markers for added detail.
Step 4: Preparing and Hanging Your Ghosts
Carefully peel the dried glue ghosts off the aluminum foil. Using a thumbtack or needle, gently prick a small hole in the top of each ghost. Be careful not to tear the glue. Thread a piece of string or fishing line through the hole and tie a secure knot. Repeat this process for each ghost. Now, attach the ghosts to the clothes hanger at varying lengths to create a visually appealing mobile. Consider staggering the ghost positions for a more natural, flowing look. Ensure the knots are tight to prevent the ghosts from falling.

Step 5: Display and Enjoy Your Swinging Ghost Mobile
Congratulations, your swinging ghost mobile is complete! Find a suitable location to hang your creation, such as near a window or in a doorway. Watch as the ghosts gently sway and dance in the breeze, adding a touch of spooky delight to your surroundings. Make sure the location is out of reach of small children and pets. Adjust the length of the strings if needed to achieve the desired effect. Now, stand back and admire your handiwork!

Tools or Materials Required
- Clear or white glue
- Sharpie marker (fine-tipped)
- String or fishing line
- Thumbtack or needle
- Clothes hanger (wire or plastic)
- Aluminum foil
Common Mistakes to Avoid
One common mistake is not allowing the glue ghosts to dry completely before adding the facial features. This will result in smudged ink and a messy appearance. Another mistake is making the ghosts too large, which can make them difficult to hang and cause the mobile to be unbalanced. Always ensure that the knots are secure to prevent the ghosts from falling off the hanger. Finally, be careful when using the thumbtack or needle to avoid accidental pricks.
Safety Considerations
When working with sharp objects like thumbtacks or needles, exercise caution to avoid injury. Keep these items out of reach of small children. Supervise children closely during the crafting process. Ensure the mobile is hung securely in a location where it will not be a hazard. Avoid hanging the mobile near heat sources or open flames.
Pro Tips
To add extra flair, consider using glitter glue for a sparkly effect. You can also experiment with different colors of glue to create a rainbow of ghosts. For a more durable mobile, use a heavier-gauge wire hanger. Add small beads to the strings for added weight and visual interest.
FAQ Section
Q: How long does it take for the glue ghosts to dry?
A: Drying time can vary depending on the thickness of the glue and the humidity level. Generally, it takes at least 24 hours for the glue to dry completely.
Q: Can I use a hot glue gun instead of craft glue?
A: While you can use a hot glue gun, it's not recommended as it can be more difficult to create smooth, even shapes and may pose a burn risk.
Q: What can I use if I don't have aluminum foil?
A: Wax paper or parchment paper can be used as a substitute for aluminum foil.
Conclusion
Creating a swinging ghost mobile is a delightful way to express your creativity and add a touch of spooky charm to your home. By following these simple steps and paying attention to detail, you can craft a unique and whimsical mobile that will bring joy for years to come. Remember to prioritize safety and have fun with the process! Enjoy your ghostly creation!