Pamper your canine companion with a cozy and stylish no-sew fringe dog bed! This project is perfect for beginners, requiring minimal crafting skills and no sewing machine. It's a fun and affordable way to create a custom bed that perfectly matches your dog's size and your home decor.
Forget complicated patterns and tedious stitching. This method relies on the simplicity of knotting fringe to create a durable and comfortable bed. You'll only need a few readily available materials, making it a quick and satisfying weekend project. Get ready to unleash your creativity and provide your furry friend with the ultimate relaxation spot.
This guide will walk you through each step, from choosing the right fabric to securing the final knots. Pay close attention to the cutting and knotting techniques to ensure a long-lasting and comfortable bed. Let's get started!
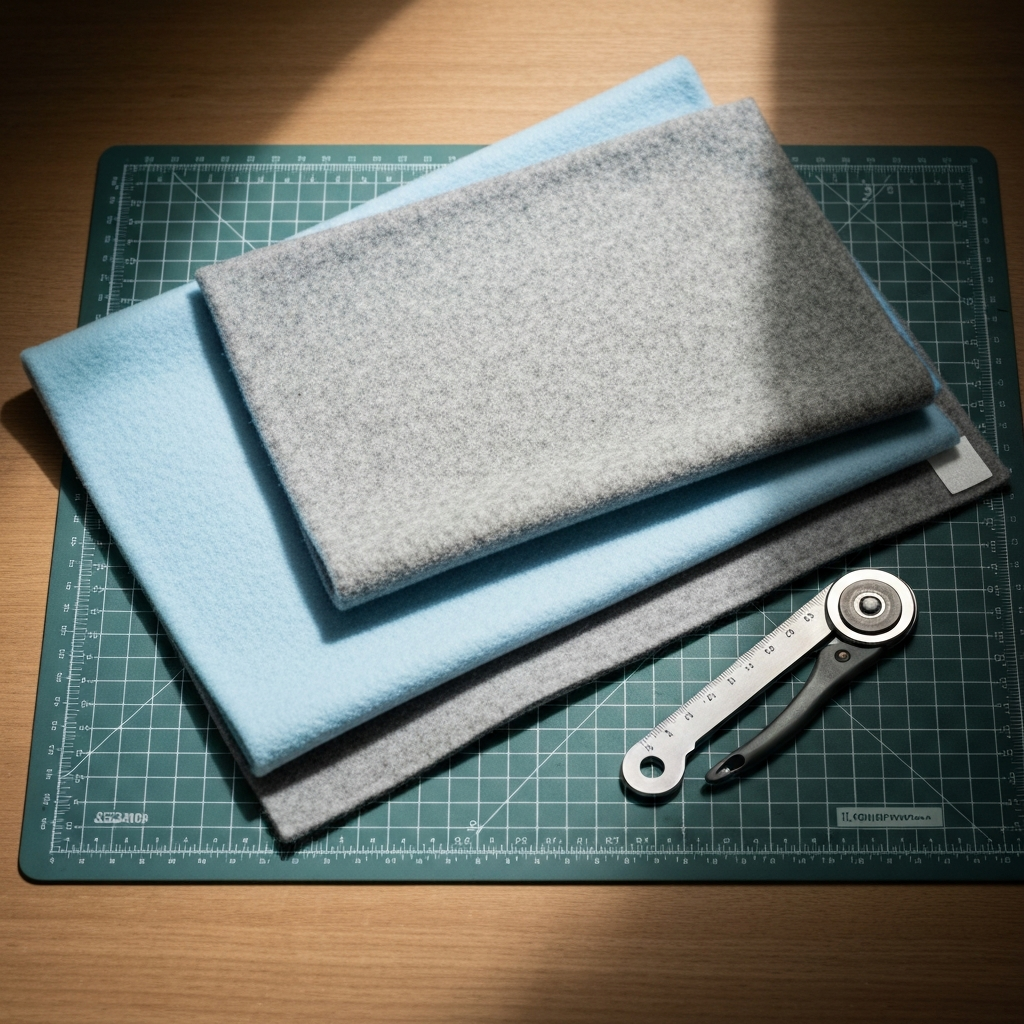
Tools or Materials Required
- Fabric (fleece or flannel recommended) – dimensions depend on dog size
- Scissors
- Measuring tape or ruler
- Pillow stuffing or batting
- Optional: Rotary cutter and cutting mat
Step 1: Measure and Cut the Fabric
Preparing the Fabric Base
First, determine the desired size of the dog bed. Measure your dog while they are sleeping in their favorite position, adding a few extra inches for wiggle room. Double this measurement to account for the top and bottom layers of the bed. For example, if your dog needs a 24x30 inch bed, you'll need a piece of fabric at least 48x60 inches. Cut two pieces of fabric to the appropriate size. Ensure the edges are as straight as possible for a neat fringe.
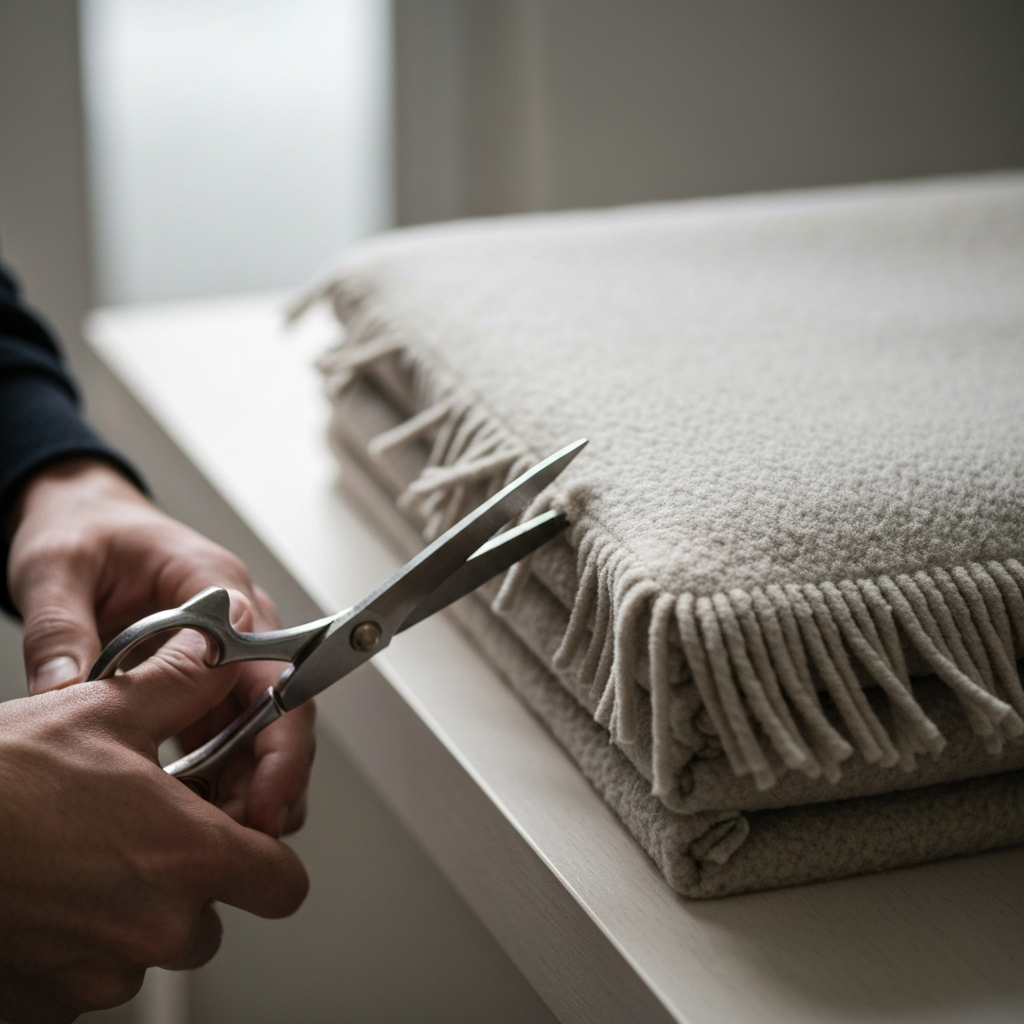
Step 2: Create the Fringe
Cutting the Fringe Edges
With the two pieces of fabric stacked precisely on top of each other, begin cutting the fringe around all four edges. Use scissors or a rotary cutter for a cleaner finish. Cut strips that are approximately 2-3 inches long and 1 inch wide. Consistency is key here, so use a ruler as a guide. Be careful to cut through both layers of fabric simultaneously to ensure the fringe pieces match up perfectly.
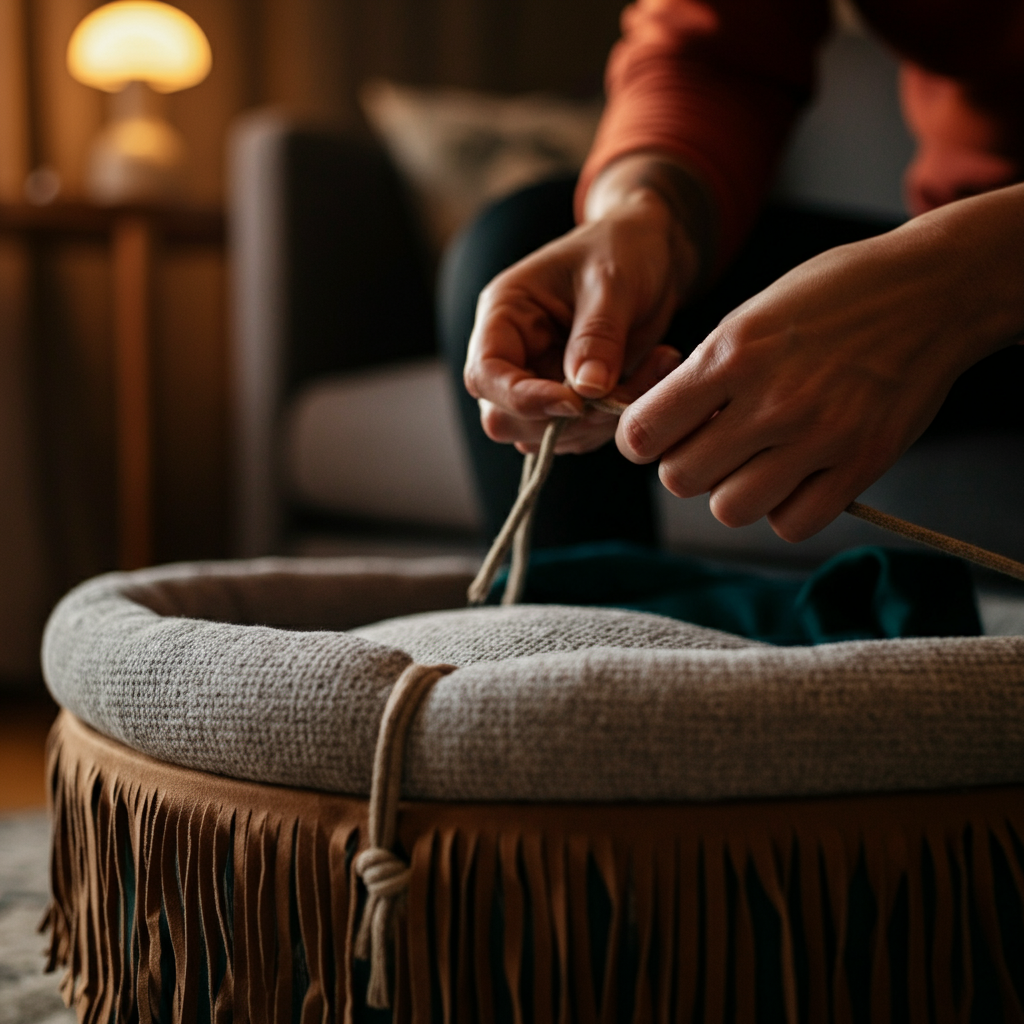
Step 3: Knotting the Fringe (Three Sides)
Securing the Bed's Perimeter
Now comes the fun part! Take one fringe strip from the top layer and one from the bottom layer along one edge. Tie them together in a secure knot. A simple overhand knot works well. Repeat this process along three sides of the fabric, knotting each pair of fringe strips together. Ensure the knots are tight to prevent the bed from falling apart. Leave one side completely open for stuffing.
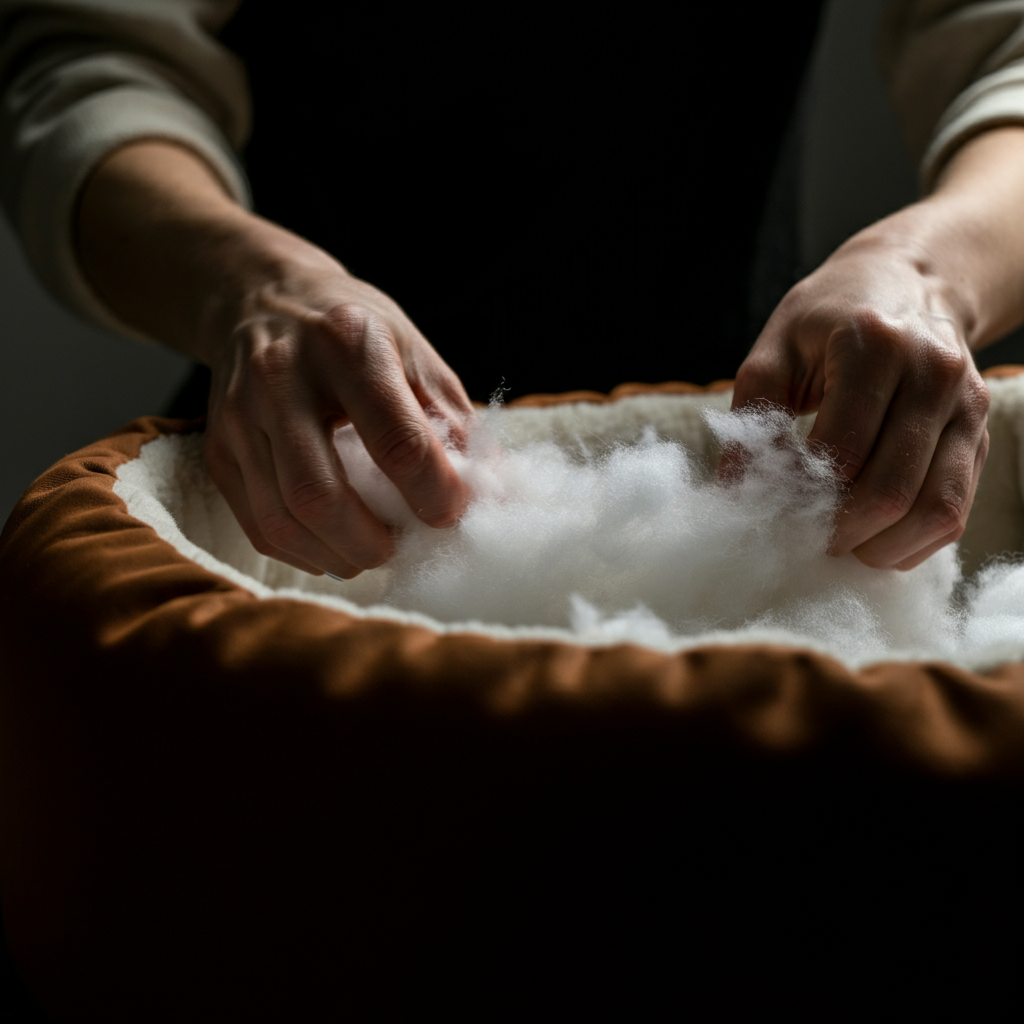
Step 4: Stuffing the Dog Bed
Adding Comfort and Support
Reach inside the opening and begin filling the bed with pillow stuffing or batting. Use your hands to evenly distribute the stuffing throughout the bed, paying particular attention to the corners. Add enough stuffing to make the bed plush and comfortable, but not so much that it becomes overstuffed and difficult for your dog to settle into. Fluff the stuffing as you go to prevent clumping.
Step 5: Knotting the Final Side
Closing the Bed and Final Touches
Once you're satisfied with the amount of stuffing, knot the remaining fringe strips together to close the opening. Just as before, ensure each knot is tight and secure. Double-check all the knots around the entire bed to make sure none have come undone. Give the bed a final fluff and inspection.
Common Mistakes to Avoid
- Cutting uneven fringe lengths. Use a ruler or cutting guide.
- Not knotting the fringe tightly enough. Secure knots are crucial for durability.
- Overstuffing the bed, making it uncomfortable for the dog.
- Using fabric that is too thin or easily tears.
Pro Tips
- Use different colored fleece for each side to create a reversible bed.
- Add a waterproof lining to the bottom of the bed for easy cleaning.
- Personalize the bed by adding your dog's name with fabric paint or iron-on letters.
- For a more polished look, consider using pinking shears to cut the fringe, preventing fraying.
Safety Considerations
- Always supervise your dog when they first use the bed to ensure they do not try to ingest the fringe.
- Regularly check the bed for any loose knots or frayed fabric that could pose a hazard.
FAQ Section
Q: What type of fabric is best for this project?
A: Fleece and flannel are excellent choices because they are soft, durable, and don't fray easily. They are also relatively inexpensive and come in a wide variety of colors and patterns.
Q: How do I clean the dog bed?
A: Most no-sew fringe dog beds can be spot-cleaned with a damp cloth and mild detergent. For a deeper clean, you can try hand-washing it in cold water and laying it flat to dry. Check the care instructions for your specific fabric.
Q: Can I use different sizes of fringe?
A: Yes, you can experiment with different fringe lengths and widths to create a unique look. Just be sure to keep the measurements consistent around the entire bed.
Conclusion
Congratulations! You've successfully created a cozy and stylish no-sew fringe dog bed. This project is not only a fun and rewarding DIY activity but also a great way to show your furry friend how much you care. Enjoy watching your dog relax and snooze in their new custom-made bed. Remember to adjust the size and stuffing to perfectly suit your dog’s needs for optimal comfort and support. Now sit back and enjoy the happy snores!