Machining an engine block is a meticulous process essential for rebuilding a reliable and high-performing engine. It involves restoring the block to its original specifications, correcting any wear or damage that has occurred over time. This comprehensive guide outlines the essential steps, from initial inspection to final preparation, providing you with the knowledge to either tackle the job yourself or confidently oversee the process at a machine shop.
This is not a simple "plug-and-play" operation. Precision is paramount. Each step requires careful attention to detail and the use of specialized equipment. A mistake at any stage can compromise the integrity of the entire engine. Therefore, it's crucial to understand the purpose of each operation and to proceed with caution.
This guide is intended for enthusiasts and professionals alike. Whether you're a seasoned mechanic or just starting your engine rebuilding journey, this information will help you understand the fundamentals of engine block machining.
Step 1: Initial Disassembly and Cleaning
Disassembling the Engine Block
Before any machining can begin, the engine block must be completely disassembled. This means removing all components, including pistons, crankshaft, camshaft, bearings, oil pump, water pump, and any remaining sensors or hardware. Document everything you remove, and label parts clearly to ensure correct reassembly later. Take pictures; they are invaluable!
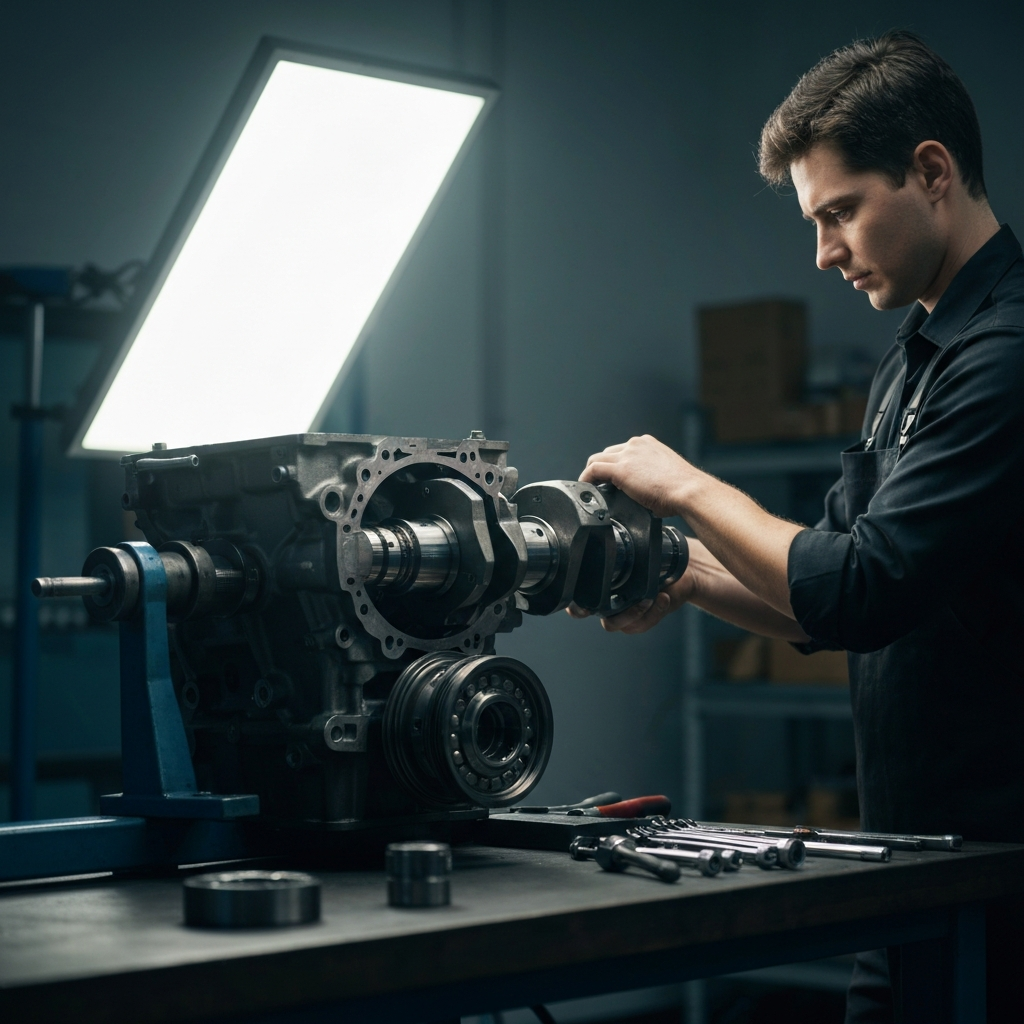
Cleaning the Block
A thoroughly cleaned engine block is essential for accurate inspection and machining. Use a combination of solvents, degreasers, and brushes to remove all traces of oil, grease, carbon buildup, rust, and any other contaminants. A hot tank or parts washer is highly recommended for this step, but manual scrubbing can also be effective. Pay close attention to oil passages and water jackets. These areas tend to accumulate debris and require extra effort to clean.

Step 2: Inspection and Measurement
Visual Inspection
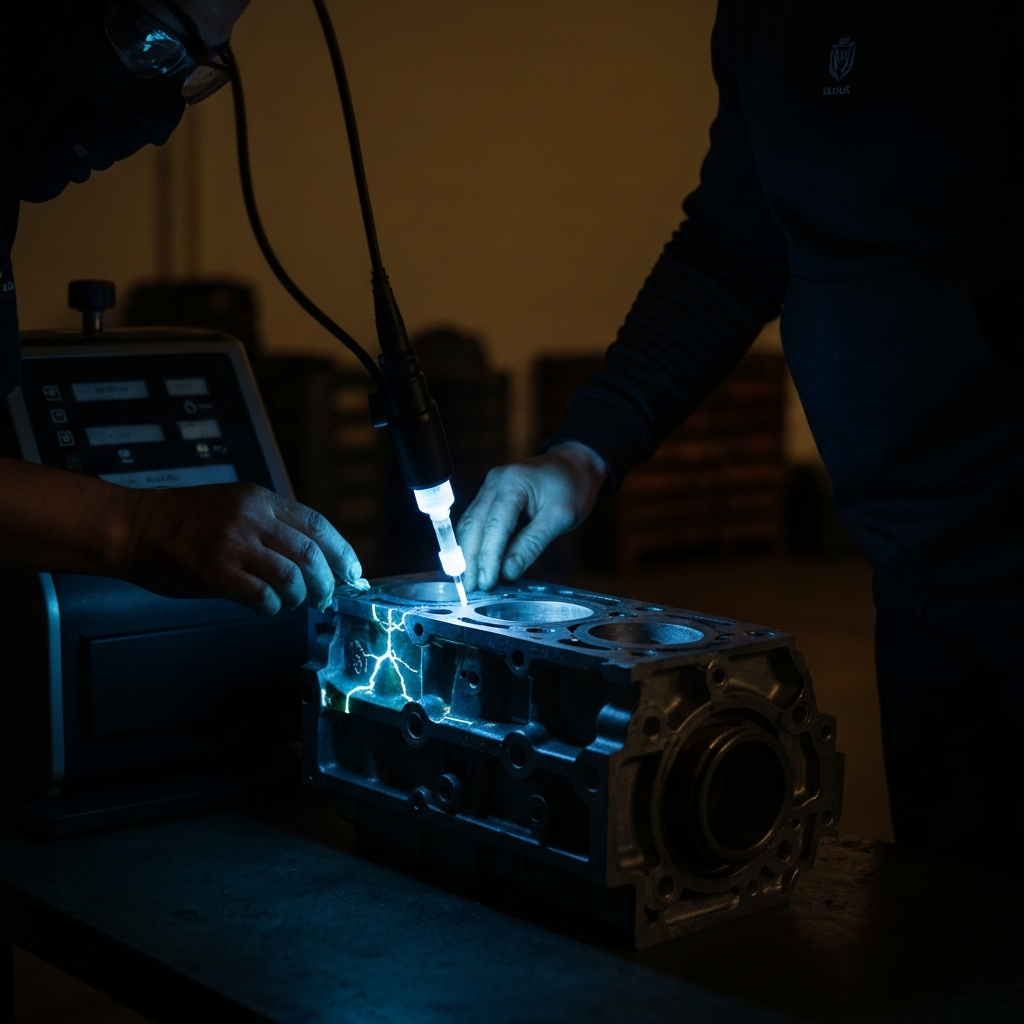
Once the block is clean, carefully inspect it for any signs of damage. Look for cracks, particularly in high-stress areas such as around the cylinder head bolt holes, main bearing saddles, and cylinder walls. Also check for any signs of corrosion or erosion. Magnafluxing (for cast iron blocks) or dye penetrant testing (for aluminum blocks) is highly recommended to reveal any hidden cracks that are not visible to the naked eye.
Precision Measurement
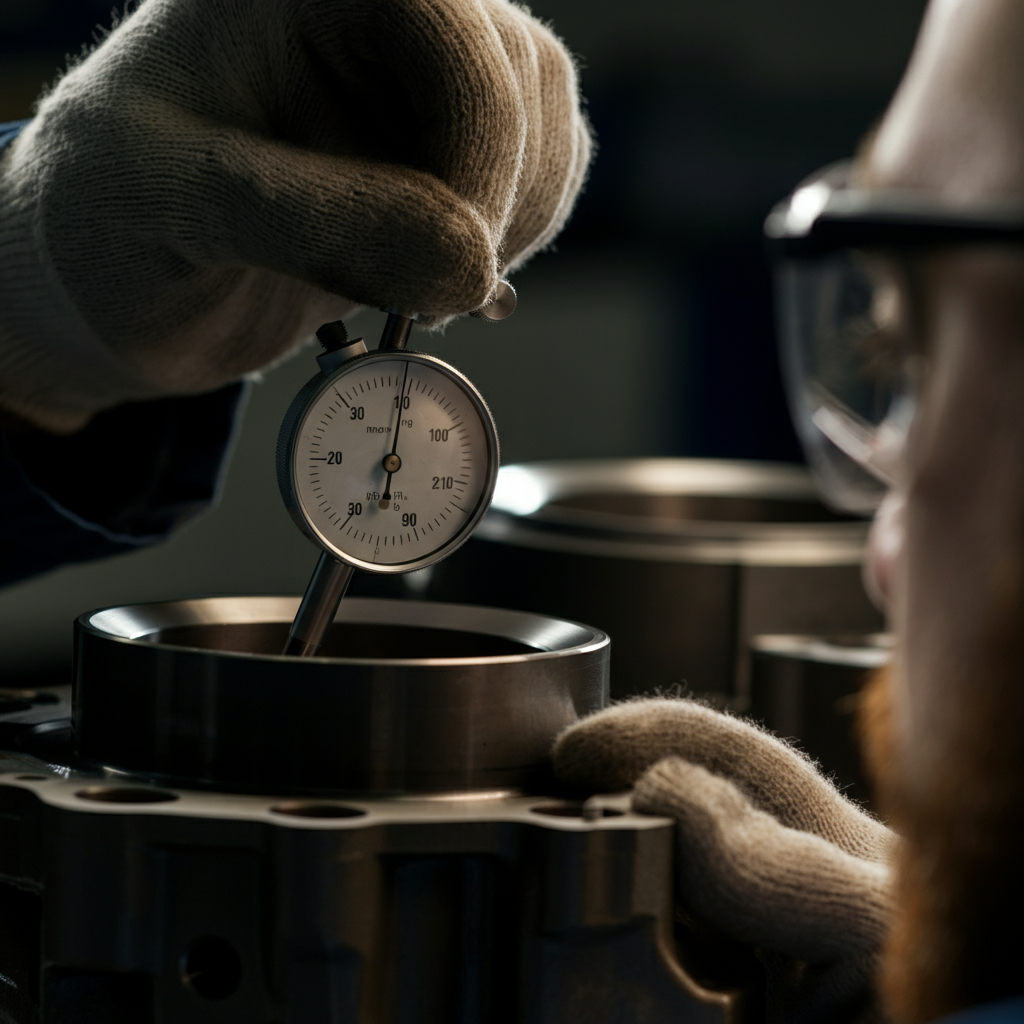
Accurate measurements are crucial for determining the extent of wear and the amount of machining required. Use precision measuring tools such as micrometers, dial bore gauges, and straightedges to measure the cylinder bore diameter, main bearing bore diameter, deck height, and crankshaft journal diameter. Record all measurements carefully. Compare your measurements to the manufacturer's specifications to determine the amount of material that needs to be removed during machining.
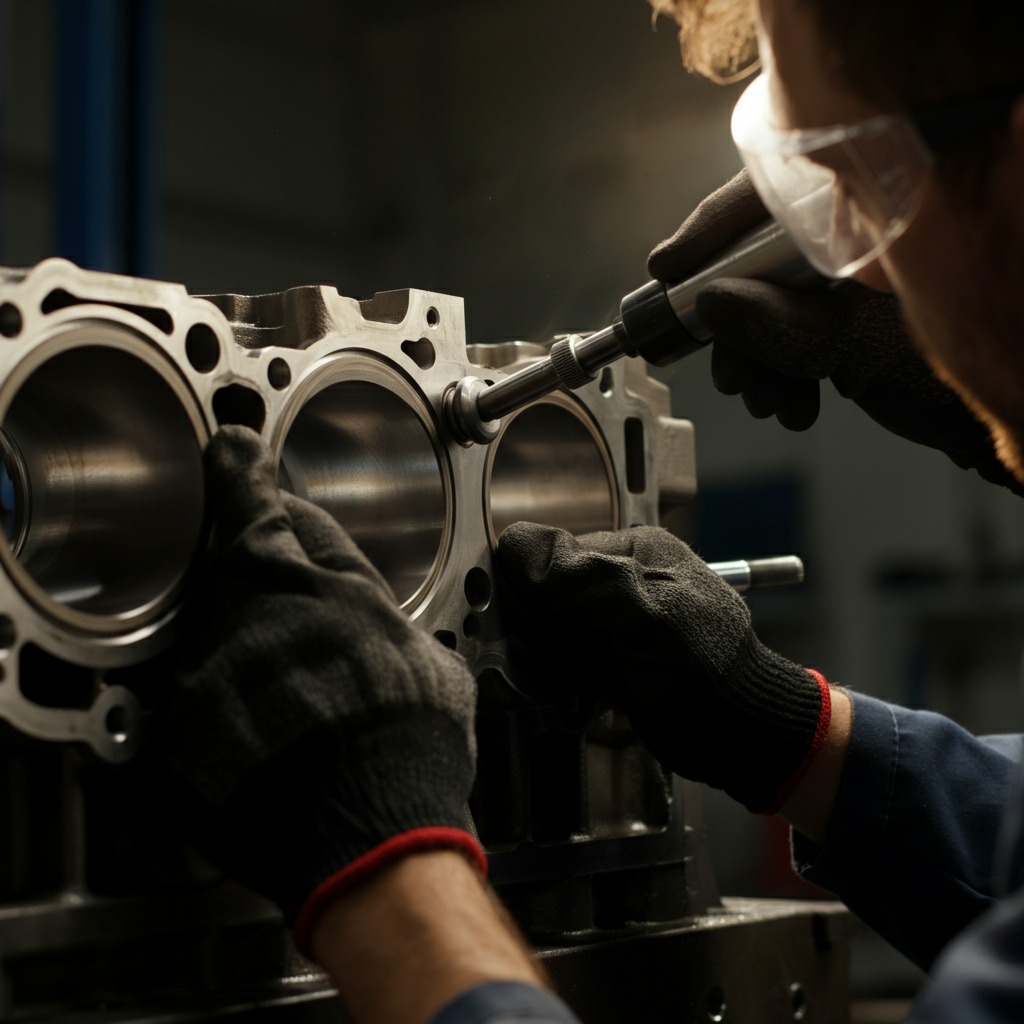
Step 3: Cylinder Boring and Honing
Boring the Cylinders
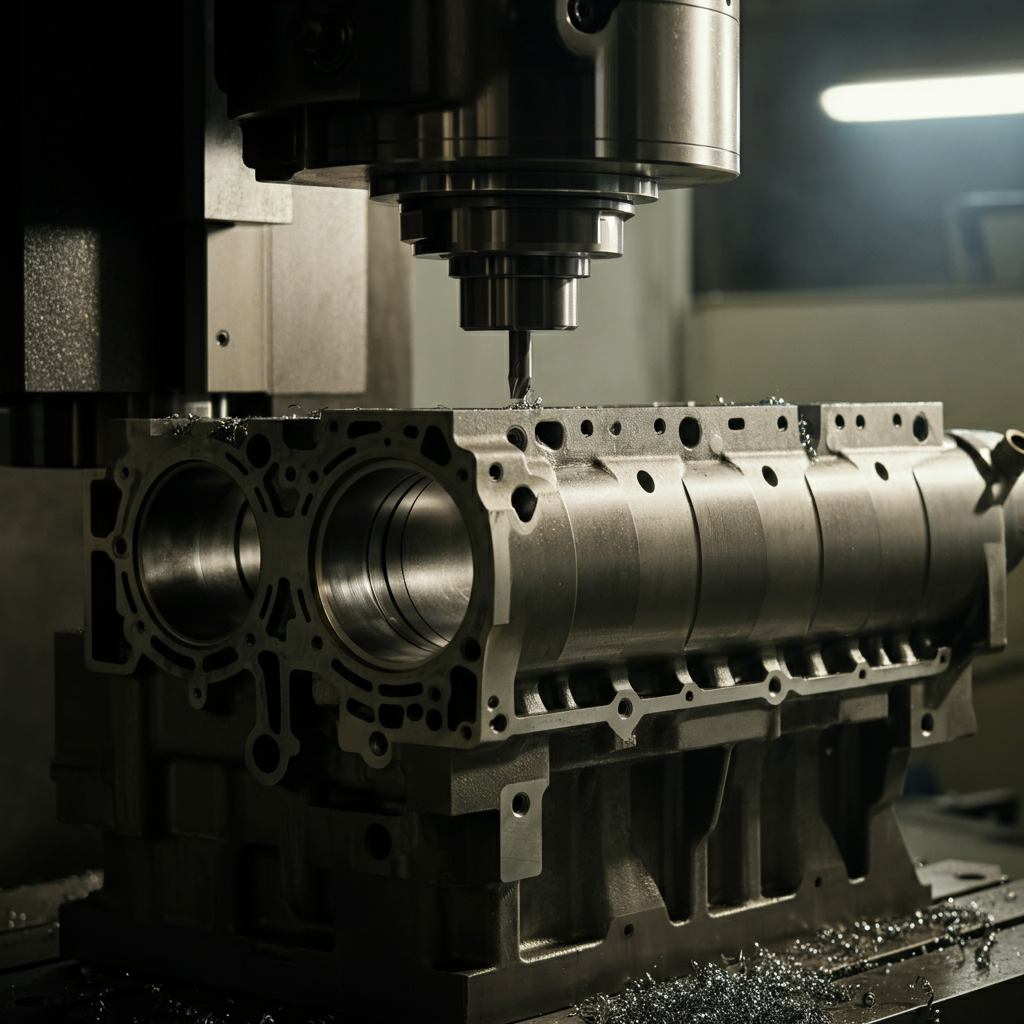
If the cylinder bores are worn or damaged, they will need to be bored to an oversize. This involves using a boring machine to remove material from the cylinder walls, creating a perfectly round and uniform bore. Select the appropriate oversize pistons before boring, as the bore diameter must match the piston size. Work slowly and carefully, taking multiple light passes to avoid overheating the block or damaging the cutting tool.
Honing the Cylinders
After boring, the cylinders must be honed to create a specific surface finish that allows the piston rings to properly seat. Honing involves using a honing tool with abrasive stones to create a crosshatch pattern on the cylinder walls. This pattern provides microscopic grooves that hold oil and allow the rings to break in properly. The angle and depth of the crosshatch are critical and must be within the manufacturer's specifications. Use a dial bore gauge to check the cylinder diameter and roundness throughout the honing process.
Step 4: Decking the Block
Milling the Deck Surface
Decking the block involves machining the top surface of the block to ensure it is perfectly flat and square to the cylinder bores. This is essential for proper head gasket sealing. A milling machine is used for this process, removing a minimal amount of material to achieve a flat and true surface. Be careful not to remove too much material, as this can affect the compression ratio and valve timing.
Step 5: Align Honing/Boring the Main Bearing Journals
Aligning the Main Bearing Bores
The main bearing bores must be perfectly aligned to ensure proper crankshaft rotation and bearing life. If the bores are misaligned or out of round, they can be corrected by align-honing or align-boring. This involves using a specialized machine to hone or bore the bores back to their original specifications. This is a very precise operation, and it's best left to experienced machinists.

Step 6: Final Cleaning and Inspection
Final Cleaning
After all machining operations are complete, the engine block must be thoroughly cleaned again to remove any metal shavings, abrasive residue, or other contaminants. Use a combination of solvents, degreasers, and brushes to clean all surfaces, including the cylinder bores, main bearing bores, oil passages, and water jackets. Pay particular attention to removing any abrasive particles from the honing process.
Final Inspection and Measurement
Before reassembling the engine, perform a final inspection of all machined surfaces. Check the cylinder bore diameter, main bearing bore diameter, deck height, and crankshaft journal diameter to ensure they are within the manufacturer's specifications. Also check for any signs of damage or contamination. It's always a good idea to double-check your measurements at this stage.
Tools or Materials Required
- Engine stand
- Solvents and degreasers
- Brushes and cleaning tools
- Magnaflux or dye penetrant kit
- Micrometers
- Dial bore gauge
- Straightedge
- Boring machine
- Honing tool
- Milling machine
- Align-honing or align-boring machine (if necessary)
- Safety glasses
- Gloves
Safety Considerations
Machining an engine block involves working with heavy equipment and potentially hazardous materials. Always wear safety glasses and gloves to protect yourself from flying debris and chemical exposure. Follow all safety instructions provided by the equipment manufacturers. Ensure proper ventilation when working with solvents and degreasers. If you are not comfortable with any of these procedures, seek the help of a qualified machinist.
Common Mistakes to Avoid
- Not properly cleaning the engine block before machining
- Removing too much material during boring or decking
- Using the wrong honing stones or honing technique
- Misaligning the main bearing bores
- Failing to properly clean the engine block after machining
Pro Tips
- Take your time and be meticulous. Rushing through the process can lead to mistakes.
- Consult the engine manufacturer's specifications for all critical measurements and tolerances.
- Use high-quality measuring tools and equipment.
- Seek the advice of experienced machinists if you have any questions.
FAQ Section
Q: How much does it cost to machine an engine block?
A: The cost of machining an engine block can vary depending on the extent of the work required, the type of engine, and the location of the machine shop. It's best to get quotes from multiple shops before making a decision.
Q: Can I machine an engine block myself?
A: Machining an engine block requires specialized equipment and expertise. If you don't have the necessary tools or experience, it's best to leave it to a qualified machinist.
Q: How do I choose a good machine shop?
A: Look for a machine shop with experienced machinists, a good reputation, and a commitment to quality. Ask for references and inspect their facilities before entrusting them with your engine block.
Conclusion
Machining an engine block is a complex but rewarding process. By following these steps and paying close attention to detail, you can ensure that your engine block is properly restored and ready for a long and reliable service life. Remember that precision and patience are key to success. If you're unsure about any of the procedures, don't hesitate to seek the help of a qualified machinist. A well-machined engine block is the foundation of a high-performing engine, so it's worth the effort to do it right.