Sconch, those delectable fried bread squares dusted with powdered sugar, are a surprisingly simple yet incredibly satisfying treat. Often enjoyed as a quick snack or a sweet indulgence, their airy texture and sugary coating make them irresistible. This guide provides a comprehensive breakdown of the sconch-making process, ensuring you can consistently create perfect batches in your own kitchen.
Forget complicated recipes and lengthy preparations. Sconch offers a delightful entry point into the world of frying, allowing you to hone your skills and impress your friends and family with minimal effort. From selecting the right bread to achieving that perfect golden-brown hue, we'll cover every aspect of the process.
Whether you're a seasoned cook or a complete beginner, this guide will equip you with the knowledge and confidence to create these addictive treats. Get ready to transform simple ingredients into a culinary masterpiece!
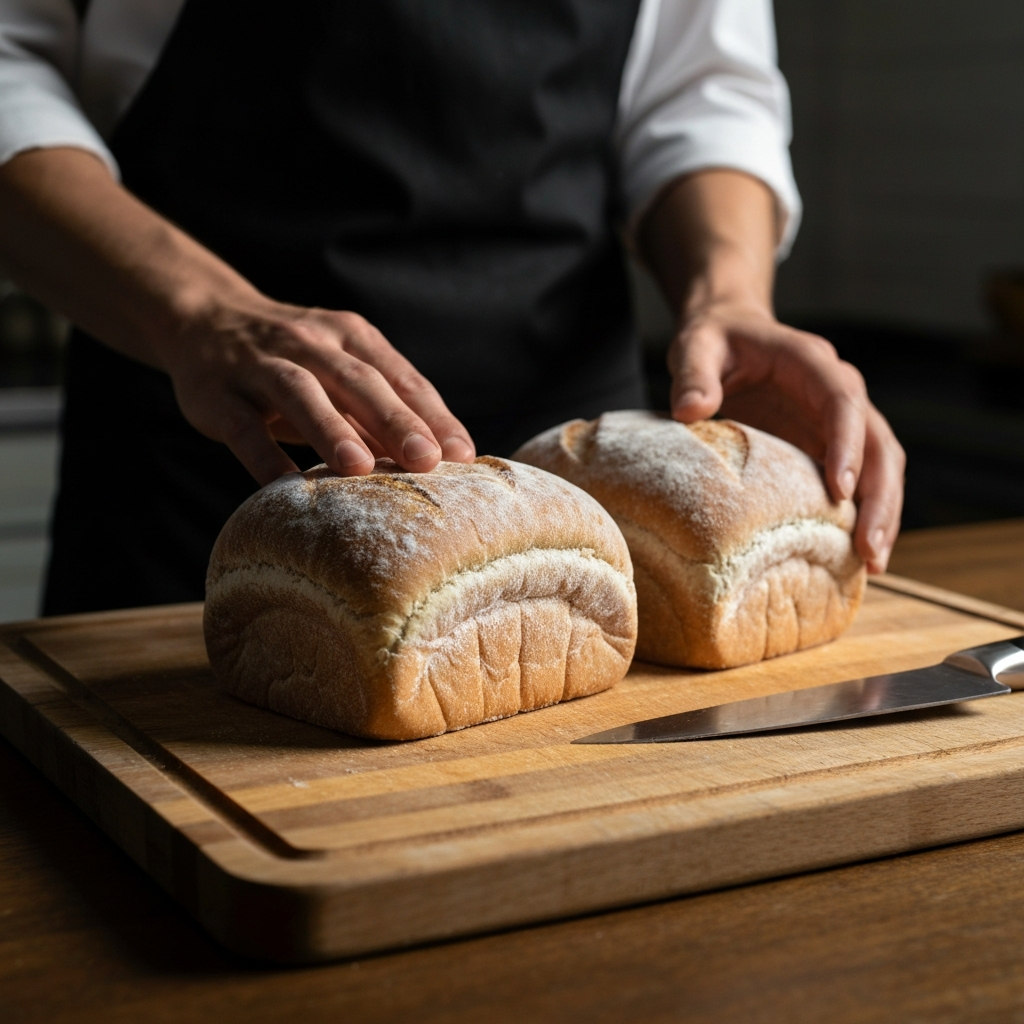
Step 1: Thawing the Frozen Loaves
The foundation of any good sconch is properly thawed bread. It's crucial to thaw the bread completely before cutting and frying to ensure even cooking and a light, airy texture. Place the frozen bread loaves on a clean surface at room temperature for approximately 30-60 minutes, depending on the size of the loaves. You're looking for the bread to be soft enough to easily cut without being overly sticky or wet. Resist the urge to microwave them, as this can lead to uneven thawing and a rubbery texture.
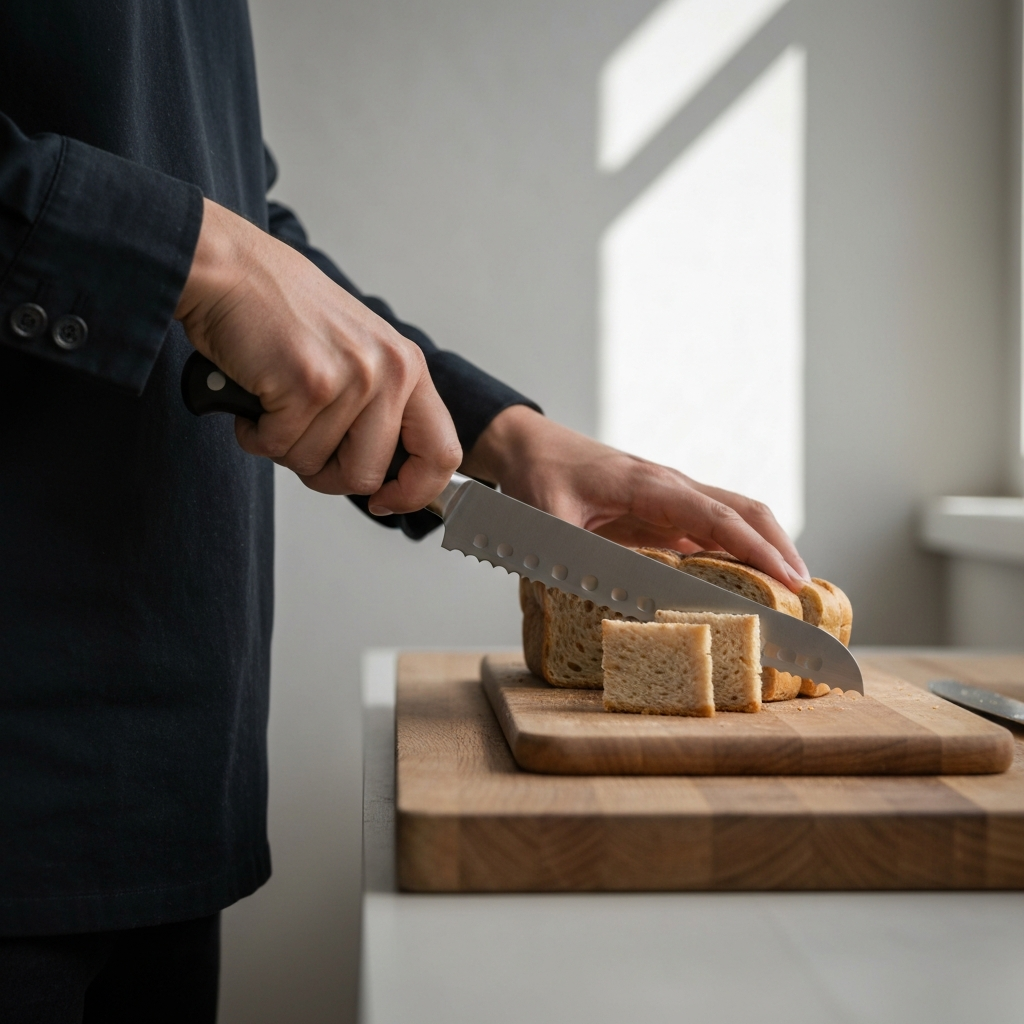
Step 2: Cutting the Bread into Pieces
Once the bread is thawed, it's time to cut it into bite-sized pieces. Use a sharp, serrated bread knife for the cleanest cuts. Aim for roughly 1-inch squares or rectangles – consistent sizing is key for even frying. Don't press down too hard, let the knife do the work to avoid squishing the bread. Irregularly shaped pieces will cook at different rates, leading to some being overly crispy while others remain doughy. Place the cut pieces on a plate or tray, ready for frying. Consider dusting the cutting board lightly with flour if the bread is particularly sticky.
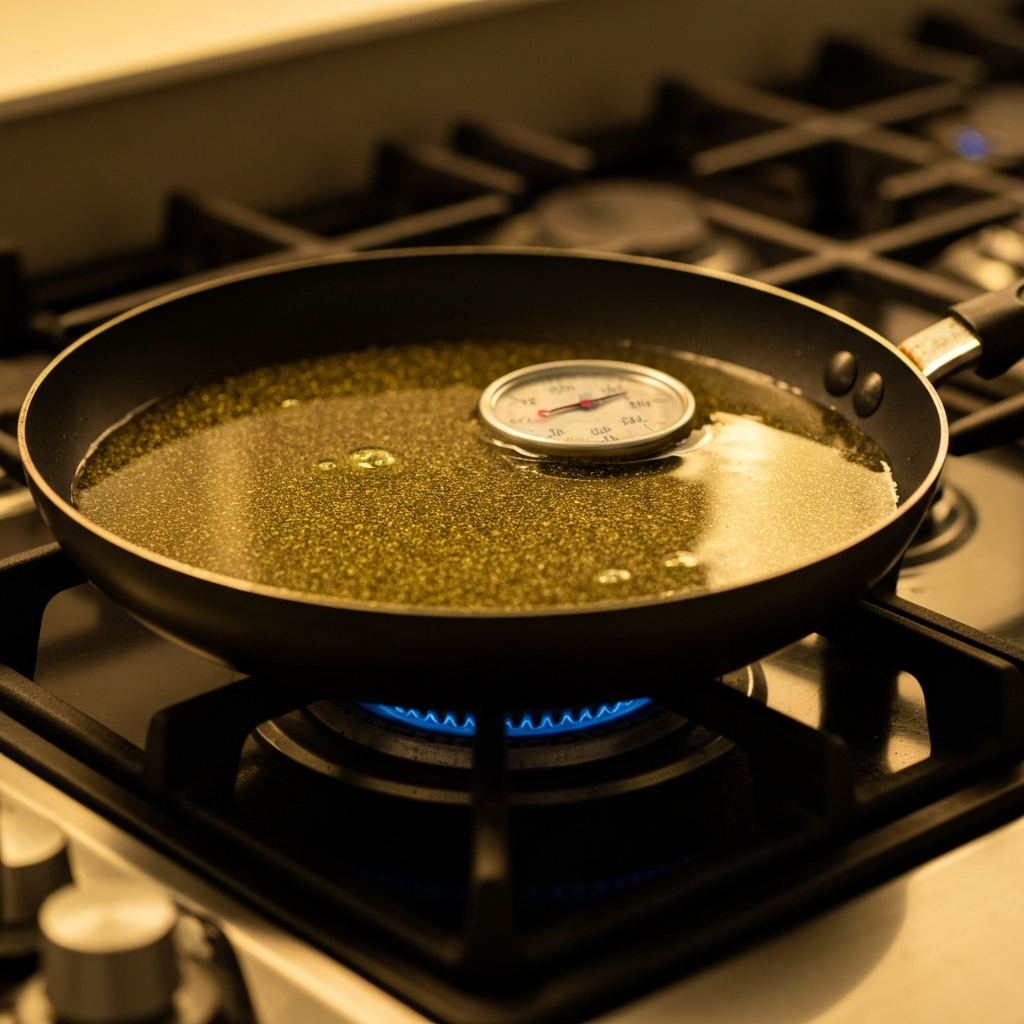
Step 3: Preparing the Frying Pan
Properly preparing the frying pan is essential for successful sconch frying. Choose a frying pan with a heavy bottom to ensure even heat distribution. Pour in enough vegetable oil to reach a depth of about ½ inch. Using too little oil will result in uneven browning, while too much can make the sconch greasy. Heat the oil over medium heat. The oil is ready when a small piece of bread dropped into it sizzles immediately. Use a thermometer to ensure the oil reaches approximately 350°F (175°C) for optimal results. Overheating the oil can lead to burning, while underheating results in soggy sconch.
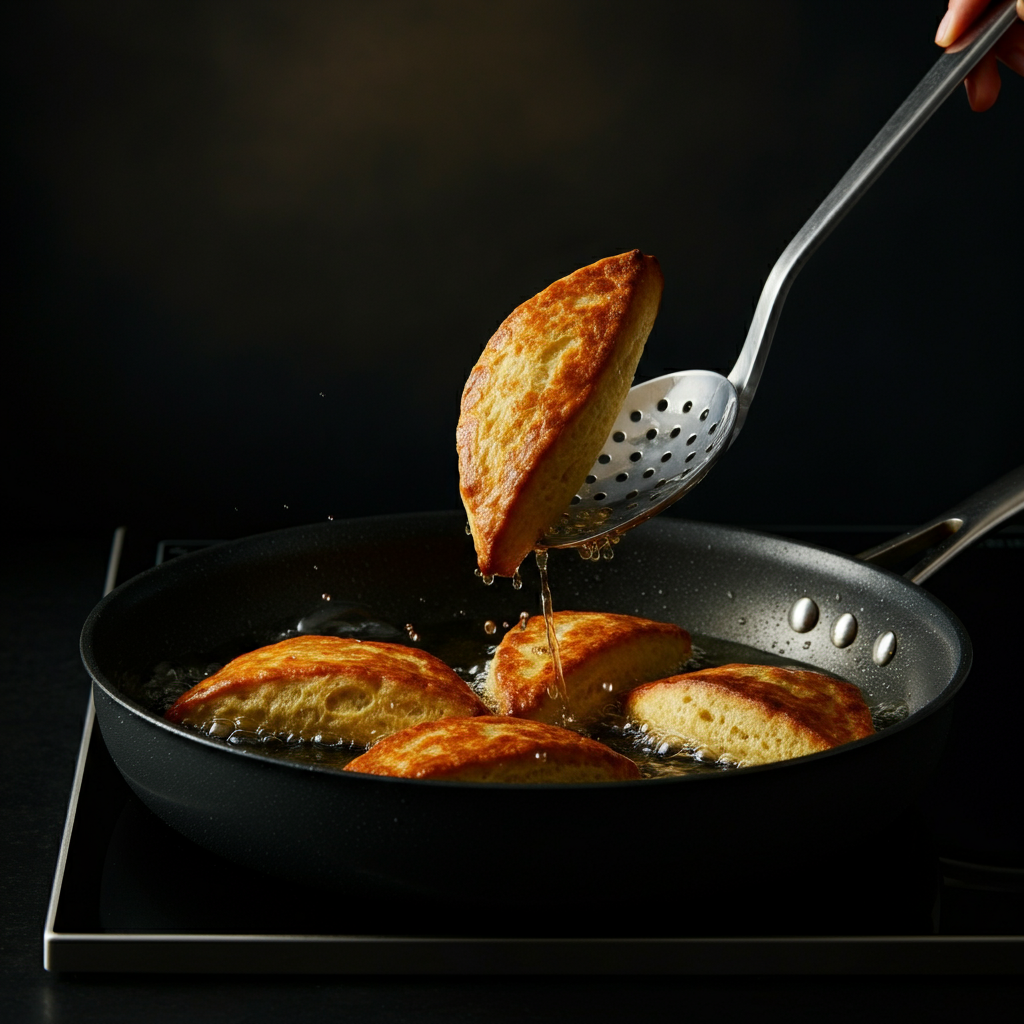
Step 4: Frying the Bread Until Puffy
Carefully place the cut bread pieces into the hot oil, being careful not to overcrowd the pan. Overcrowding will lower the oil temperature and result in unevenly cooked sconch. Fry the bread for approximately 1-2 minutes per side, or until golden brown and puffy. Use a spatula or slotted spoon to gently flip the pieces as needed. Watch them closely, as they can burn quickly. The goal is to achieve a light, airy texture with a crispy exterior. Don't be afraid to adjust the heat slightly to maintain the desired browning rate.
Step 5: Draining and Coating with Powdered Sugar
Once the sconch are golden brown and puffy, use a slotted spoon to carefully remove them from the hot oil and place them on a plate lined with paper towels. This will help absorb excess oil, preventing them from becoming greasy. Allow the sconch to cool slightly for a minute or two before generously dusting them with powdered sugar. The residual heat will help the sugar adhere to the surface. For an even coating, you can place the sconch in a large bowl with powdered sugar and gently toss them until fully coated. Serve immediately and enjoy!

Tools or Materials Required
- Frozen bread loaves
- Vegetable oil
- Powdered sugar
- Frying pan
- Serrated bread knife
- Spatula or slotted spoon
- Paper towels
- Plate or tray
Safety Considerations
- Hot Oil: Use extreme caution when working with hot oil. Never leave the pan unattended. Keep a fire extinguisher nearby.
- Splattering: Hot oil can splatter. Use long-handled utensils and wear appropriate clothing to protect your skin.
- Cooling: Allow the sconch to cool slightly before handling to avoid burns.
Common Mistakes to Avoid
- Not Thawing Bread Properly: This leads to uneven cooking and a dense texture.
- Overcrowding the Pan: This lowers the oil temperature and results in soggy sconch.
- Overheating the Oil: This can cause the sconch to burn quickly.
- Using Too Much Oil: This makes the sconch greasy.
Pro Tips
- Experiment with different types of bread. Brioche or challah can add richness and flavor.
- Add a pinch of cinnamon or nutmeg to the powdered sugar for a warm, spiced flavor.
- Serve with a side of honey or maple syrup for dipping.
- Store leftover sconch in an airtight container at room temperature. Reheat them in the oven or toaster oven for the best results.
FAQ Section
Q: Can I use a different type of oil?
A: Yes, you can use other neutral oils with a high smoke point, such as canola oil or peanut oil.
Q: How do I know when the oil is hot enough?
A: Use a thermometer to measure the oil temperature. Alternatively, drop a small piece of bread into the oil. If it sizzles immediately, the oil is ready.
Q: Can I make these ahead of time?
A: Sconch are best enjoyed fresh. However, you can fry them ahead of time and reheat them in the oven or toaster oven before serving.
In conclusion, mastering the art of sconch is a rewarding culinary journey. By following these steps and paying attention to detail, you can consistently create delicious, golden-brown treats that are sure to impress. Remember to prioritize safety when working with hot oil, and don't be afraid to experiment with different flavors and variations. Now, go forth and sconch!