Bikrampurer Bibikhana Pitha is a celebrated traditional cake originating from the Bikrampur region of Bangladesh. This rich and flavorful pitha is a delightful fusion of textures and tastes, primarily featuring the earthy sweetness of jaggery and the tropical notes of coconut. It’s not just a dessert; it’s a taste of heritage, often enjoyed during special occasions and family gatherings.
Creating Bibikhana Pitha from scratch might seem daunting at first, but with careful preparation and attention to detail, you can easily recreate this culinary masterpiece in your own kitchen. This guide will walk you through each step, from preparing the ingredients to baking the perfect pitha, ensuring a delicious and authentic experience.
Get ready to embark on a flavorful journey and bring a piece of Bikrampur to your table. Let's begin crafting this exquisite sweet treat that will surely impress your family and friends.
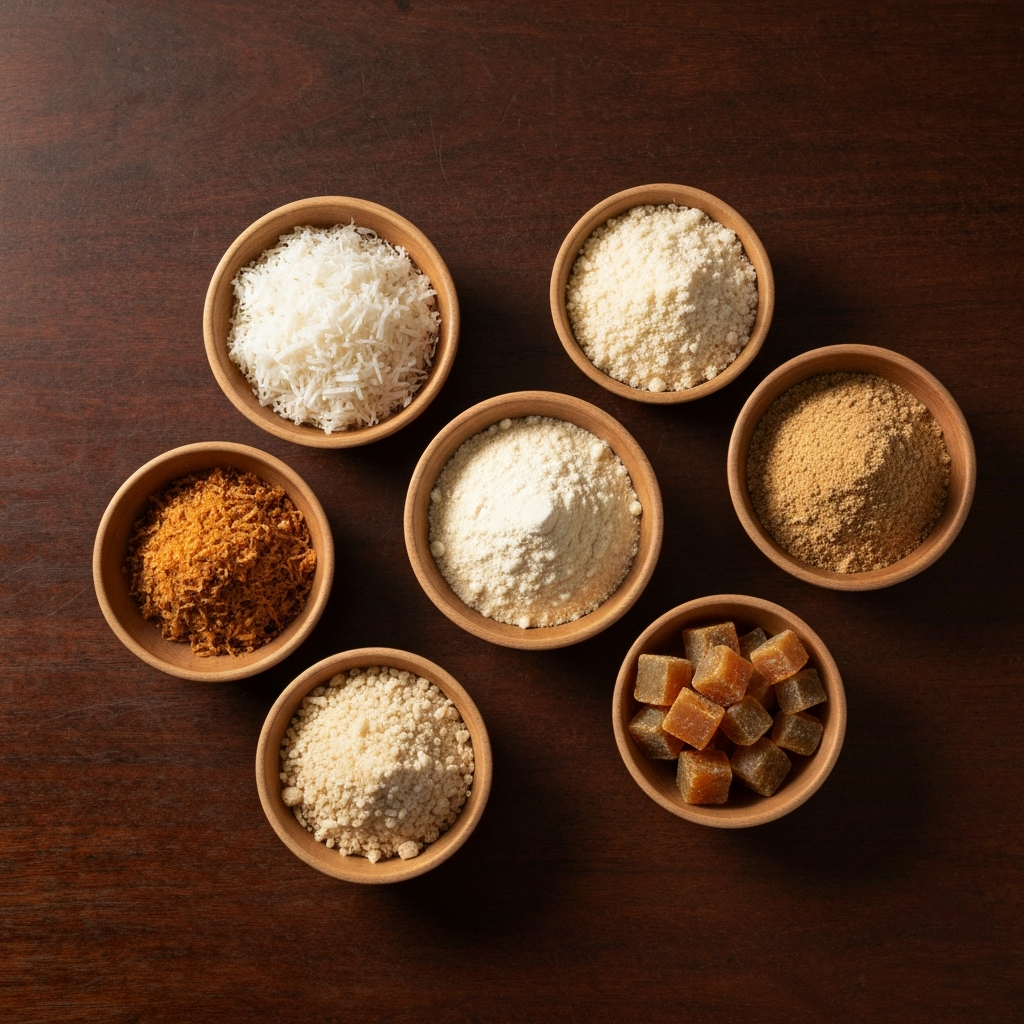
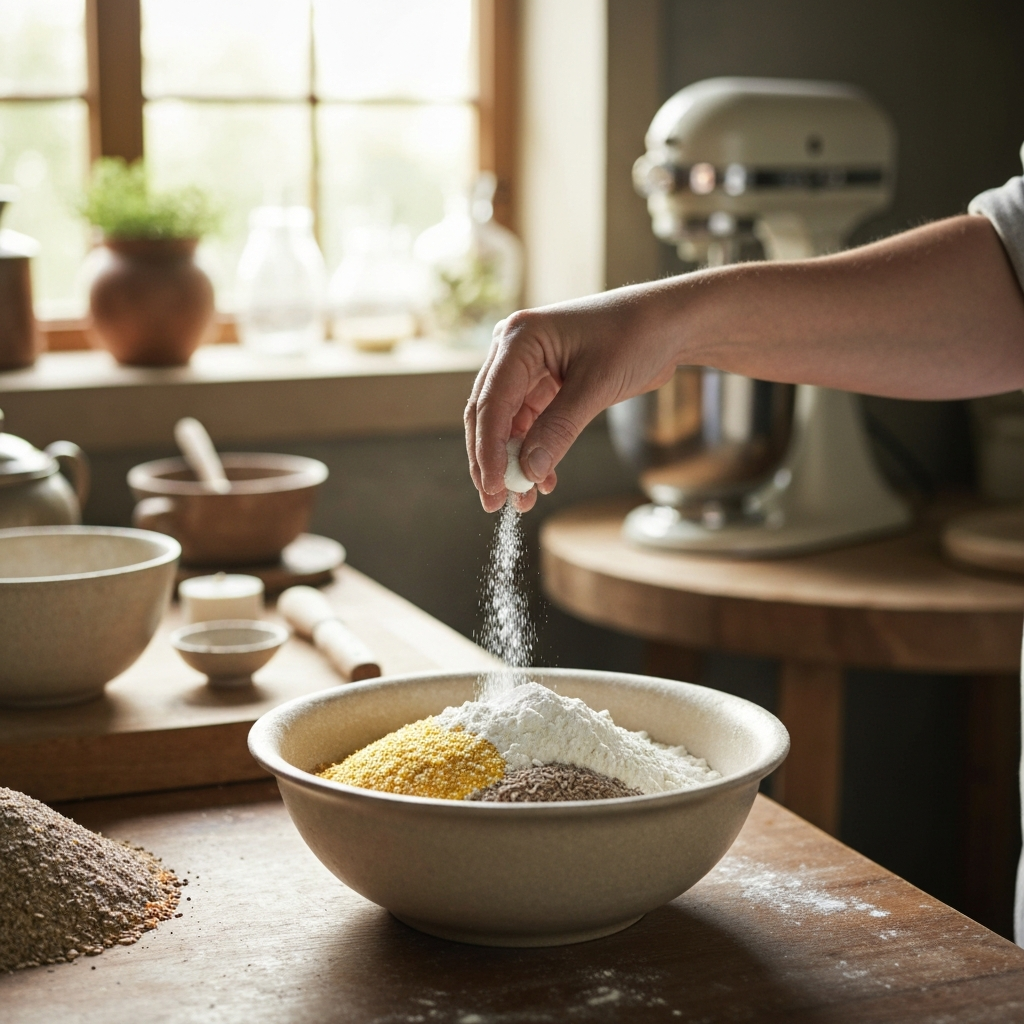
Step 1: Prepare the Key Ingredients
Before you start mixing and baking, it's crucial to prepare all the ingredients properly. This ensures that the flavors meld together beautifully and the texture is just right. Proper ingredient preparation is the foundation of a perfect Bibikhana Pitha.
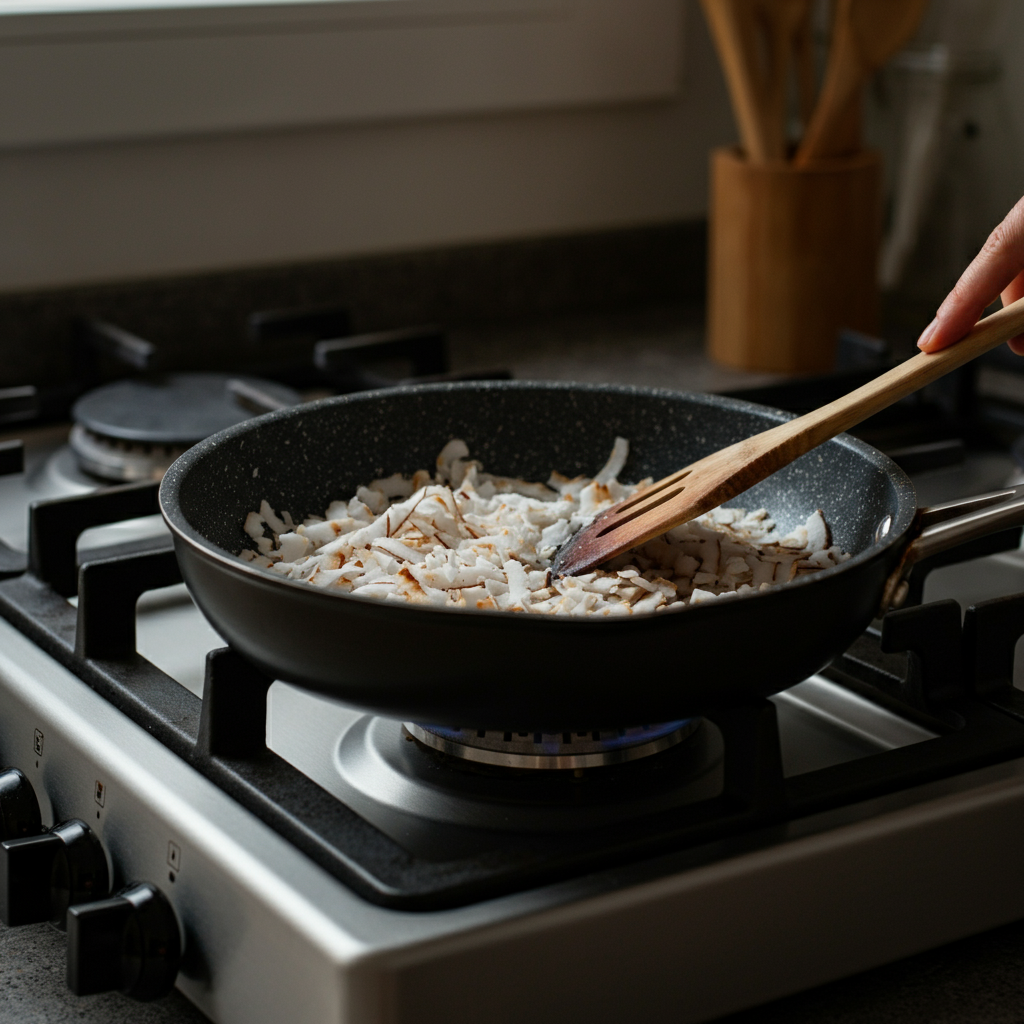
Step 2: Roast the Shredded Coconut
Roasting the coconut enhances its flavor and removes excess moisture, which is crucial for achieving the right consistency in your pitha. Use a dry pan over medium heat, stirring constantly to prevent burning. Roast until the coconut turns a light golden brown and releases a fragrant aroma. This typically takes about 5-7 minutes. Be vigilant, as coconut can burn quickly, and burnt coconut will impart a bitter taste to the final product. Set aside to cool completely before using.
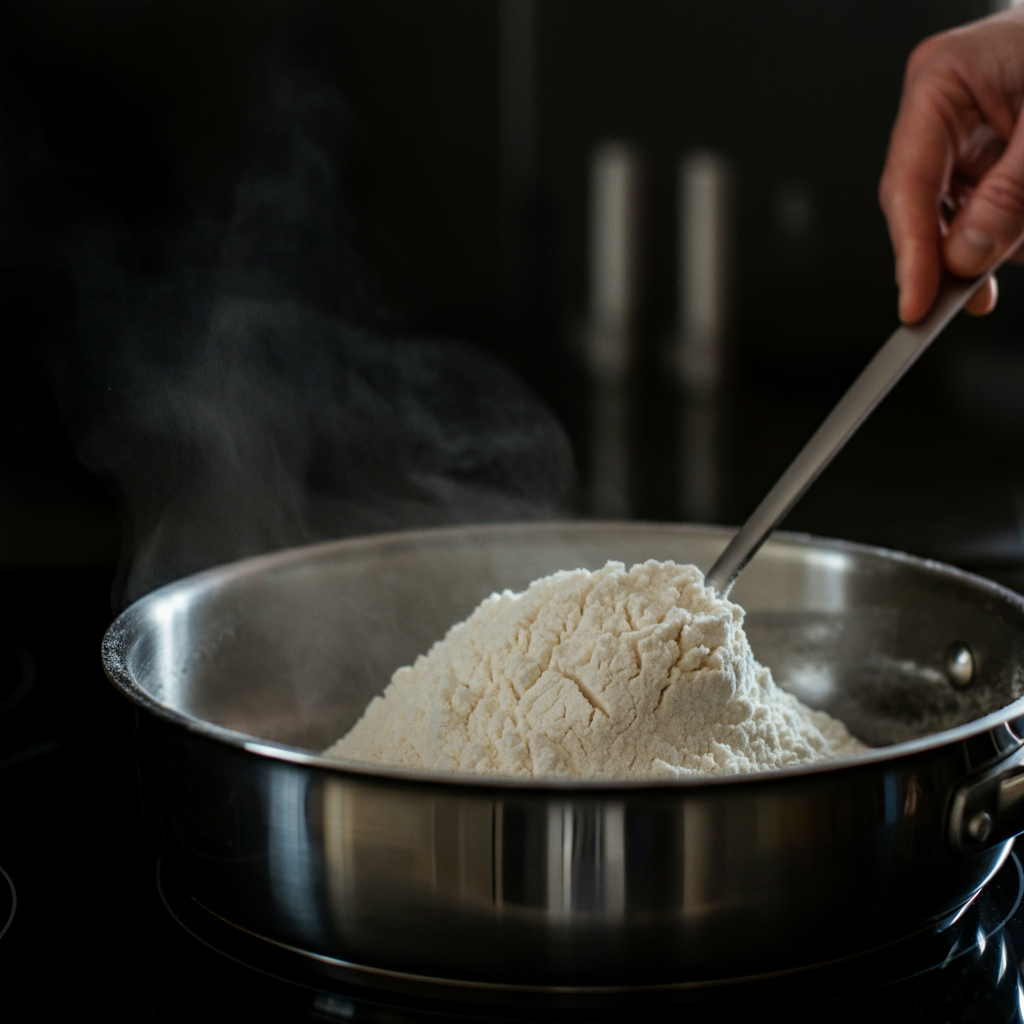
Step 3: Roast the Rice Flour
Roasting the rice flour is essential to eliminate its raw taste and to create a light and airy texture in the pitha. Spread the rice flour evenly in a dry pan over low to medium heat. Stir continuously to prevent it from sticking and burning. Roast until the flour turns slightly fragrant and its color changes subtly, about 8-10 minutes. Over-roasting can make the flour bitter, so keep a close watch. Once roasted, remove from the pan and let it cool completely. This step is vital for preventing a dense, gummy texture.
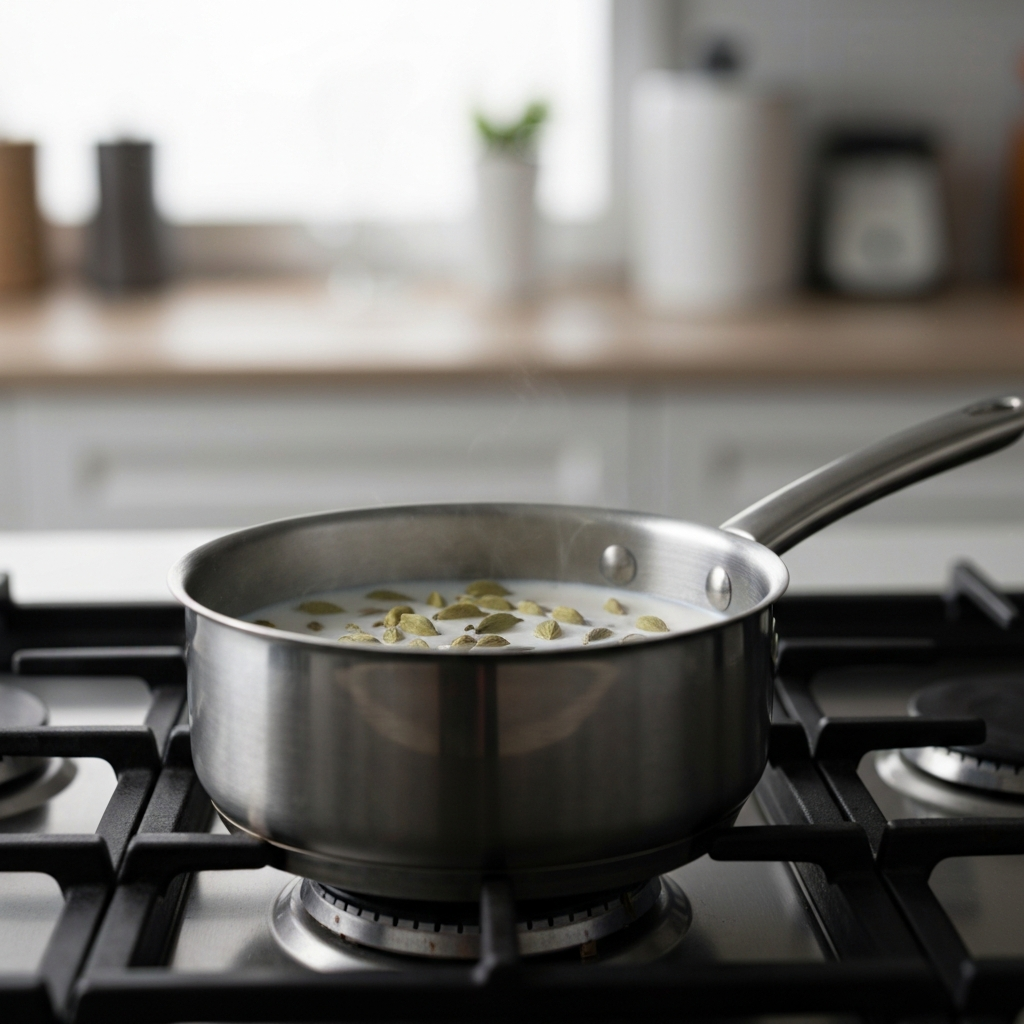
Step 4: Create the Milk Mixture
A rich milk mixture is key to the moistness and flavor of the Bibikhana Pitha. You will need milk (whole milk is recommended for richness) and a few aromatic spices like cardamom and cinnamon. In a saucepan, gently heat the milk with crushed cardamom pods and a cinnamon stick. Do not boil the milk; just heat it enough to infuse the spices. Let it simmer on low heat for about 10-15 minutes. Remove from heat, strain the milk to remove the spices, and set aside to cool. You can also add a pinch of saffron strands for color and added flavor.
Step 5: Combine the Dry Ingredients
In a large mixing bowl, combine the roasted rice flour with all-purpose flour. The ratio of rice flour to all-purpose flour is important for the final texture. Too much rice flour can make the pitha crumbly, while too much all-purpose flour can make it dense. A balanced ratio ensures a tender and moist cake. Gently whisk together the flours to evenly distribute them.

Step 6: Incorporate Baking Powder and Salt
Add baking powder and a pinch of salt to the flour mixture. The baking powder is essential for leavening, giving the pitha a light and airy texture. The salt enhances the flavors of the other ingredients, balancing the sweetness. Ensure the baking powder is fresh, as expired baking powder will not provide the necessary lift. Whisk all the dry ingredients together thoroughly to ensure even distribution.
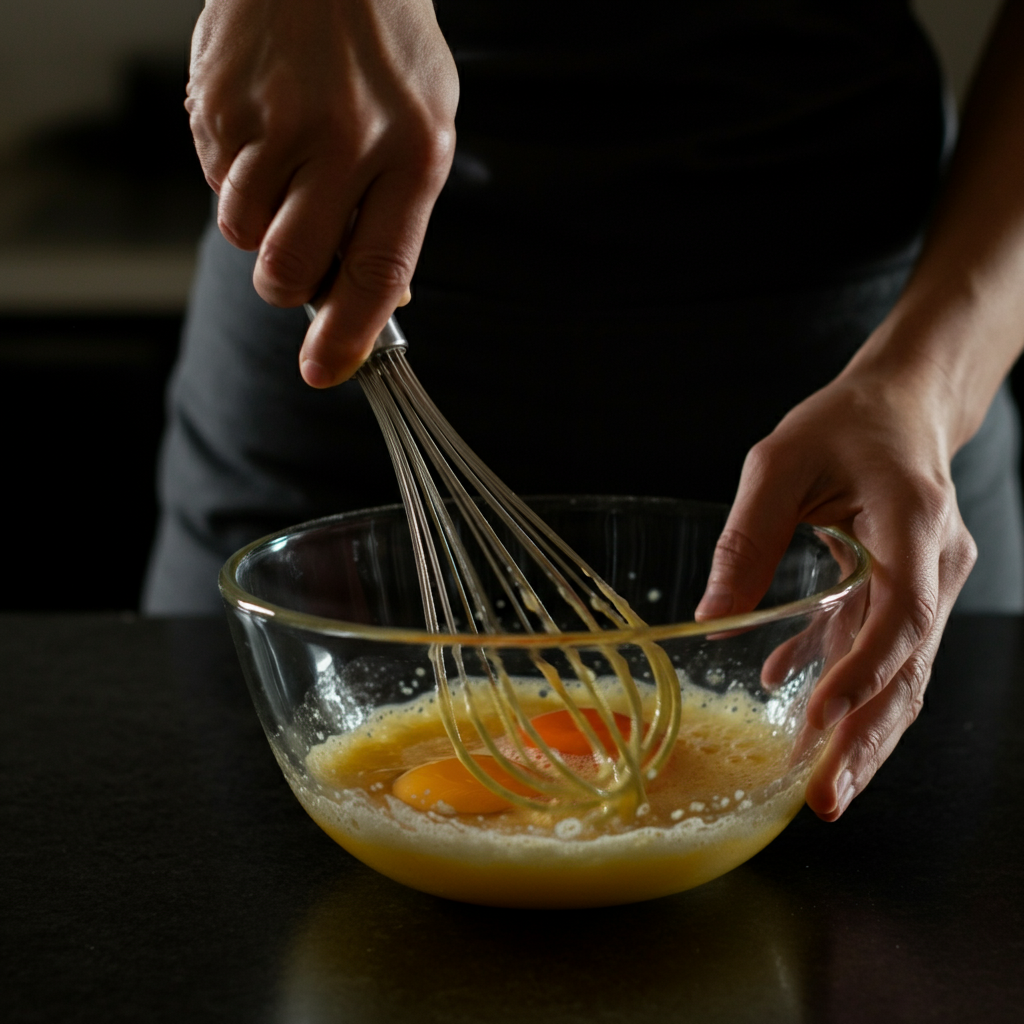
Step 7: Whisk the Eggs
In a separate bowl, crack the eggs and whisk them until they are light and frothy. This step incorporates air into the batter, contributing to a lighter texture. Whisk the eggs vigorously for at least 2-3 minutes until they are pale and have increased in volume. Over-whisking can make the eggs tough, so stop when they are uniformly light and airy.
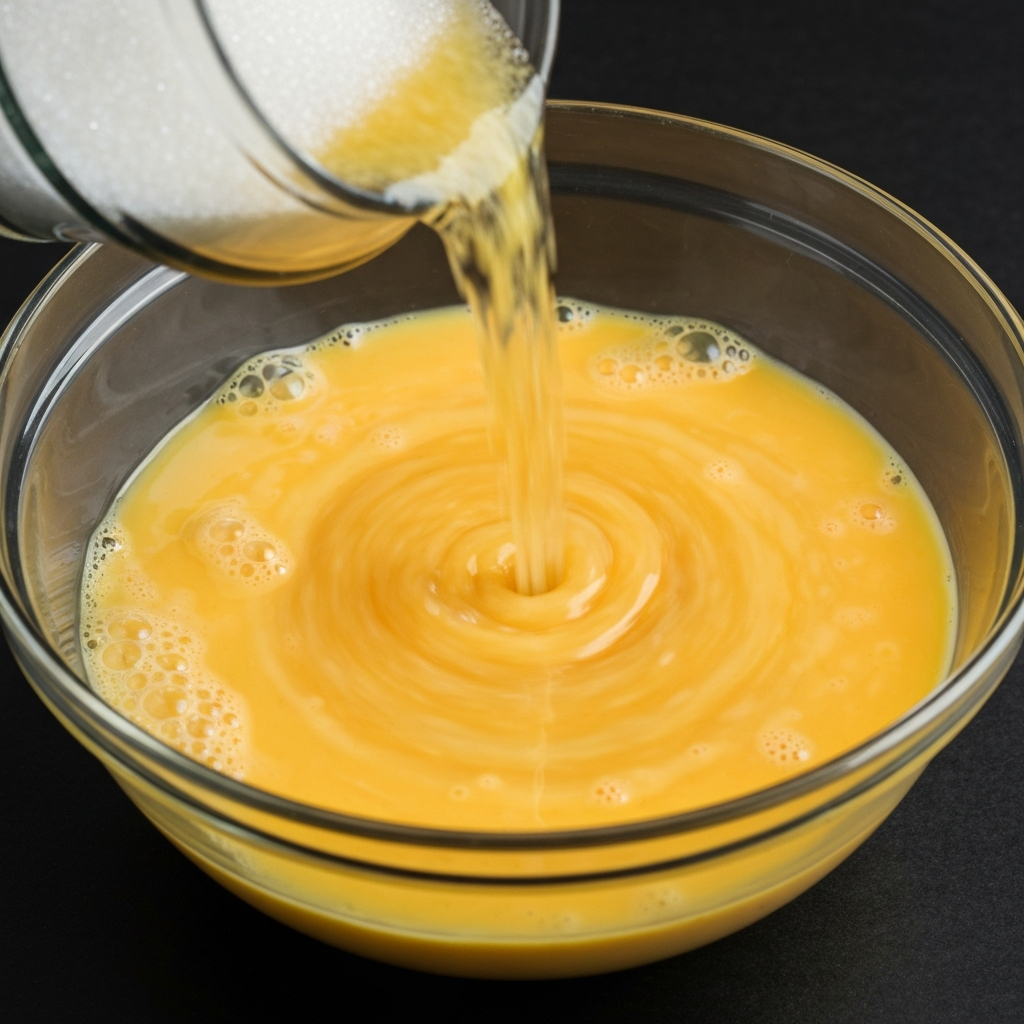
Step 8: Add Sugar and Jaggery
Gradually add sugar to the whisked eggs, continuing to whisk until the sugar is completely dissolved and the mixture is smooth. Next, add the melted jaggery, ensuring it has cooled slightly to prevent cooking the eggs. Jaggery adds a unique caramel-like flavor that distinguishes Bibikhana Pitha. Whisk until everything is well combined and the mixture is smooth and creamy. Adjust the amount of sugar and jaggery based on your preference for sweetness.
Step 9: Melt Ghee or Butter
Melt ghee (clarified butter) or butter in a small saucepan or in the microwave. Ghee adds a rich, nutty flavor, but butter can be used as a substitute. Allow the melted ghee or butter to cool slightly before adding it to the egg mixture to prevent the eggs from curdling. Once cooled, pour the melted ghee or butter into the egg mixture and whisk until well combined.
Step 10: Incorporate the Milk Mixture
Gradually add the cooled milk mixture to the egg mixture, whisking continuously to ensure everything is well incorporated. The milk adds moisture and richness to the batter. Pour the milk in slowly to prevent the mixture from separating. Continue whisking until the batter is smooth and uniform.
Step 11: Add Roasted Coconut
Gently fold in the roasted shredded coconut into the wet ingredients. Ensure the coconut is evenly distributed throughout the batter. The roasted coconut adds texture and a delightful nutty flavor to the pitha. Be careful not to overmix at this stage, as it can make the batter tough.
Step 12: Combine Wet and Dry Ingredients
Gradually add the dry ingredients to the wet ingredients, folding gently until just combined. Avoid overmixing, as this can develop the gluten in the flour, resulting in a tough pitha. Fold the batter just until the dry ingredients disappear. A few lumps are okay, as they will dissolve during baking.
Step 13: Rest the Batter
Cover the batter and let it rest at room temperature for at least 30 minutes. This allows the flour to fully absorb the liquid, resulting in a more tender and moist pitha. Resting the batter is a crucial step that should not be skipped. You can even let it rest for up to an hour for better results.
Step 14: Prepare the Baking Dish
Grease an oven-safe dish (preferably a loaf pan or a square baking pan) with ghee or butter. This prevents the pitha from sticking to the pan and makes it easier to remove after baking. You can also line the bottom of the pan with parchment paper for added insurance. Ensure the dish is thoroughly greased, especially the corners.
Step 15: Set Up the Water Bath
A water bath, or bain-marie, is essential for baking Bibikhana Pitha to ensure even cooking and a moist texture. Preheat your oven to 325°F (160°C). Place the greased baking dish inside a larger baking pan. Pour hot water into the larger pan until it reaches about halfway up the sides of the smaller baking dish. The water bath prevents the pitha from drying out and cracking.
Step 16: Bake the Pitha
Carefully place the baking pan with the water bath into the preheated oven. Bake for approximately 60-75 minutes, or until a toothpick inserted into the center comes out clean. The baking time may vary depending on your oven, so check the pitha regularly. If the top starts to brown too quickly, cover it loosely with aluminum foil.
Step 17: Cool and Serve
Once the pitha is baked, remove it from the oven and let it cool in the water bath for about 15-20 minutes. Then, carefully remove the pitha from the pan and let it cool completely on a wire rack before slicing and serving. Cooling the pitha completely prevents it from crumbling when sliced. Garnish with extra shredded coconut, chopped nuts, or a drizzle of honey for an added touch of elegance.
Tools or Materials Required
- Mixing bowls
- Whisk
- Spatula
- Measuring cups and spoons
- Baking pan (loaf pan or square pan)
- Larger baking pan for water bath
- Saucepan
- Wire rack
- Oven
Common Mistakes to Avoid
- Burning the coconut or rice flour during roasting.
- Overmixing the batter, resulting in a tough pitha.
- Not using a water bath, causing the pitha to dry out.
- Using expired baking powder, preventing the pitha from rising properly.
Pro Tips
- For a richer flavor, use homemade ghee.
- Add a pinch of cardamom powder for enhanced aroma.
- Adjust the amount of sugar and jaggery to suit your taste.
- Experiment with different toppings, such as nuts or a honey glaze.
FAQ Section
Q: Can I use brown sugar instead of jaggery?
A: While jaggery provides a unique flavor, brown sugar can be used as a substitute in a pinch. It won't have the exact same taste, but it will still provide sweetness and a slightly molasses-like flavor.
Q: Can I freeze Bibikhana Pitha?
A: Yes, you can freeze Bibikhana Pitha. Wrap it tightly in plastic wrap and then in foil to prevent freezer burn. Thaw it overnight in the refrigerator before serving.
Q: How long does Bibikhana Pitha last?
A: Stored properly in an airtight container at room temperature, Bibikhana Pitha will last for about 3-4 days.
Conclusion
Creating Bikrampurer Bibikhana Pitha is a labor of love, but the end result is well worth the effort. With its unique blend of flavors and textures, this traditional cake is sure to be a hit with your family and friends. Remember the key is to carefully prepare each ingredient, avoid overmixing, and use a water bath for even baking. Enjoy the process and the delicious outcome of this treasured recipe!