The world around us is brimming with potential for artistic expression. Forget expensive canvases and specialized equipment. With a little imagination and some basic techniques, everyday objects can be transformed into stunning works of art. This guide will unlock your creative potential, showing you how to see beyond the mundane and discover the art hidden within the ordinary.
We'll explore a range of techniques, from simple assemblage to more complex manipulation, providing step-by-step instructions and expert tips along the way. Get ready to challenge your perceptions, embrace experimentation, and create art that is both unique and meaningful. No matter your skill level, there's something here for everyone eager to unleash their inner artist.
Art isn't confined to galleries and museums. It can be found – and created – anywhere. Let's begin our journey of artistic transformation.
Step 1: Finding Your Inspiration
Before diving into any project, take some time to observe the objects around you. Look at them with fresh eyes. Consider their shape, texture, color, and function. What stories do they tell? What emotions do they evoke? Don't limit yourself to obvious choices; even discarded items can hold surprising artistic potential. A rusty nail, a cracked teacup, a faded photograph – these are all raw materials waiting to be reimagined. Think about themes you want to explore in your art, and how these objects might help you express those themes.

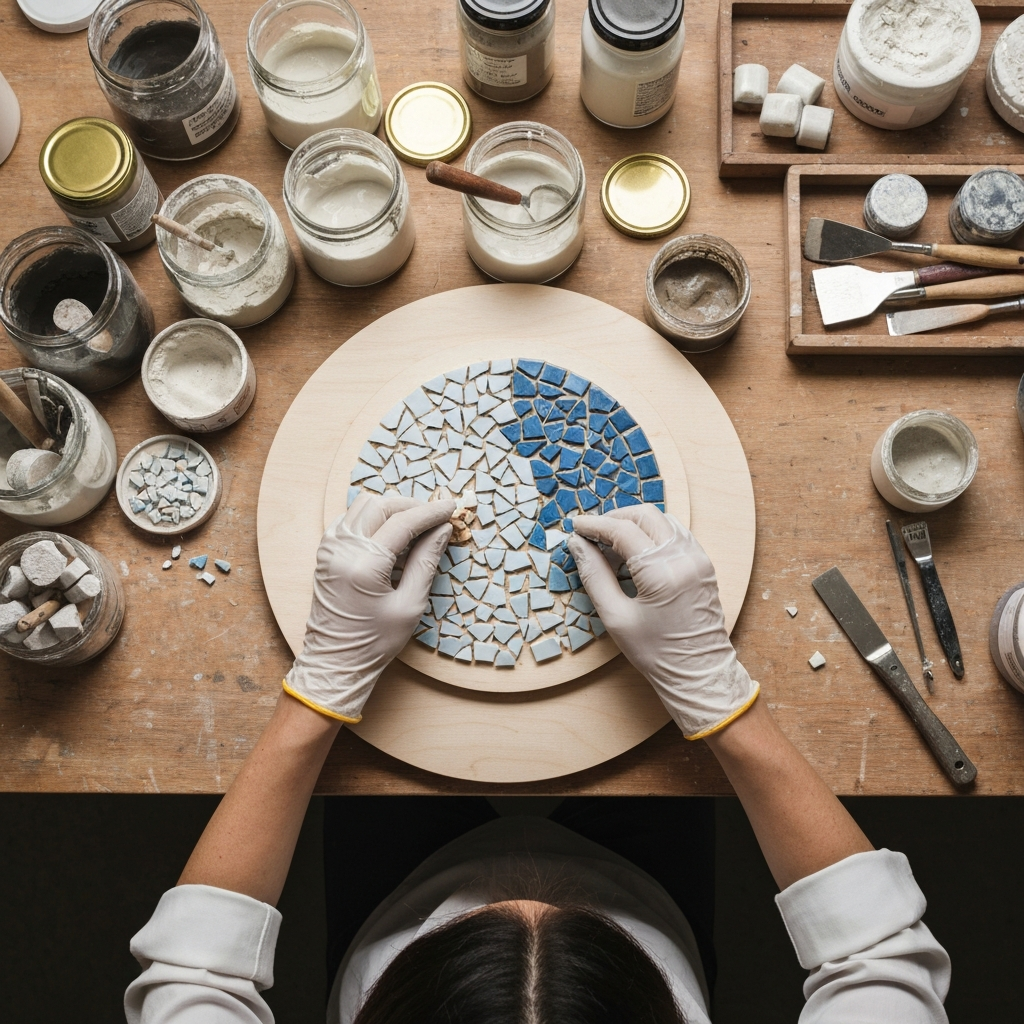
Step 2: Creating a Mosaic from Broken Ceramics
Broken pottery, tiles, or even old plates can be transformed into vibrant mosaics. First, gather your broken pieces and carefully sort them by color and size. Wear safety glasses and gloves to protect yourself from sharp edges. Next, prepare your base – this could be a wooden board, a flower pot, or even a piece of furniture. Apply a layer of adhesive (such as tile adhesive or strong craft glue) to the base. Now, carefully arrange the broken pieces on the adhesive, creating a pattern or design that appeals to you. Once the adhesive has dried, apply grout to fill the gaps between the pieces. Finally, wipe away any excess grout and allow the mosaic to cure completely.
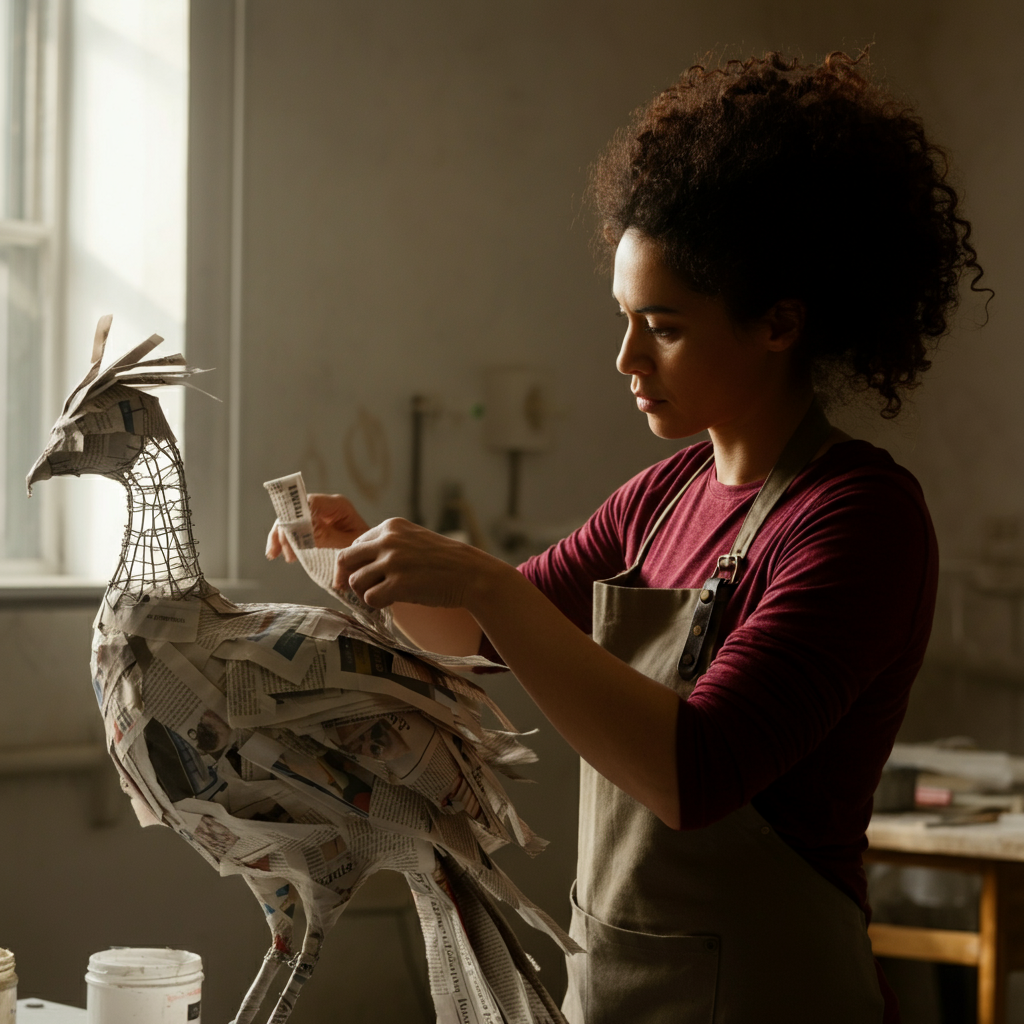
Step 3: Transforming Newspapers into Paper Mache Sculptures
Newspaper, water, and flour – that's all you need to create stunning paper mache sculptures. Tear newspaper into strips. Mix equal parts water and flour to create a paste. Dip each strip of newspaper into the paste and then apply it to a wireframe or other support structure. Layer the strips, overlapping them to create a strong and durable surface. Allow each layer to dry completely before adding the next. Once the sculpture is complete, you can paint it, decorate it, or leave it in its natural state.
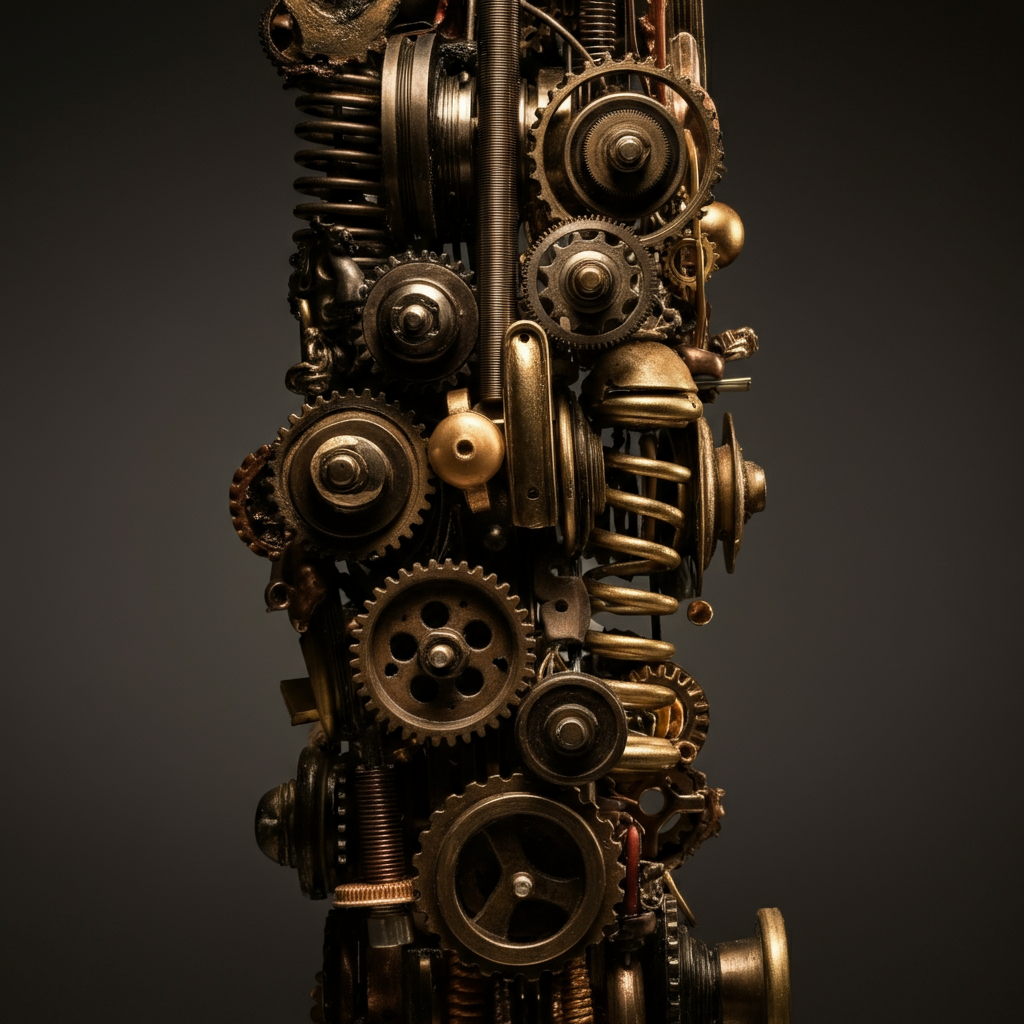
Step 4: Building Assemblages from Found Objects
Assemblage is the art of creating sculptures or three-dimensional collages from found objects. Gather a collection of interesting objects – buttons, bottle caps, scraps of metal, pieces of wood, anything that catches your eye. Arrange these objects on a base, experimenting with different compositions until you find one that you like. Consider the relationships between the objects – their shapes, textures, and colors. Once you're happy with the arrangement, glue the objects together using a strong adhesive.
Step 5: Creating Nature Prints with Hammered Flowers and Leaves
Capture the delicate beauty of nature by creating prints with hammered flowers and leaves. Gather fresh flowers and leaves with interesting shapes and textures. Place a sheet of paper on a hard surface, such as a piece of wood or a cutting board. Arrange the flowers and leaves on the paper. Cover them with another sheet of paper. Using a hammer, gently tap the top sheet of paper, pressing the pigments from the plants onto the paper below. Be careful not to hit too hard, or you could tear the paper. Remove the top sheet of paper and carefully peel away the plants to reveal the print.
Tools or Materials Required
- Adhesive (craft glue, tile adhesive)
- Grout
- Newspaper
- Flour
- Water
- Wireframe (for paper mache)
- Found objects
- Flowers and leaves
- Hammer
- Paper
- Safety glasses
- Gloves
Safety Considerations
When working with sharp objects, such as broken ceramics or metal scraps, always wear safety glasses and gloves to protect yourself from injury. Use caution when using adhesives and follow the manufacturer's instructions carefully. Ensure adequate ventilation when working with paints or other potentially hazardous materials.
Pro Tips
Don't be afraid to experiment with different materials and techniques. The best way to learn is by doing. Consider the context in which your art will be displayed. This can influence your choice of materials and techniques. Embrace imperfections. They often add character and uniqueness to your art.
FAQ Section
Q: Where can I find inspiration for my art?
A: Inspiration can be found everywhere! Look at nature, architecture, everyday objects, and other people's art. Visit museums and galleries, browse online art websites, and keep a sketchbook to record your ideas.
Q: What if I'm not "naturally" artistic?
A: Everyone is capable of being creative. Art is a skill that can be learned and developed through practice. Don't be afraid to experiment and make mistakes. The most important thing is to have fun and express yourself.
Q: How do I display my art?
A: There are many ways to display your art. You can frame it, hang it on the wall, place it on a shelf, or even incorporate it into your garden. The best way to display your art is to find a way that reflects your personal style and complements the artwork itself.
Conclusion
Turning everyday objects into artful masterpieces is a rewarding journey of discovery and self-expression. By embracing experimentation, observing the world around you with fresh eyes, and applying the techniques outlined in this guide, you can unlock your creative potential and create art that is both unique and meaningful. Remember to prioritize safety, have fun, and never stop exploring the endless possibilities of artistic transformation.