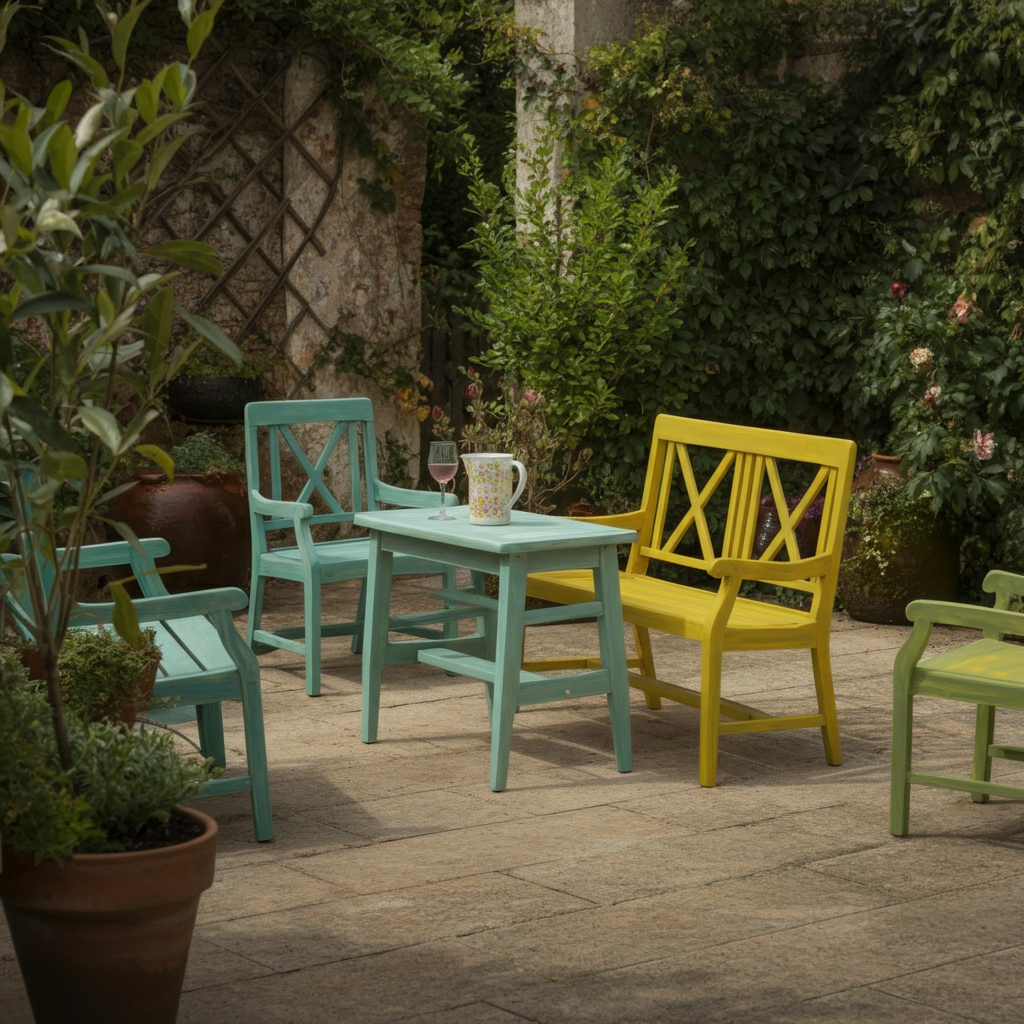
Garden furniture, exposed to the elements year after year, inevitably begins to show its age. Faded paint, rust, mildew, and general wear and tear can leave your once-inviting outdoor oasis looking a little lackluster. But before you resign yourself to replacing your beloved pieces, know that a little elbow grease and the right techniques can restore them to their former glory, and even improve upon their original look.
This guide will walk you through the essential steps to rejuvenate your tired garden furniture, covering everything from cleaning and repairing to painting and protecting. Whether you have wooden benches, metal chairs, or plastic tables, you'll find practical advice and expert tips to help you achieve professional-looking results. Prepare to be amazed at the transformation!
By following these instructions, you can not only save money on replacements but also extend the lifespan of your furniture, reduce waste, and enjoy a refreshed outdoor space for years to come. So, gather your supplies, put on your work gloves, and let's get started!
Step 1: Assessment and Preparation
Before you start any cleaning or repair work, take a close look at each piece of furniture to assess its condition. Identify any areas of damage, such as cracks, rust, mildew, or peeling paint. This assessment will help you determine the specific steps you need to take to restore each item. Consider the material of your furniture – wood, metal, or plastic – as the appropriate cleaning and repair methods will vary.
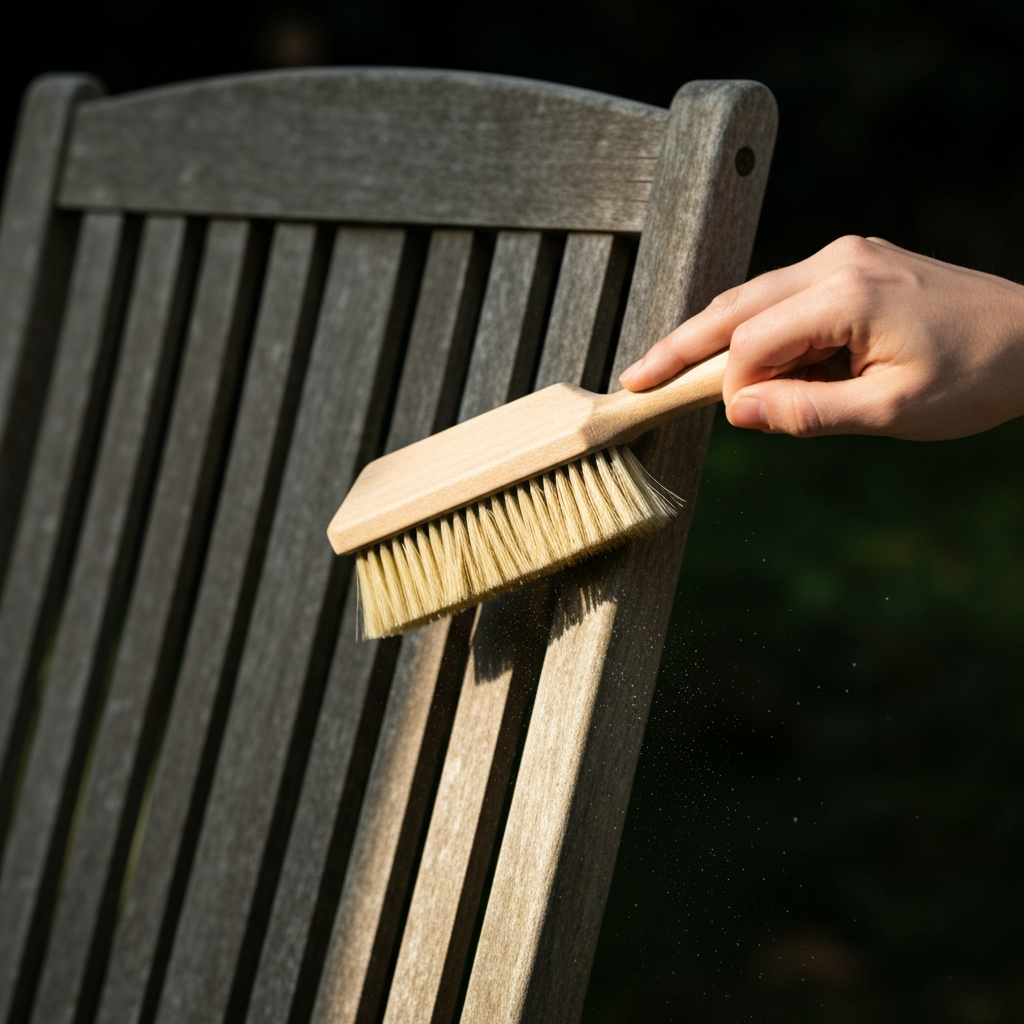
Thoroughly clean the furniture before you begin any repairs or refinishing. Remove any loose dirt, leaves, or debris with a brush or broom. For more stubborn dirt, use a mixture of warm water and mild detergent. Avoid using harsh chemicals or abrasive cleaners, as these can damage the furniture's surface. Rinse well with clean water and allow the furniture to dry completely before proceeding to the next step.
Step 2: Cleaning and Mildew Removal
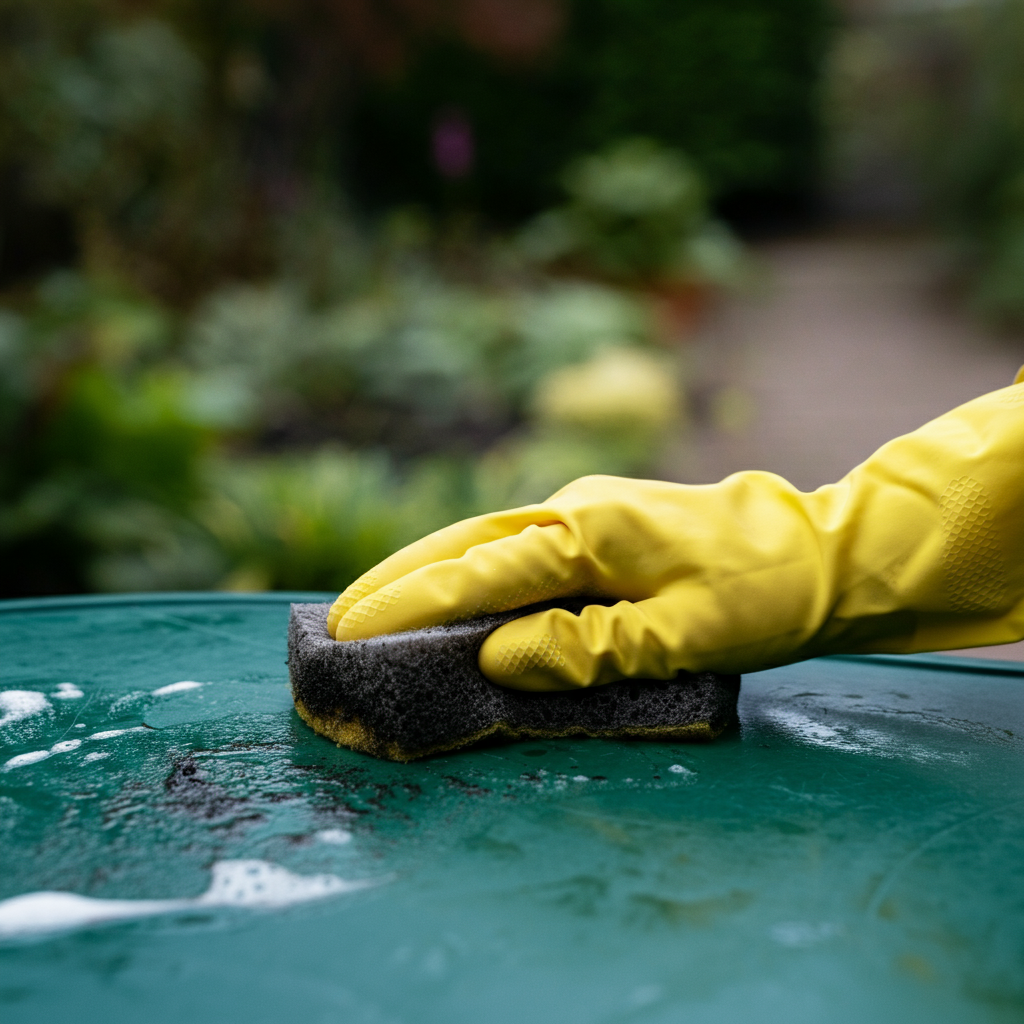
For stubborn stains and mildew, a more targeted cleaning approach is necessary. A solution of equal parts water and white vinegar can be effective for removing mildew from most surfaces. Apply the solution to the affected areas, let it sit for a few minutes, and then scrub gently with a soft brush or sponge. For wooden furniture, be sure to rinse thoroughly and allow it to dry completely to prevent further mildew growth.
On metal furniture, rust can be a major problem. Use a wire brush or sandpaper to remove loose rust. For more severe rust, consider using a rust converter product, which will chemically transform the rust into a stable, paintable surface. Always follow the manufacturer's instructions when using rust converters.
Step 3: Repairs - Wood, Metal, and Plastic
Once the furniture is clean, address any structural repairs that are needed. For wooden furniture, fill cracks and holes with wood filler, sand smooth, and allow to dry. Tighten any loose screws or bolts. If the wood is severely damaged, consider replacing the affected pieces entirely.
For metal furniture, weld any broken joints or replace damaged sections. If welding isn't an option, metal epoxy can be used to bond pieces together. Make sure to clean the metal thoroughly before applying the epoxy.
Plastic furniture can be more challenging to repair. For small cracks, plastic epoxy can be used. For larger breaks, consider reinforcing the area with fiberglass mesh and epoxy. Remember that repairs to plastic may not be as strong as the original material, so avoid putting excessive weight or stress on the repaired areas.

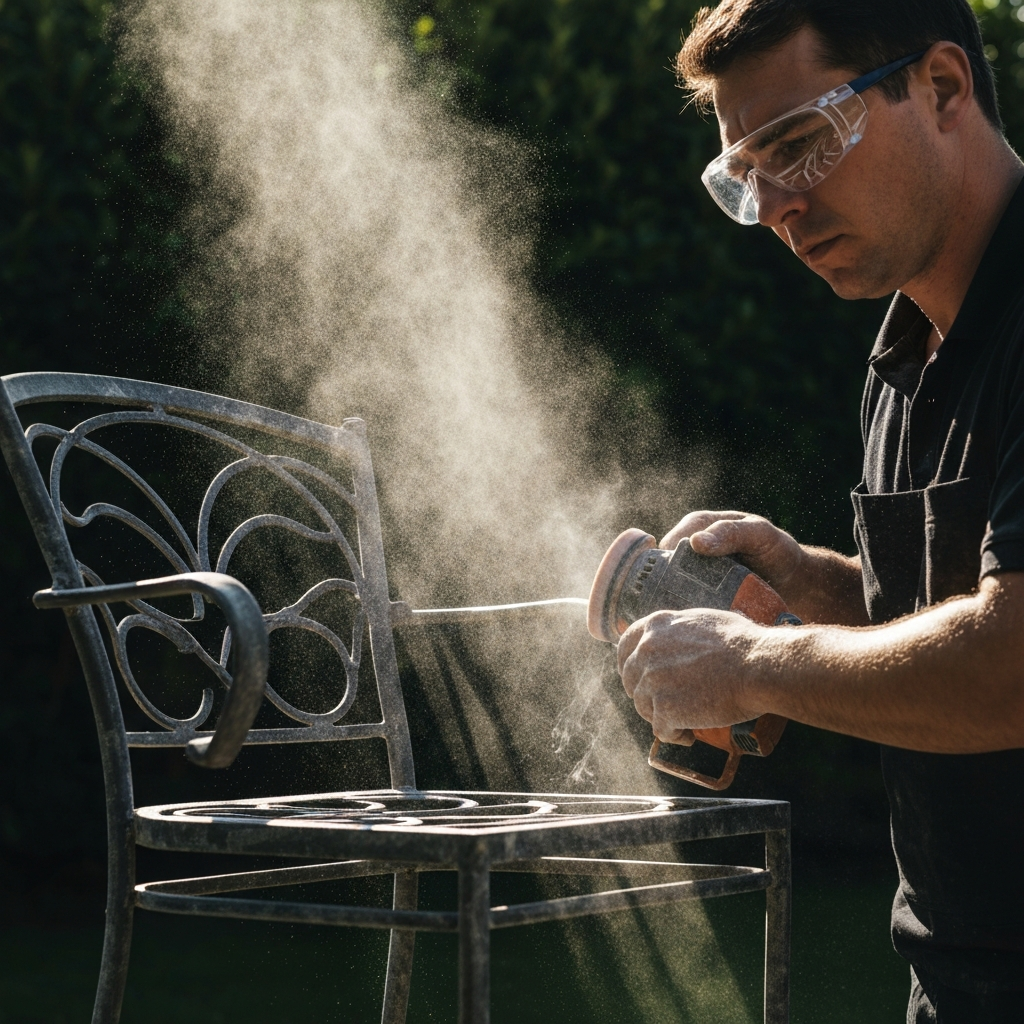
Step 4: Sanding and Priming
Sanding is crucial for creating a smooth surface for painting or staining. For wooden furniture, use progressively finer grits of sandpaper, starting with a coarser grit to remove old finishes and imperfections, and finishing with a finer grit to smooth the surface. Sand in the direction of the wood grain to avoid scratching.
For metal furniture, sanding helps to remove any remaining rust and create a surface that paint can adhere to. Use a medium-grit sandpaper to scuff the surface, then wipe clean with a tack cloth.
Priming is essential for both wood and metal furniture. A primer creates a uniform surface, helps the paint adhere better, and prevents rust or tannin bleed-through. Choose a primer that is specifically designed for the type of material you are working with. Apply the primer in thin, even coats, and allow it to dry completely before painting.
Step 5: Painting or Staining
Now for the fun part: applying a fresh coat of paint or stain! Choose a paint or stain that is specifically designed for outdoor use and that is appropriate for the material of your furniture. Acrylic latex paints are a good choice for both wood and metal, as they are durable, weather-resistant, and easy to clean.
Apply the paint or stain in thin, even coats, using a brush, roller, or spray gun. Allow each coat to dry completely before applying the next. For best results, apply at least two coats of paint or stain. For wooden furniture, consider applying a clear topcoat to protect the finish and enhance its durability.
Always work in a well-ventilated area and wear appropriate safety gear, such as a respirator, when spraying paint.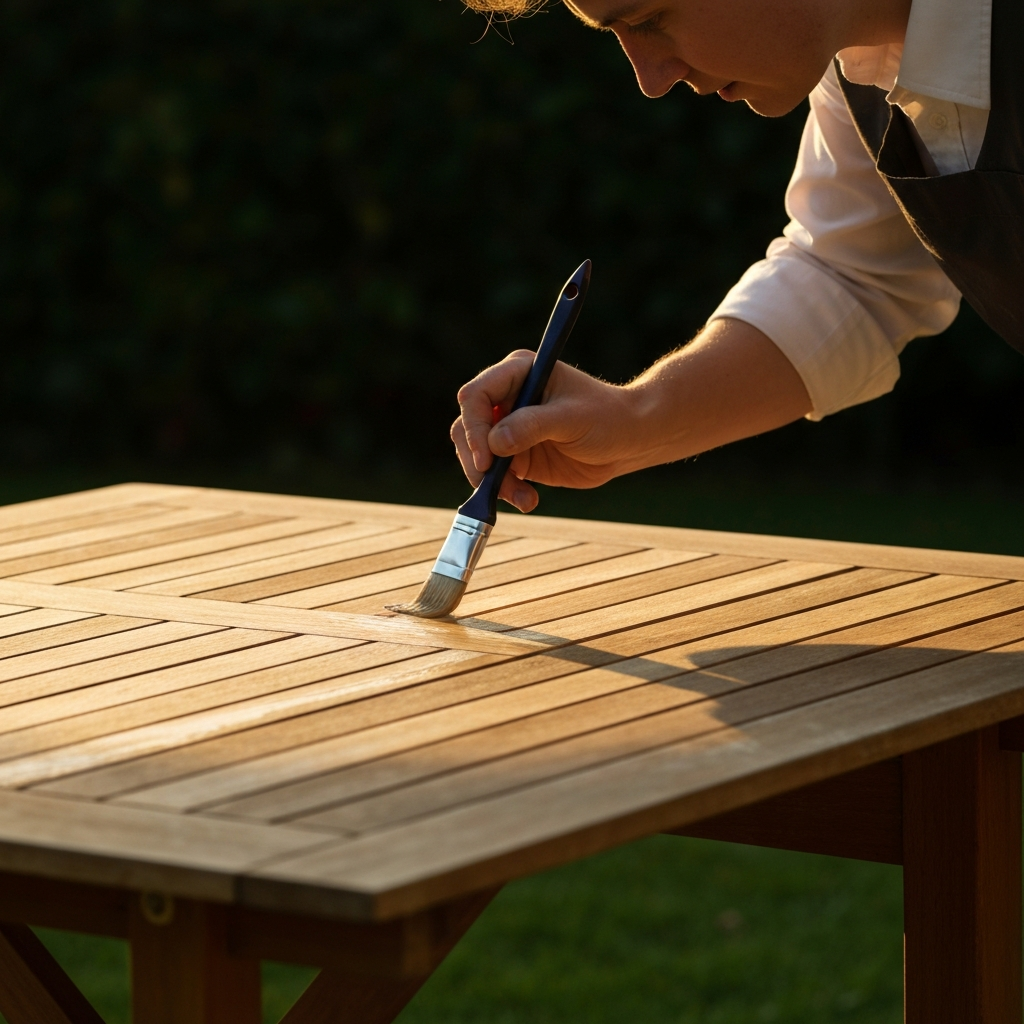
Step 6: Protection and Maintenance
Once the paint or stain is dry, consider applying a sealant or protective coating to further protect your furniture from the elements. This is especially important for wooden furniture, as it will help to prevent water damage and rot. Choose a sealant that is specifically designed for outdoor use and that is compatible with the type of finish you have applied.
To keep your garden furniture looking its best, perform regular maintenance. Clean it periodically with a mild detergent and water. Inspect for any signs of damage, such as cracks, rust, or peeling paint, and address these issues promptly. Cover your furniture during the off-season or store it in a shed or garage to protect it from the harshest weather conditions.
Safety Considerations
Always wear appropriate safety gear when working with tools and chemicals. This includes safety glasses, gloves, and a respirator. Work in a well-ventilated area to avoid inhaling fumes. Follow the manufacturer's instructions for all products you use. Dispose of waste materials properly. Keep children and pets away from the work area.
FAQ Section
Q: How often should I clean my garden furniture?
A: Clean your furniture at least twice a year, or more often if it is exposed to heavy dirt or mildew.
Q: What is the best way to store garden furniture in the winter?
A: Clean your furniture thoroughly, cover it with waterproof covers, and store it in a dry location, such as a shed or garage.
Q: Can I use car wax on my metal garden furniture?
A: Yes, car wax can help protect the paint from the elements and keep it looking shiny.
Conclusion
Breathing new life into tired garden furniture is a rewarding project that can transform your outdoor space and save you money. By following these steps and taking proper care of your furniture, you can enjoy it for many years to come. Remember to assess the condition of your furniture, clean it thoroughly, make any necessary repairs, and apply a protective finish. With a little effort and the right techniques, your garden furniture will look as good as new!