The plié, a fundamental movement in ballet, translates to "bent" in French. It's more than just bending your knees; it's the cornerstone of almost every ballet step, from jumps and turns to graceful landings. While seemingly simple, mastering the plié requires precise technique, core strength, and a deep understanding of body alignment. It's a move that beginners learn early on, but even seasoned professionals continuously refine their plié.
This guide will break down the plié into easy-to-understand steps, covering both the demi-plié (half bend) and the grand-plié (full bend). We'll explore the nuances of proper form, the muscles involved, and common pitfalls to avoid. Whether you're just starting your ballet journey or looking to perfect your technique, this guide will provide the knowledge you need to execute a beautiful and effective plié.
Prepare to engage your core, activate your turnout muscles, and focus on controlled, graceful movement. Let's begin!
Step 1: Understanding the Importance of Turnout
Turnout, the outward rotation of the legs from the hip joints, is crucial for executing a correct plié. It allows for a greater range of motion in the hips and knees, enabling a deeper bend and a more aesthetically pleasing line. It's essential, however, to prioritize healthy turnout over forcing it. Never push your body beyond its natural range; gradual improvement over time is the key to preventing injury. Think of rotating *from* the hips, not twisting the knees or ankles. Your natural turnout will improve with consistent stretching and proper alignment.
Step 2: Learning First Position
First position is a foundational stance in ballet and often the starting point for a plié. Stand tall with your heels together and your toes turned out as far as comfortably possible, aiming for a 180-degree line with your feet. Keep your weight evenly distributed between both feet and your shoulders relaxed. Imagine a string pulling you upwards from the crown of your head, maintaining a long, straight spine. Engage your core to support your posture and prevent swaying. Don't worry if you can't achieve a full 180-degree turnout immediately; focus on a sustainable and healthy range of motion. You might find that a slightly wider first position is more comfortable and effective to begin with.
Step 3: Executing a Demi-Plié
Demi-Plié: Bending with Control
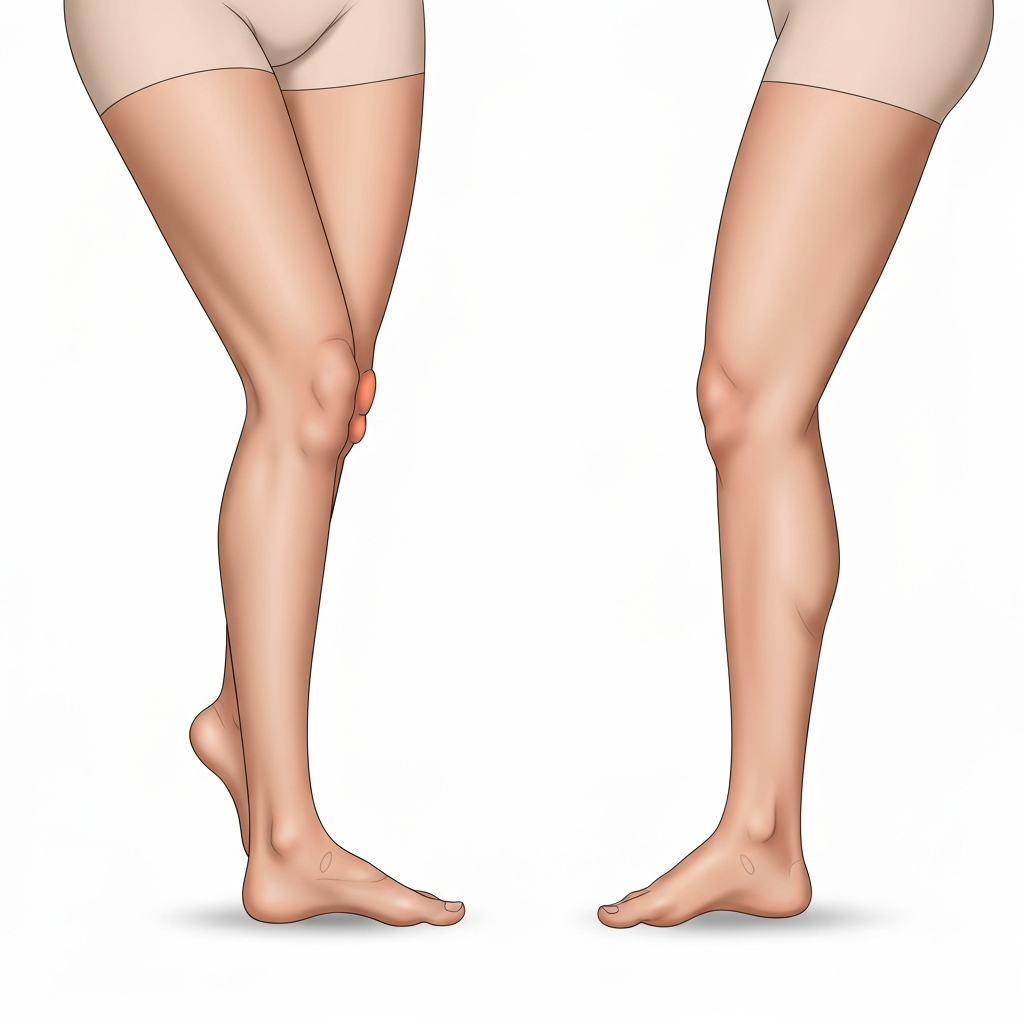
From first position, slowly bend your knees outward, keeping your heels firmly planted on the floor. Maintain your turnout, ensuring that your knees track directly over your toes. Engage your core to prevent your hips from sticking out or your back from arching. Imagine your spine as a straight line descending directly down, and aim to lower your body vertically. Only bend as far as you can while maintaining proper alignment and keeping your heels on the ground. This is a demi-plié (half bend). It's a controlled descent; avoid any bouncing or rushing. Pay close attention to your balance; if you feel yourself leaning forward or backward, adjust your weight distribution.
Step 4: Rising from a Demi-Plié
Demi-Plié: Ascending with Grace
To rise from the demi-plié, engage your inner thighs, glutes, and quadriceps. Push down through your feet, as if pressing the floor away. Maintain your turnout and avoid collapsing inwards. Keep your core engaged and your spine long. The ascent should be as controlled and graceful as the descent. Avoid snapping your knees straight; maintain a slight bend at the top of the movement to protect your joints. It's important that the feeling is of lengthening *upwards* through the legs, rather than simply straightening the knees.
Step 5: Introducing the Grand-Plié
Grand-Plié: A Deeper Bend
The grand-plié is a full bend of the knees. Begin in first position, just like the demi-plié. As you bend your knees, your heels will naturally lift off the floor. Continue bending until your thighs are as close to parallel with the floor as possible while keeping your back straight and core engaged. The key difference is that your heels will come off the floor at some point. It's very important to keep your knees over your toes. Some teachers allow for shifting to the front of the foot in grand-plié, while others instruct to attempt to keep the weight distributed as evenly as possible. Follow your instructor's advice on this, as schools of ballet differ on this point.
Step 6: Mastering the Rise from a Grand-Plié
Grand-Plié: Recovering with Strength
Rising from a grand-plié requires significant strength and control. Engage your glutes, quadriceps, and hamstrings to push yourself back upwards. As you rise, gradually lower your heels back to the floor as soon as possible. Maintain your turnout and avoid collapsing inwards. Keep your core engaged and your spine long. Imagine you are pulling yourself up from the bottom of the plié using all the muscles in your legs. It’s important to control the return of the heels to the floor to prevent injury. A helpful visualization is to imagine zipping up a tight jacket, pulling everything inwards and upwards.
Step 7: Practicing in Second Position
Once you are comfortable with the plié in first position, practice it in second position. Second position is similar to first, but your feet are shoulder-width apart, maintaining the same turnout. The execution of the plié remains the same, but the wider base of support can make it easier to maintain balance. In the grand-plié in second position, the heels generally do *not* come off the floor. Second position plies are an excellent variation for improving strength and flexibility.
Common Mistakes to Avoid
- Knees collapsing inwards: This is a common mistake that can lead to knee injury. Focus on maintaining turnout and tracking your knees directly over your toes.
- Hips sticking out: Engage your core to maintain a neutral pelvic alignment. Avoid arching your back or sticking your hips out.
- Shoulders hunching: Keep your shoulders relaxed and down. Imagine a string pulling you upwards from the crown of your head.
- Rushing the movement: Control and precision are key. Avoid bouncing or rushing the plié.
- Forcing turnout: Never force your turnout beyond your natural range of motion. Gradual improvement over time is the goal.
Safety Considerations
Before attempting any ballet exercise, it's crucial to warm up your muscles properly. Focus on stretching your calves, hamstrings, and inner thighs. Listen to your body and stop if you feel any pain. If you have any pre-existing injuries, consult with a doctor or physical therapist before starting ballet training. Start slowly and gradually increase the depth and intensity of your pliés as you gain strength and flexibility. Proper alignment is critical to prevent injuries, so seek guidance from a qualified ballet instructor if possible.
Pro Tips
- Use a mirror: Practice in front of a mirror to check your alignment and ensure proper form.
- Use a barre or chair for support: If you're struggling with balance, use a barre or chair for light support.
- Visualize the movement: Imagine your body moving through the plié correctly before you even begin.
- Focus on your breath: Inhale as you descend and exhale as you rise.
- Practice regularly: Consistency is key to improving your technique and building strength. Aim for at least 15 minutes of practice several times a week.
FAQ Section
Q: How deep should my plié be?
A: The depth of your plié will depend on your flexibility and strength. Focus on maintaining proper form and alignment, rather than forcing a deep bend. For the demi-plié, aim to bend your knees as far as possible while keeping your heels on the ground. For the grand-plié, bend until your thighs are nearly parallel to the floor.
Q: What if I can't turn out very far?
A: Don't worry! Turnout is something that improves over time with consistent stretching and proper technique. Focus on rotating from the hips, rather than forcing your knees or ankles. Consult with a ballet instructor for personalized guidance.
Q: How long does it take to master the plié?
A: Mastering the plié is an ongoing process. While you can learn the basic technique relatively quickly, it takes years of consistent practice to refine your form and develop the necessary strength and flexibility.
Conclusion
The plié is a deceptively simple yet profoundly important movement in ballet. By understanding the principles of turnout, alignment, and controlled movement, you can execute a beautiful and effective plié that will serve as a foundation for your ballet training. Remember to prioritize proper form over depth, listen to your body, and practice consistently. With dedication and patience, you can master this essential step and unlock new levels of grace and artistry in your dancing.