Living in an apartment doesn't mean you have to give up on sustainable practices like composting. In fact, with a little creativity and the right techniques, you can easily manage your food waste and create nutrient-rich compost, even without a backyard. This guide will walk you through various apartment-friendly composting methods, from small countertop bins to worm composting, helping you choose the system that best suits your lifestyle and space constraints.
Composting not only reduces landfill waste but also provides valuable resources for indoor plants or community gardens. The key to successful apartment composting is managing odor and space efficiently. We’ll delve into practical tips and tricks to avoid common pitfalls and ensure a clean, effective composting process.
Whether you're a seasoned environmentalist or just starting your journey towards a more sustainable lifestyle, this guide offers everything you need to know to start composting in your apartment today. Let's get started!
Step 1: Choose Your Composting Method
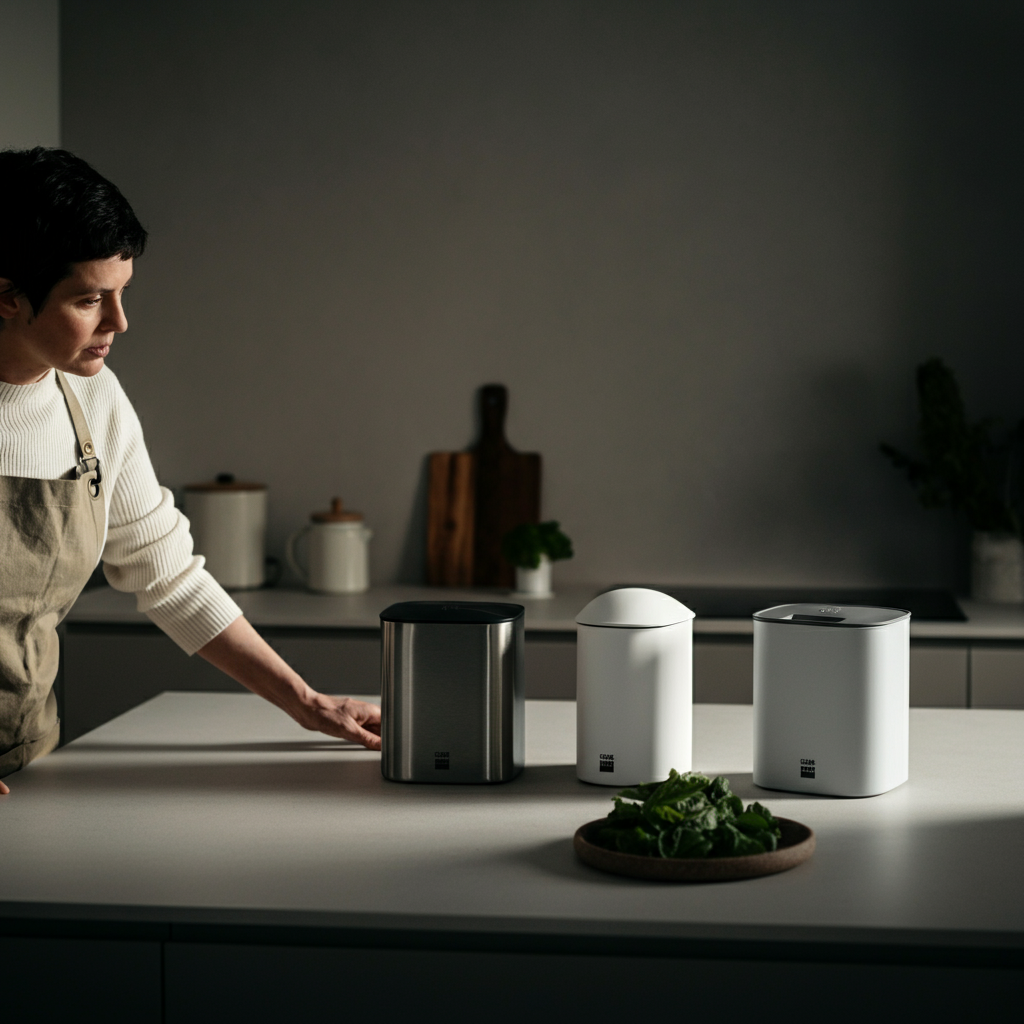
Selecting the right composting method is crucial for success in an apartment setting. Several options cater to different space availability, waste volume, and desired level of involvement. These include countertop bins (for collecting scraps), bucket composting, Bokashi composting, vermicomposting (worm composting), electric digesters, window box composting, and compost tumblers. Consider how much space you have available, how much food waste you generate, and how much time you're willing to dedicate to the composting process. The best method is the one that fits seamlessly into your daily routine.
Step 2: Set Up a Countertop Compost Bin
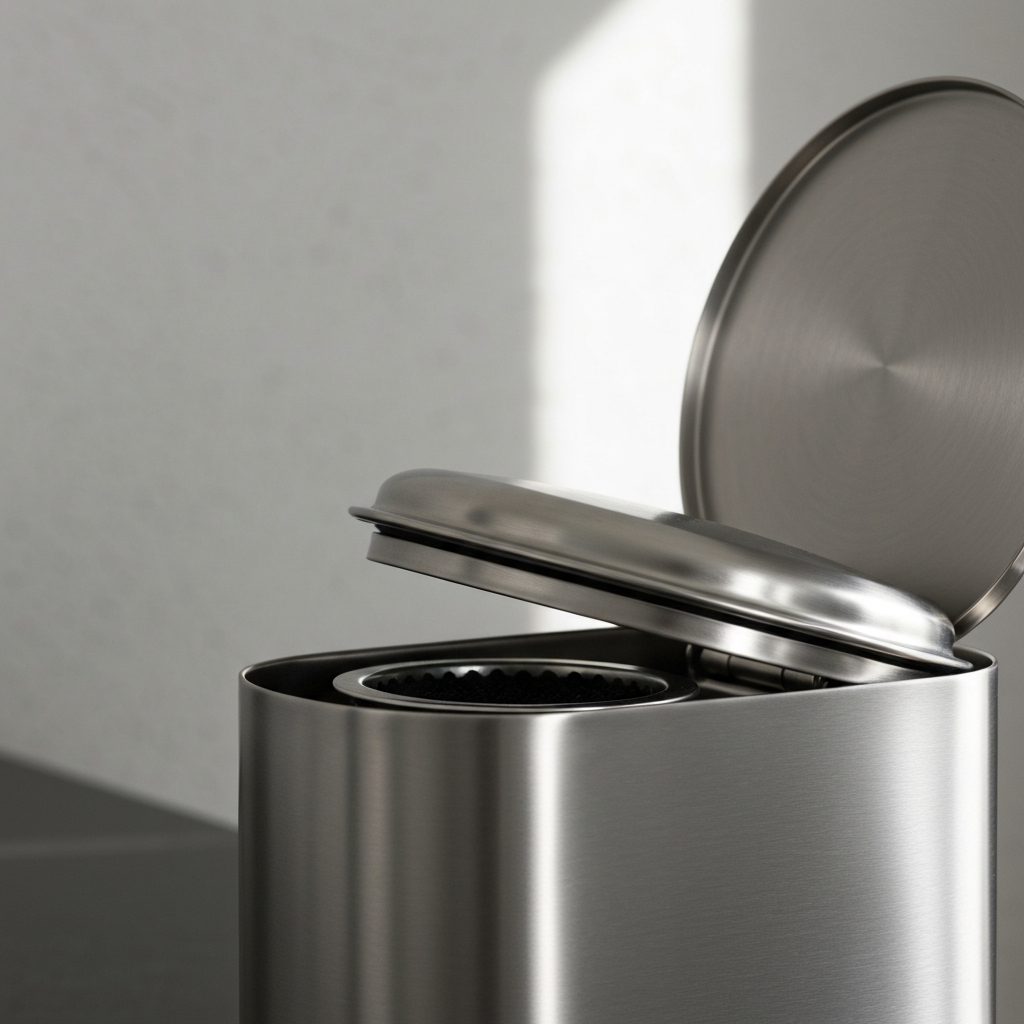
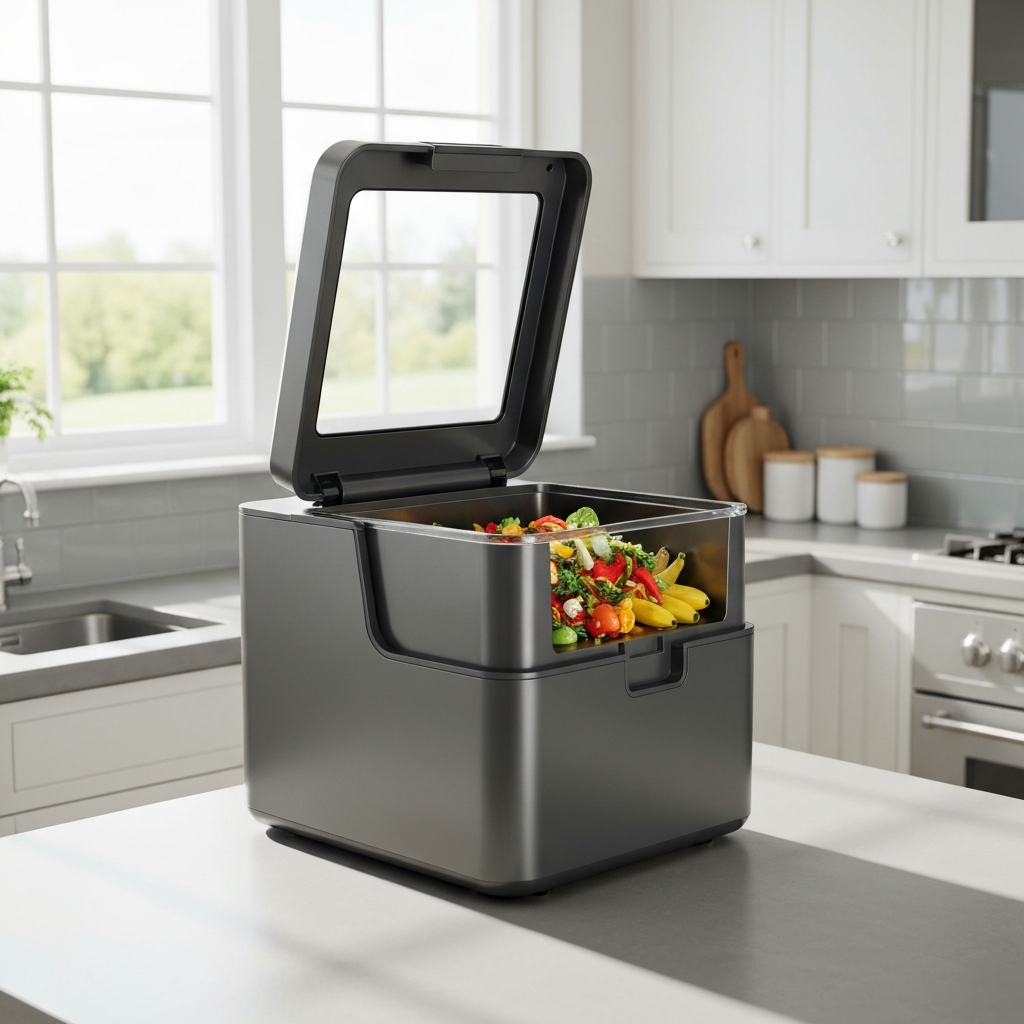
A countertop compost bin is your first line of defense against food waste odors and a convenient way to collect scraps before transferring them to your primary composting system. Opt for a small, lidded bin, preferably with a charcoal filter to minimize smells. Many bins also come with biodegradable bags for easy cleanup. Place the bin in a convenient location, such as on your kitchen counter or under the sink. Empty the bin regularly, every few days, to prevent odors and fruit flies. Remember, this bin is for collection, not for active composting.
Step 3: Try Bucket Composting
Bucket composting is a simple and inexpensive method suitable for small apartments. Use a 5-gallon bucket with a tight-fitting lid. Add a layer of "brown" materials (shredded paper, cardboard, dried leaves) to the bottom, followed by a layer of "green" materials (food scraps). Alternate layers, ensuring that the "brown" materials outweigh the "green" by about 2:1. Moisture is key; the compost should be damp but not soggy. Keep the lid tightly sealed to prevent odors and pests. Turn the compost periodically (every week or two) to aerate it. This can be done by rolling the bucket on its side or using a small garden trowel to mix the contents.
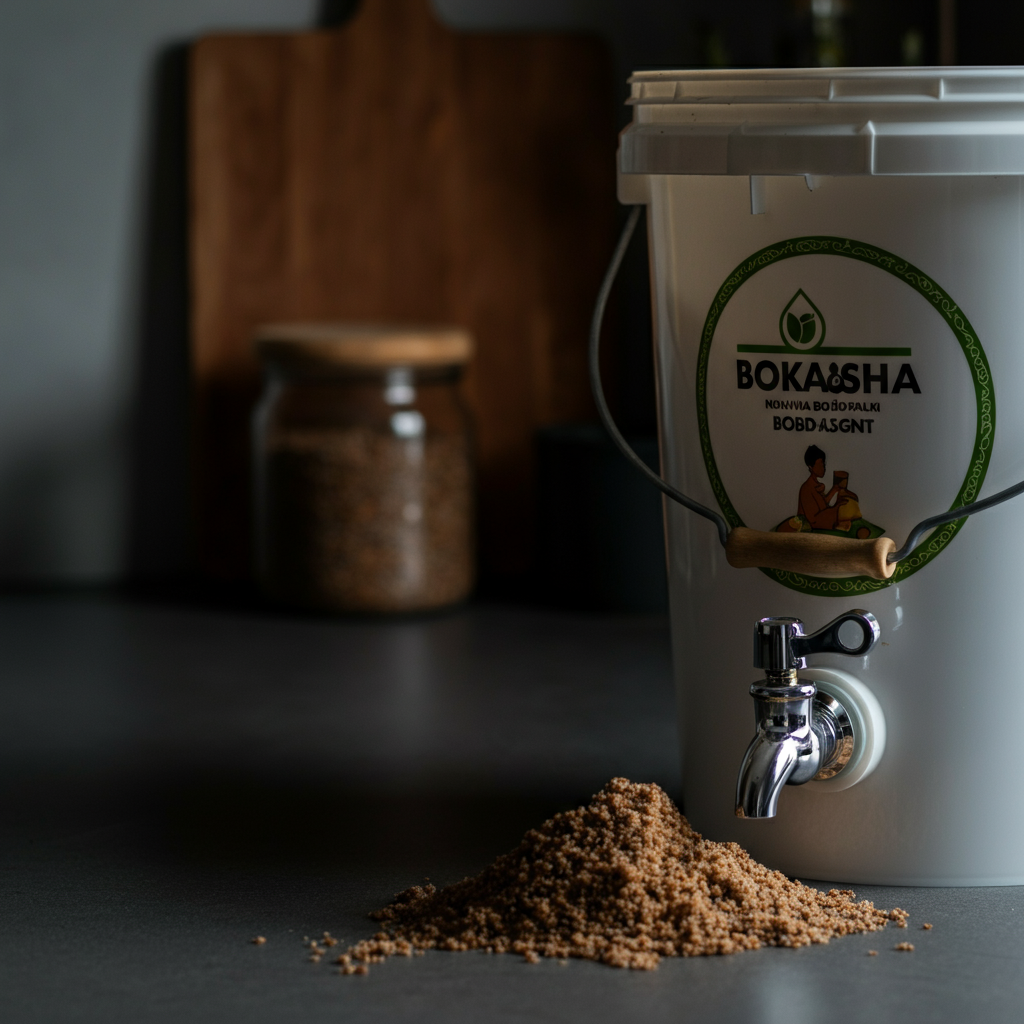
Step 4: Explore Bokashi Composting
Bokashi composting is an anaerobic (oxygen-free) method that uses inoculated bran to ferment food waste, including meat and dairy products that are generally avoided in traditional composting. This makes it a great option for reducing all types of food waste. Layer food scraps with Bokashi bran in a special Bokashi bucket (which has a spigot for draining excess liquid). Press down on the mixture to eliminate air pockets. Once the bucket is full, seal it tightly and let it ferment for about two weeks. The fermented waste can then be buried in the soil or added to a traditional compost pile to finish decomposing. Bokashi is known for its ability to handle a wider variety of food scraps without producing strong odors.
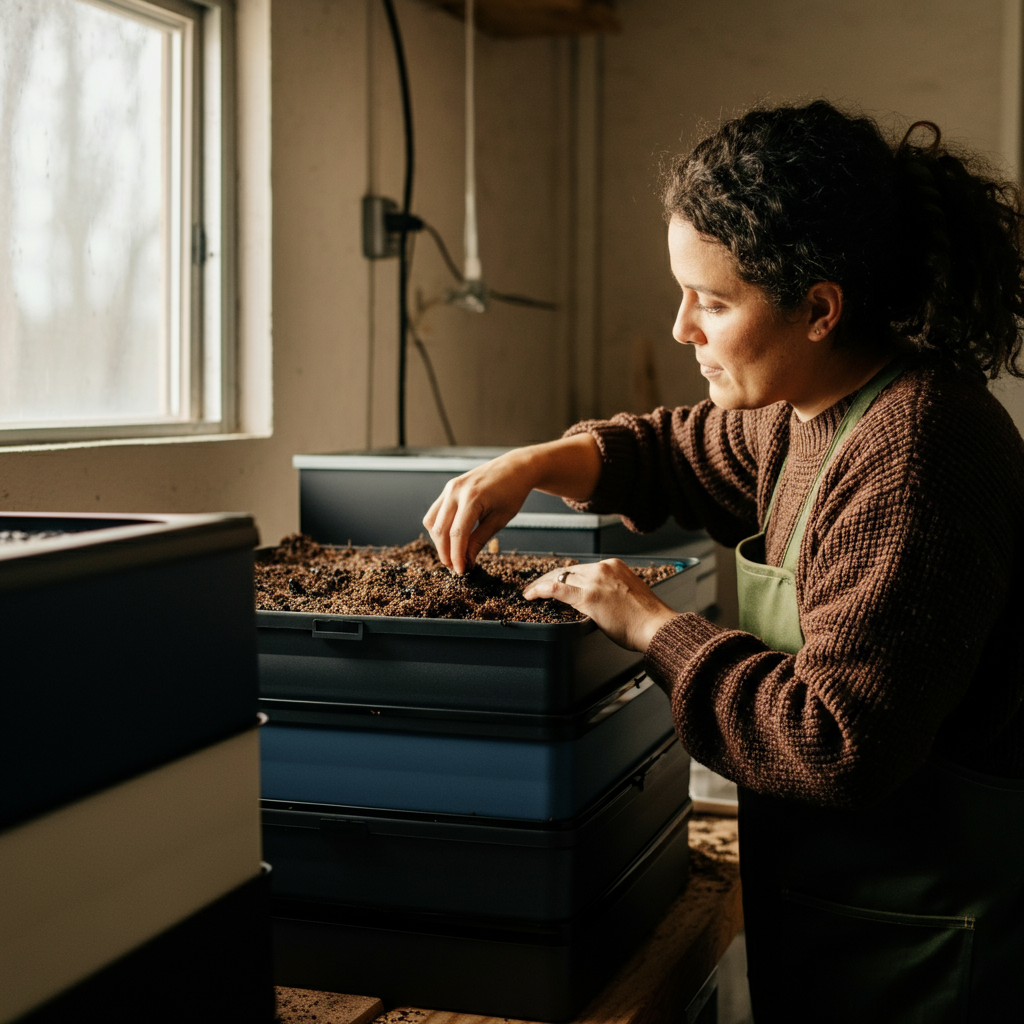
Step 5: Vermicomposting (Worm Composting)
Vermicomposting uses worms to break down food waste, resulting in nutrient-rich castings perfect for indoor plants. A worm bin typically consists of a plastic container with bedding material (shredded paper, coconut coir) and red wiggler worms. Add food scraps to the bin, burying them under the bedding to prevent odors. Worms thrive in a moist, dark environment, so keep the bedding damp and the bin covered. Avoid overfeeding the worms and remove any uneaten food to prevent fruit flies. Harvest the worm castings every few months to use as fertilizer.
Step 6: Electric Food Digester
An electric food digester dehydrates and grinds food waste into a dry, odorless material that can be used as a soil amendment or disposed of in the trash. While not true composting, it significantly reduces the volume of food waste and eliminates odors. Simply add food scraps to the digester, and it will automatically process them. This is a convenient option for those who want to reduce food waste without the complexities of traditional composting. However, be aware of the energy consumption of the appliance.
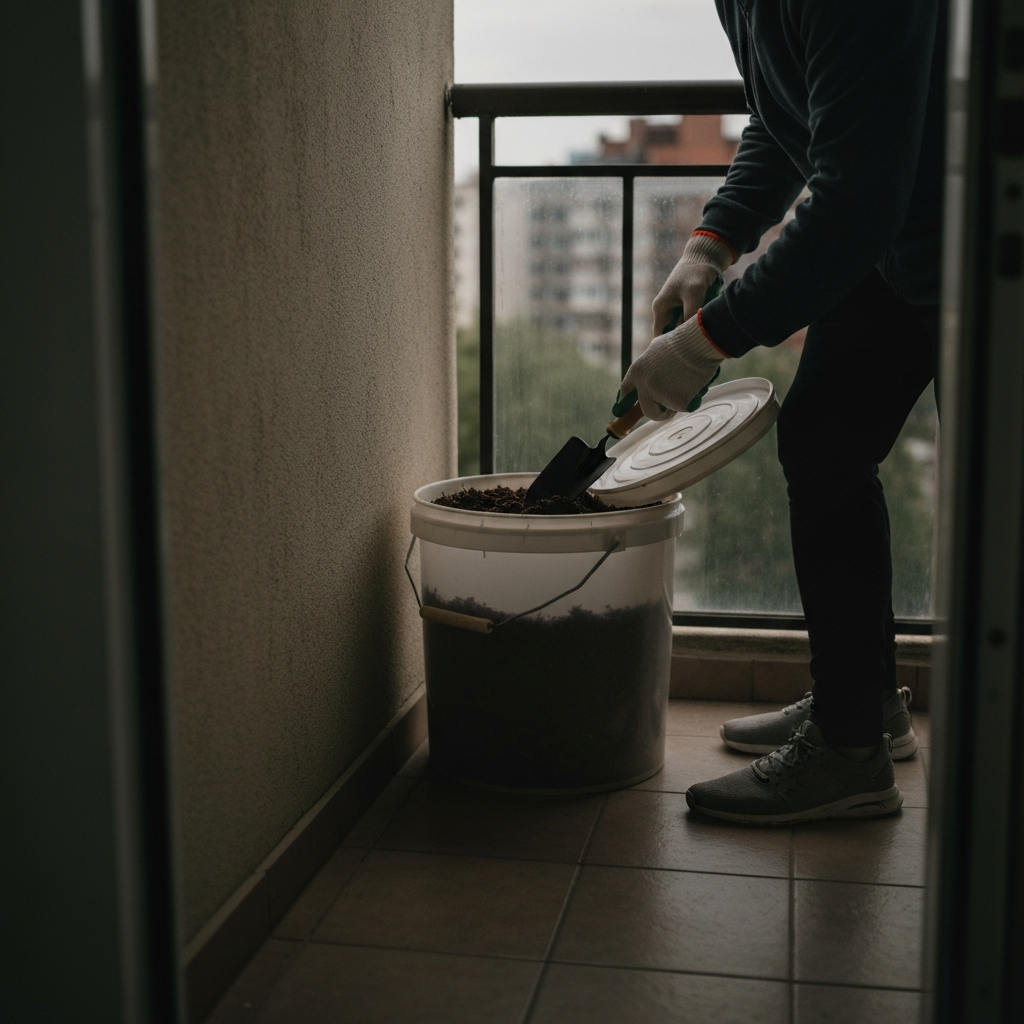
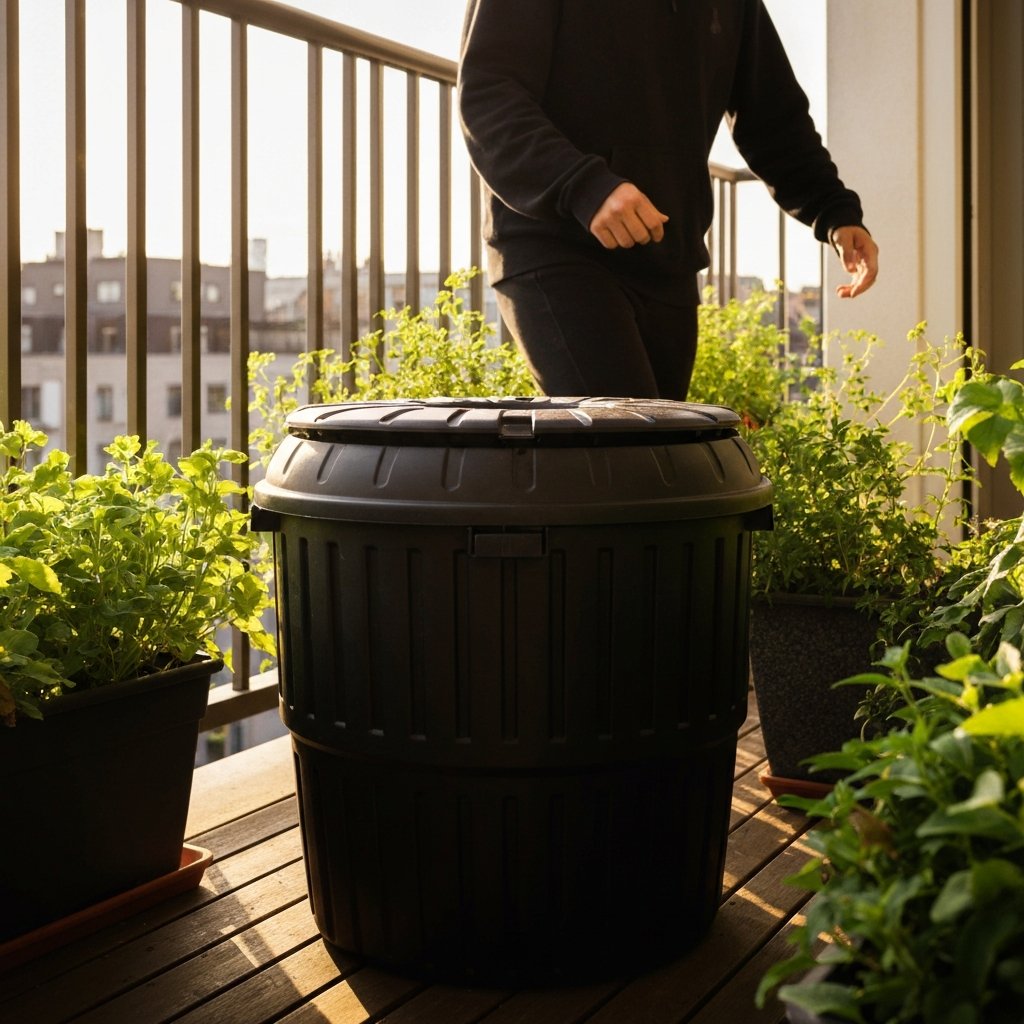
Step 7: Compost Tumbler on Balcony
If you have balcony space, a compost tumbler offers a convenient and relatively odorless way to compost. These rotating bins make it easy to aerate the compost, speeding up the decomposition process. Add layers of "brown" and "green" materials, ensuring adequate moisture. Turn the tumbler regularly (every few days) to mix the contents. A dark colored tumbler placed in a sunny spot will compost faster. The enclosed design of a tumbler helps prevent odors and keeps pests out.
Tools or Materials Required
- Countertop compost bin
- 5-gallon bucket with lid
- Bokashi bran
- Worm bin with red wiggler worms
- Electric food digester
- Compost tumbler
- Shredded paper, cardboard, dried leaves ("brown" materials)
- Food scraps ("green" materials)
- Spray bottle for water
- Garden trowel
Common Mistakes to Avoid
- Adding too much "green" material, leading to foul odors.
- Not maintaining adequate moisture, hindering decomposition.
- Overfeeding worms in vermicomposting, attracting fruit flies.
- Failing to aerate compost regularly, slowing down the process.
- Composting meat, dairy, or oily foods in traditional compost bins (except with Bokashi).
Safety Considerations
- Wash your hands thoroughly after handling compost.
- Avoid composting diseased plants or those treated with pesticides.
- Store compost in a well-ventilated area to prevent mold growth.
- Be mindful of weight limits if placing compost bins on balconies.
Pro Tips
- Chop food scraps into smaller pieces to speed up decomposition.
- Add a handful of garden soil to your compost bin to introduce beneficial microorganisms.
- Use a compost thermometer to monitor the temperature of your compost pile.
- Keep a bag of "brown" materials readily available for layering.
FAQ Section
Q: What can I compost in my apartment?
A: Most fruit and vegetable scraps, coffee grounds, tea bags, eggshells, and shredded paper can be composted. Avoid composting meat, dairy, oily foods (unless using Bokashi), and diseased plants.
Q: How do I prevent odors in my compost bin?
A: Use a lidded bin with a charcoal filter, balance "brown" and "green" materials, ensure adequate aeration, and empty the bin regularly.
Q: How long does it take to make compost in an apartment?
A: The composting time varies depending on the method and conditions. Bucket composting and tumblers can take several months, while vermicomposting and Bokashi can produce results in a few weeks.
Conclusion
Composting in an apartment is not only feasible but also a rewarding way to reduce waste and contribute to a more sustainable lifestyle. By choosing the right method, managing odor and moisture, and avoiding common mistakes, you can successfully compost your food scraps and create valuable resources for your plants or community gardens. Embrace the challenge, experiment with different techniques, and enjoy the benefits of apartment composting!