Composite decking has revolutionized outdoor living, offering a compelling blend of durability, aesthetics, and low maintenance. Unlike traditional wood decks that require regular staining, sealing, and repair, composite decks resist fading, scratching, and insect infestation. This makes them an ideal choice for homeowners seeking a long-lasting and beautiful outdoor space with minimal upkeep. This guide provides a detailed, step-by-step walkthrough of the composite deck building process, empowering you to create your dream outdoor retreat.
Before embarking on this project, it's crucial to understand the scope and complexity involved. While building a composite deck is a manageable DIY project for experienced homeowners, it requires careful planning, precise execution, and adherence to local building codes. Improper construction can lead to structural issues, safety hazards, and costly repairs down the line. If you're unsure about any aspect of the process, consulting with a qualified contractor is always recommended.
This guide will cover everything from initial planning and design to final finishing touches, ensuring you have the knowledge and confidence to build a composite deck that will last for years to come.
Step 1: Planning and Design
Detailed Site Assessment and Design
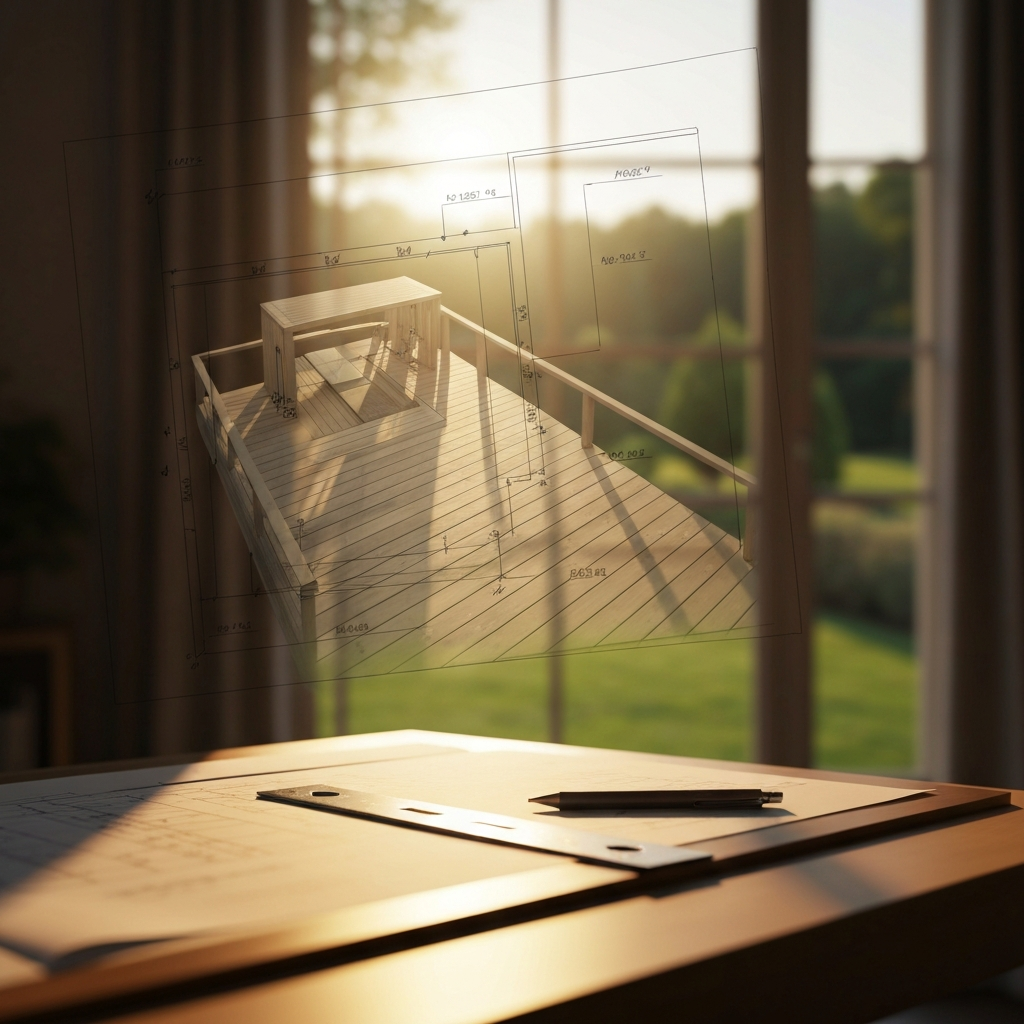
The first step in building any deck is thorough planning. Start by carefully measuring the area where you intend to build your deck. Consider the dimensions, shape, and orientation of the space. Think about how you plan to use the deck – will it primarily be for dining, lounging, or entertaining? This will influence the size and layout. Note the position of your house doors and windows to optimize access and views. Evaluate existing features like trees, shrubs, or utilities that might impact the design. Pay close attention to sun exposure and prevailing winds to ensure comfortable usage throughout the year. Create a detailed deck plan including dimensions, materials, and features like stairs, railings, and built-in seating.
Step 2: Permits and Regulations
Navigating Local Building Codes
Before you even think about picking up a hammer, it's essential to research and obtain all necessary permits. Contact your local building department or municipality to inquire about specific regulations and requirements for deck construction in your area. Building codes often dictate setbacks from property lines, maximum deck height, railing specifications, and foundation requirements. Failing to obtain the required permits can result in fines, project delays, or even mandatory demolition of your deck. Be prepared to submit detailed plans and obtain inspections throughout the construction process. Factor permit fees and inspection timelines into your overall project budget and schedule.

Step 3: Material Selection and Procurement
Choosing the Right Composite Decking
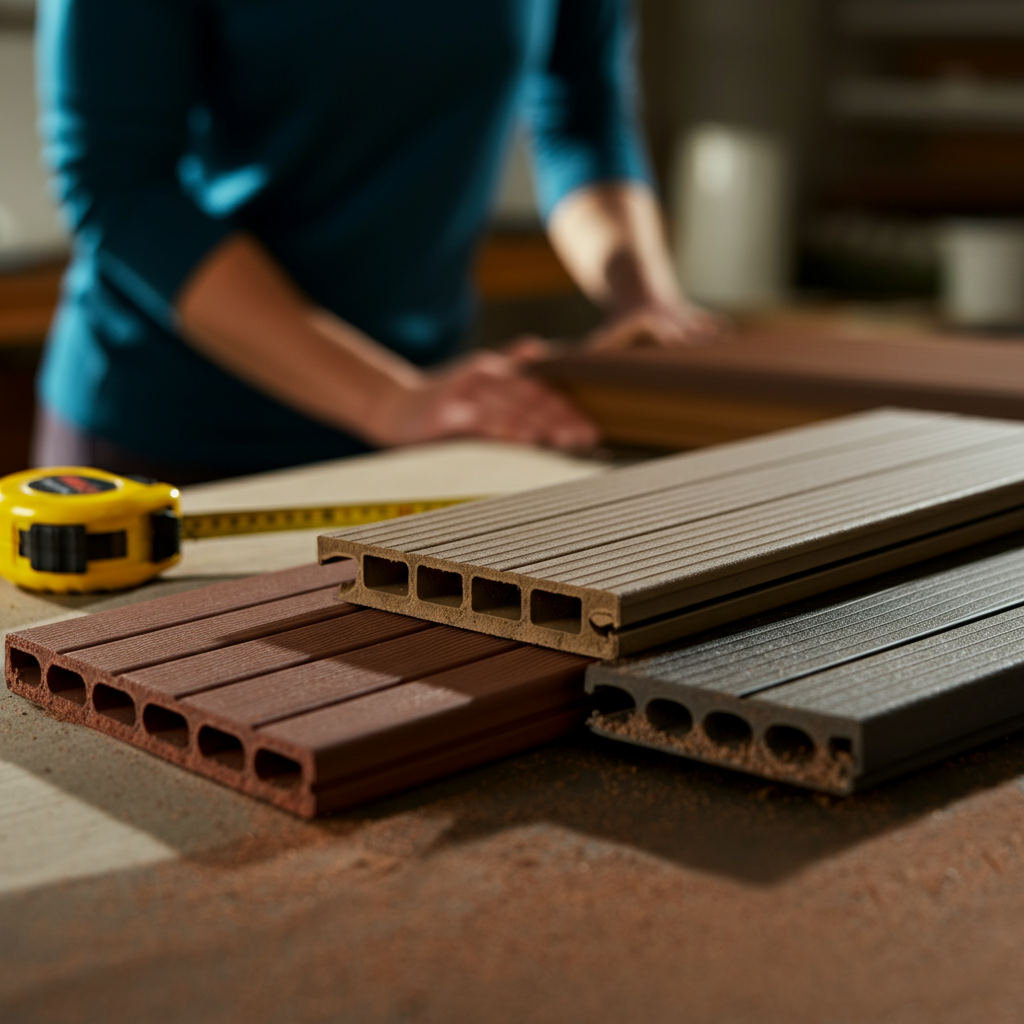
Selecting the right composite decking is a crucial decision that impacts the deck's appearance, performance, and longevity. Composite decking is available in a wide range of colors, textures, and profiles, allowing you to customize the look of your deck to match your home's aesthetic. Consider factors such as fade resistance, scratch resistance, moisture absorption, and ease of cleaning. Read online reviews and compare warranties to ensure you're choosing a high-quality product from a reputable manufacturer. Don't forget the substructure materials, which are typically pressure-treated lumber. Ensure the lumber is rated for ground contact, especially for posts. Carefully calculate the quantity of materials required to avoid shortages or excessive waste. Order all materials well in advance to account for potential shipping delays.
Step 4: Site Preparation
Preparing the Ground for Construction
Proper site preparation is vital for the structural integrity and longevity of your deck. Start by clearing the area of all vegetation, debris, and topsoil. This will prevent weeds from growing under the deck and ensure a solid foundation for the substructure. Level the ground to create a uniform surface. If the deck is close to the ground, consider installing a weed barrier fabric to further prevent weed growth. For decks built on uneven terrain, you may need to excavate or build up the ground to create a level base. Ensure proper drainage to prevent water from pooling under the deck, which can lead to rot and structural damage. Install gravel or drainage pipes if necessary. Accurately mark the location of your footings according to your deck plans.

Step 5: Foundation Construction
Pouring Footings and Setting Posts
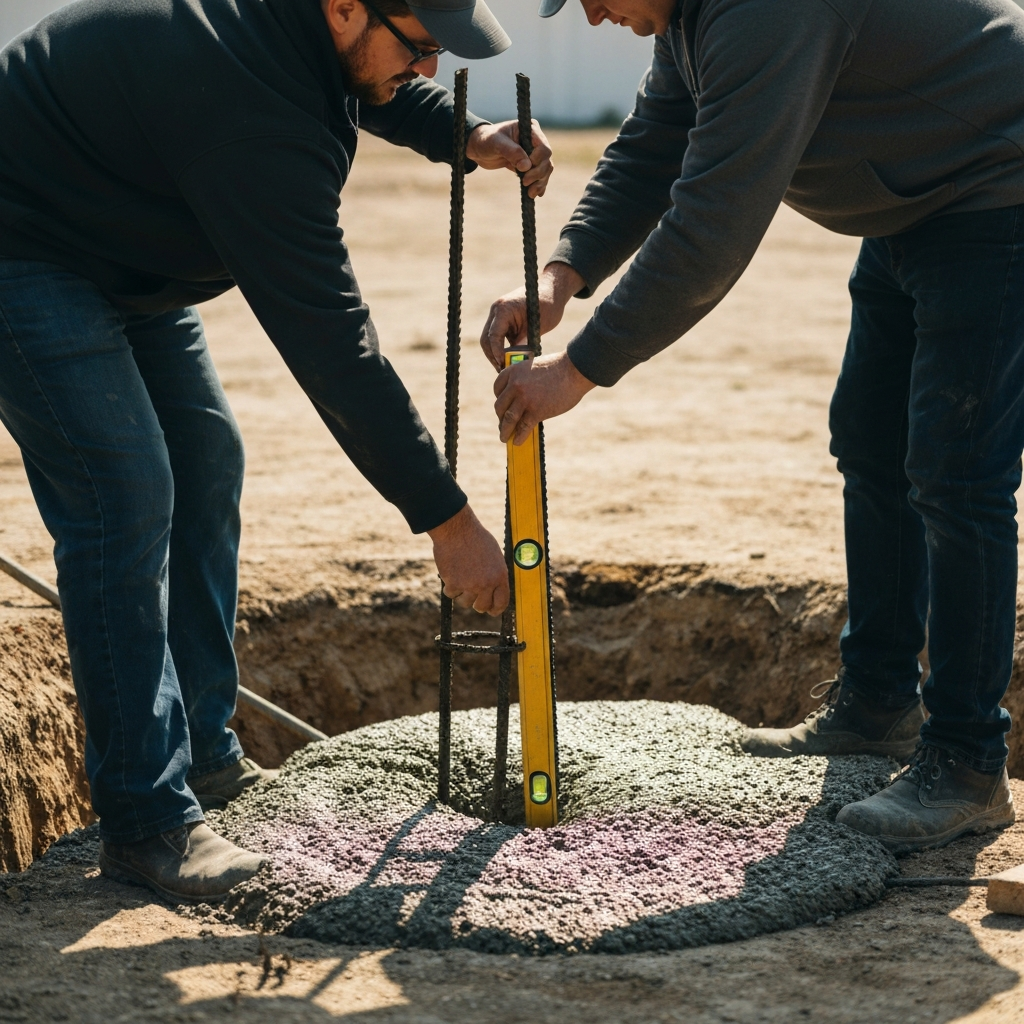
The foundation is the backbone of your deck, providing critical support and stability. Dig holes for the concrete footings according to your local building codes. The depth and diameter of the holes will depend on soil conditions and frost depth in your area. Pour concrete into the holes, ensuring the footings are level and plumb. Embed post anchors into the wet concrete. Allow the concrete to cure completely before attaching the posts, typically 24-48 hours. Use pressure-treated lumber for the posts, cut to the correct height. Attach the posts to the post anchors using galvanized hardware. Ensure the posts are properly aligned and plumb before securing them permanently. The accuracy of this step directly affects the stability of the entire deck.
Step 6: Framing the Substructure
Building the Support System
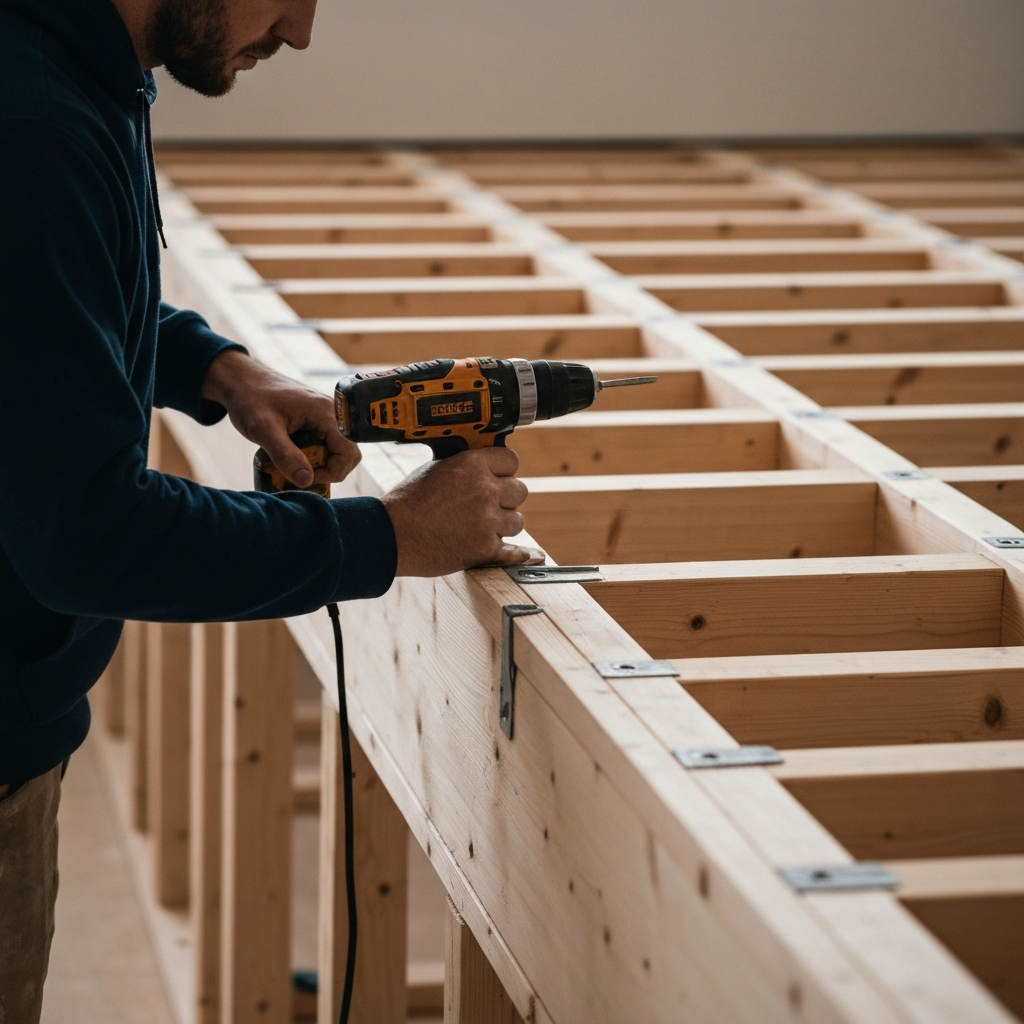
The substructure, or framing, provides the support for the decking boards. Attach a ledger board to your house using appropriate fasteners, ensuring it's level and securely connected to the house's framing. Install beams to the posts, using proper hardware such as carriage bolts or structural screws. Use joist hangers to attach the joists to the beams and ledger board. Ensure the joists are spaced according to the manufacturer's recommendations for your chosen composite decking. Use pressure-treated lumber for all framing members, and ensure they are properly sized to support the deck's load. Pay close attention to detail when framing, as this will impact the flatness and stability of the finished deck.
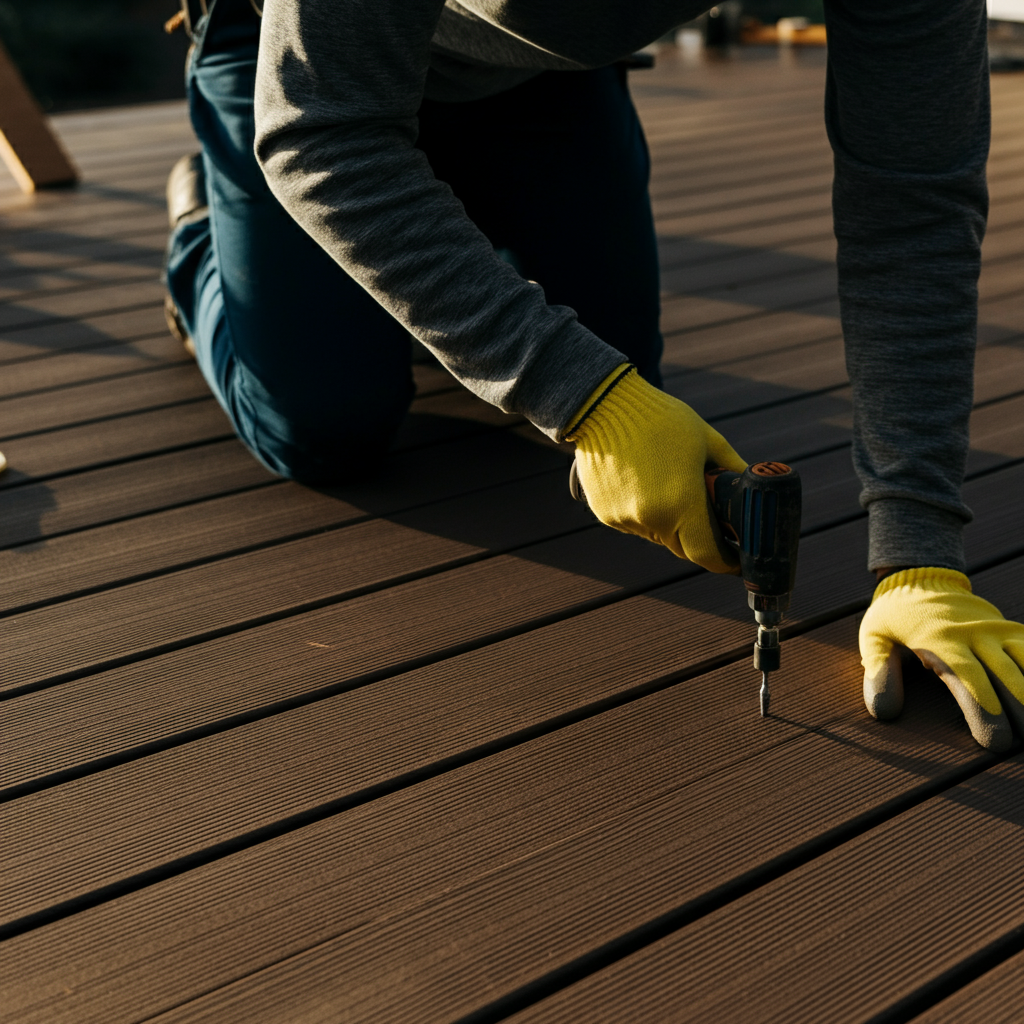
Step 7: Installing the Decking Boards
Laying the Composite Surface
With the substructure in place, it's time to install the composite decking boards. Start by laying the first board along the edge of the deck, leaving a small gap for expansion and contraction. Use composite decking screws or hidden fastener systems to attach the boards to the joists. Follow the manufacturer's recommendations for spacing and fastening to ensure proper performance and prevent warping or buckling. Use a chalk line to ensure the boards are straight and aligned. Cut the boards to length using a circular saw or miter saw. Stagger the joints to create a more visually appealing and structurally sound deck. Use shims if necessary to ensure the boards are level and flush.
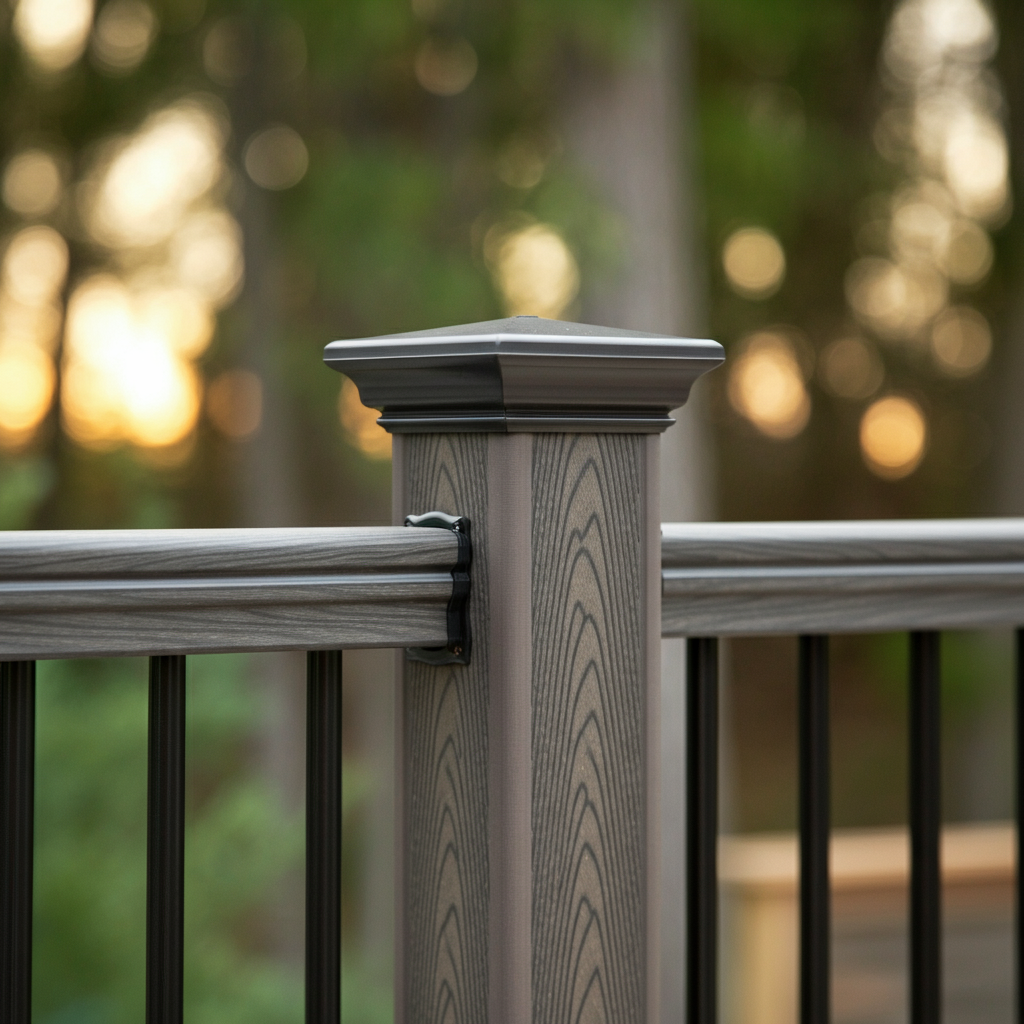
Step 8: Railing Installation
Adding Safety and Style
Railing is crucial for safety, especially if your deck is elevated. Choose a railing system that complements the design of your deck and meets local building codes. Composite railing systems are available in a variety of styles, including traditional wood-look railings, modern metal railings, and glass panel railings. Install the railing posts securely to the deck framing, ensuring they are plumb and properly spaced. Follow the manufacturer's instructions for installing the railing components, including the top rail, bottom rail, and balusters. Ensure the railing is strong and sturdy to prevent falls. Check your local building codes for specific requirements regarding railing height and spacing.
Step 9: Finishing Touches
Adding the Final Details
Once the decking and railing are installed, it's time to add the finishing touches that will elevate the look of your deck. Install fascia boards around the perimeter of the deck to conceal the framing and create a clean, finished appearance. Add stairs if your deck is elevated, ensuring they are safe and comfortable to use. Consider adding lighting to your deck to enhance its ambiance and safety at night. Clean the deck thoroughly to remove any dirt or debris. Add furniture, planters, and other accessories to create a welcoming and inviting outdoor space.
Step 10: Inspection and Maintenance
Ensuring Longevity
After completing your composite deck, schedule a final inspection with your local building department to ensure it meets all applicable codes. Regular maintenance will help to extend the life of your deck and keep it looking its best. Clean the deck regularly with a mild soap and water solution to remove dirt and grime. Inspect the deck for any signs of damage, such as loose screws, cracked boards, or sagging framing. Repair any damage promptly to prevent it from worsening. Apply a composite deck cleaner and sealant if desired to protect the deck from the elements. With proper care and maintenance, your composite deck will provide years of enjoyment.
Tools or Materials Required
- Composite Decking Boards
- Pressure-Treated Lumber (for substructure)
- Concrete Mix
- Post Anchors
- Joist Hangers
- Deck Screws (composite-specific)
- Circular Saw
- Miter Saw
- Drill
- Level
- Tape Measure
- Post-Hole Digger
- Shovel
- Safety Glasses
- Work Gloves
- String and Stakes
- Concrete Trowel
Safety Considerations
- Always wear safety glasses and work gloves when cutting and drilling.
- Use caution when working with power tools and follow the manufacturer's instructions.
- Ensure the work area is clear of hazards and obstructions.
- Never work alone, especially when lifting heavy materials.
- Be aware of overhead power lines when using long lumber or ladders.
- Consult with a qualified electrician for any electrical work related to deck lighting.
Pro Tips
- Pre-drill screw holes to prevent splitting the composite decking.
- Use a composite decking spacer tool to ensure consistent spacing between boards.
- Install hidden fastener systems for a cleaner, more professional look.
- Seal the cut ends of composite decking boards to prevent moisture absorption.
- Store composite decking boards in a cool, dry place before installation.
FAQ Section
Q: How long will a composite deck last?
A: With proper care and maintenance, a composite deck can last for 25-50 years or more.
Q: Is composite decking more expensive than wood decking?
A: Composite decking typically has a higher upfront cost than wood decking, but it requires less maintenance and has a longer lifespan, making it a more cost-effective option in the long run.
Q: Can I paint or stain my composite deck?
A: Most composite decking manufacturers do not recommend painting or staining their products, as it can void the warranty and may not adhere properly.
Conclusion
Building a composite deck is a rewarding project that can significantly enhance your outdoor living space. By following the steps outlined in this guide and paying attention to detail, you can create a beautiful, durable, and low-maintenance deck that will provide years of enjoyment. Remember to prioritize safety, obtain necessary permits, and consult with professionals when needed. With careful planning and execution, you can transform your backyard into an outdoor oasis.