Preparing a baseball field is a crucial task that ensures player safety, promotes fair play, and enhances the overall experience for everyone involved. Whether you are a seasoned groundskeeper, a volunteer parent, or simply passionate about the game, understanding the steps involved in field preparation is essential. A well-maintained field not only looks professional but also minimizes the risk of injuries and allows players to perform at their best. This guide provides a comprehensive, step-by-step approach to preparing a baseball field, covering everything from initial inspection to final safety checks.
This is more than just cutting grass; it’s about creating a safe and playable environment. Consistent maintenance prevents bad hops, ensures proper drainage, and keeps the field looking its best. This detailed guide outlines the necessary tools, techniques, and considerations to help you achieve a field that meets the highest standards of quality and safety. Follow these steps carefully, and you'll be well on your way to creating a field that players and fans alike will appreciate.
Let's begin transforming your baseball field into a pristine and professional playing surface. Each step contains detailed instructions, expert tips, and common pitfalls to avoid, ensuring you're equipped with all the knowledge necessary for success. Remember that preparation is key!
Step 1: Initial Inspection and Planning
Begin with a thorough inspection of the entire baseball field. Walk the field, paying close attention to the condition of the grass, infield, pitcher's mound, bases, and warning track. Identify any areas that require immediate attention, such as divots, uneven surfaces, drainage issues, or damaged equipment. Check for any foreign objects like rocks, glass, or debris that could pose a safety hazard to players. Based on your inspection, create a detailed plan of action, prioritizing tasks and allocating time accordingly. Consider weather conditions and upcoming games when scheduling your work. Failing to plan is planning to fail – a detailed checklist is your best friend.
Step 2: Assemble Tools and Supplies
Gather all the necessary tools and supplies before starting any actual work. Essential tools include a field mower, edger, infield drag mat or rake, soil conditioner applicator (spreader), tamper, chalk liner or field marking paint machine, measuring tape, string line, bases, and a water hose with adjustable nozzle. Make sure you have sufficient quantities of materials like infield mix, topdressing, chalk, or field marking paint. Having all the necessary equipment readily available will save you time and prevent interruptions during the preparation process. Regularly inspect and maintain your tools to ensure they are in good working order. A dull mower blade, for instance, can tear the grass instead of cutting it cleanly.

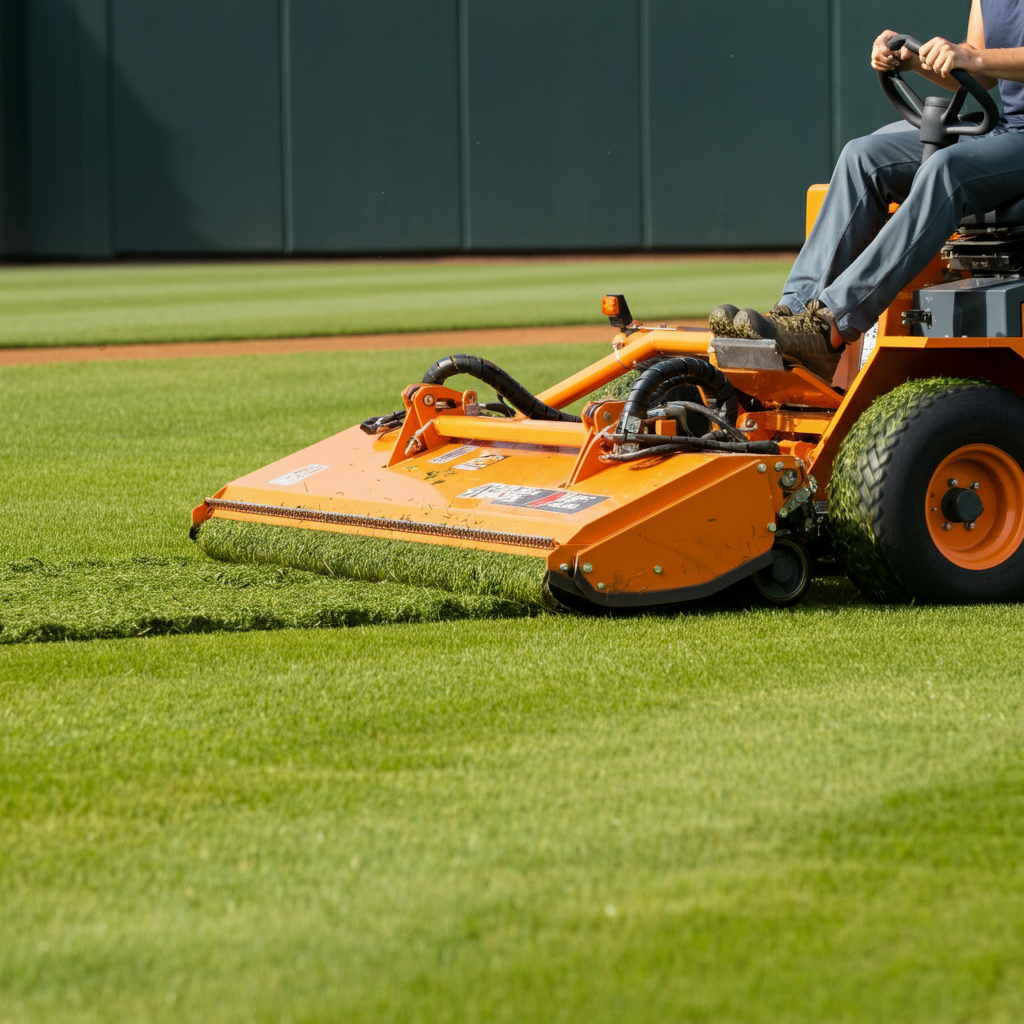
Step 3: Mowing and Edging the Grass
Mowing is crucial for maintaining a uniform playing surface. Use a field mower to cut the grass to the appropriate height, typically between 1.5 and 2.5 inches, depending on the type of grass and local regulations. Ensure that the mower blades are sharp to avoid tearing the grass, which can lead to disease and a patchy appearance. Overlap each pass slightly to prevent scalping the turf. Use an edger to define the boundaries between the infield and outfield, as well as along the basepaths. This creates a clean, professional look and helps to prevent grass from encroaching onto the dirt areas. Pay attention to the perimeter of the field as well. Don't forget to vary mowing patterns to prevent soil compaction.
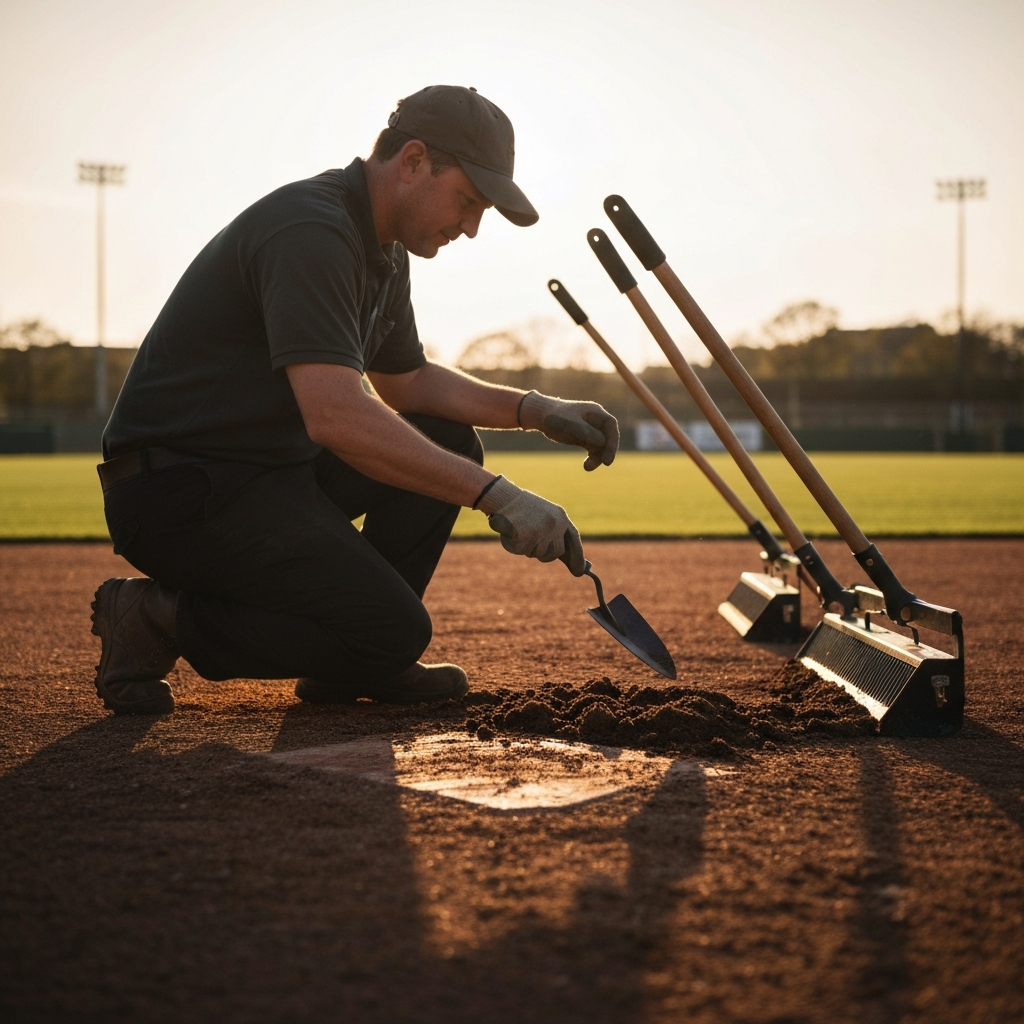
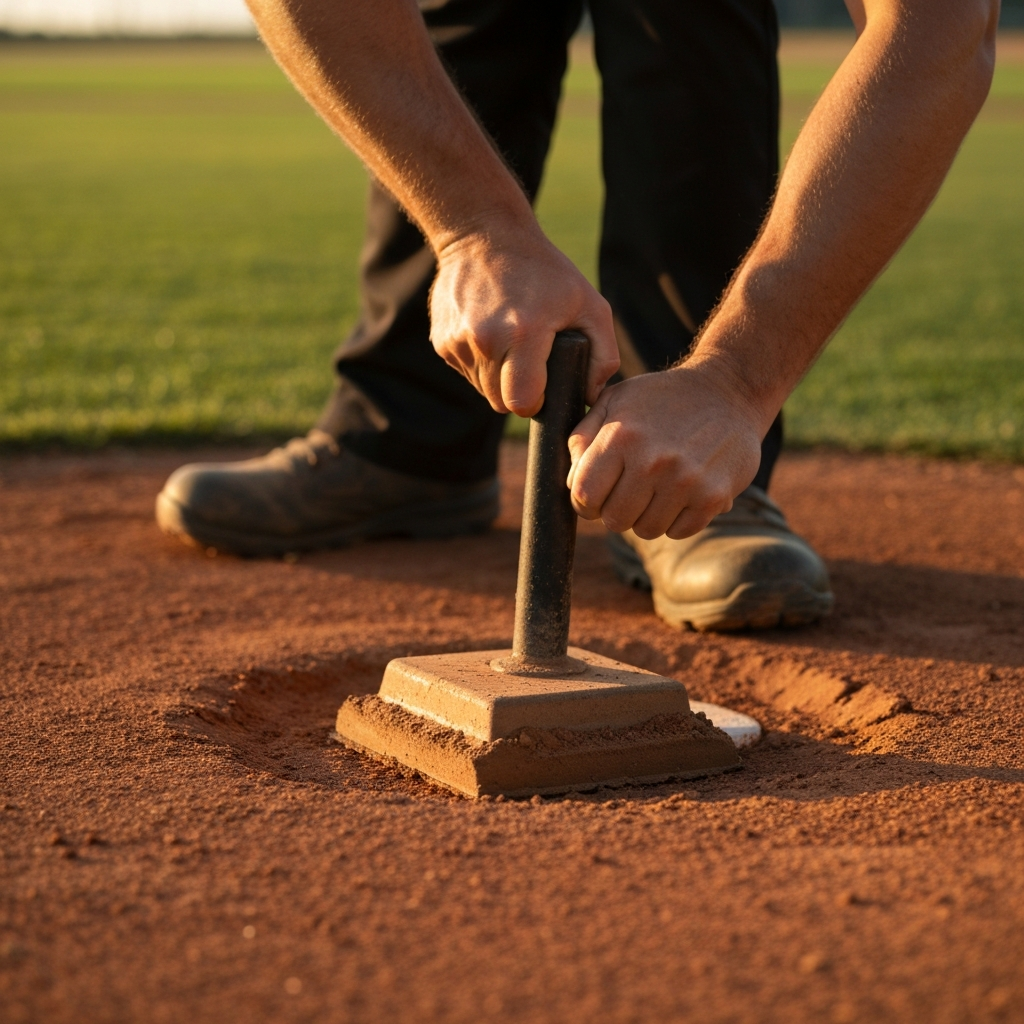
Step 4: Preparing the Pitcher's Mound and Home Plate Area
The pitcher's mound and home plate area require special attention due to the high level of wear and tear they endure. Use a tamper to compact the clay in these areas, ensuring a firm and even surface. Repair any divots or holes with fresh clay or infield mix, tamping it down firmly to match the surrounding grade. Pay close attention to the slope of the pitcher's mound, ensuring it conforms to regulations. The pitching rubber should be securely anchored and level. The home plate area must be clean and clearly defined. Consider using a plate tamper to ensure it is embedded correctly and remains level.
Step 5: Dragging the Infield
Dragging the infield is essential for creating a smooth and level playing surface. Use an infield drag mat or steel drag, pulling it evenly across the infield to fill in any holes, remove clumps, and level out irregularities. Overlap each pass slightly to ensure complete coverage. Avoid dragging when the infield is too wet, as this can cause the soil to compact and become uneven. Conversely, dragging when the infield is too dry can create excessive dust. Aim for a slightly damp, workable soil condition. Consider the type of drag you are using, as different drags have different leveling abilities.

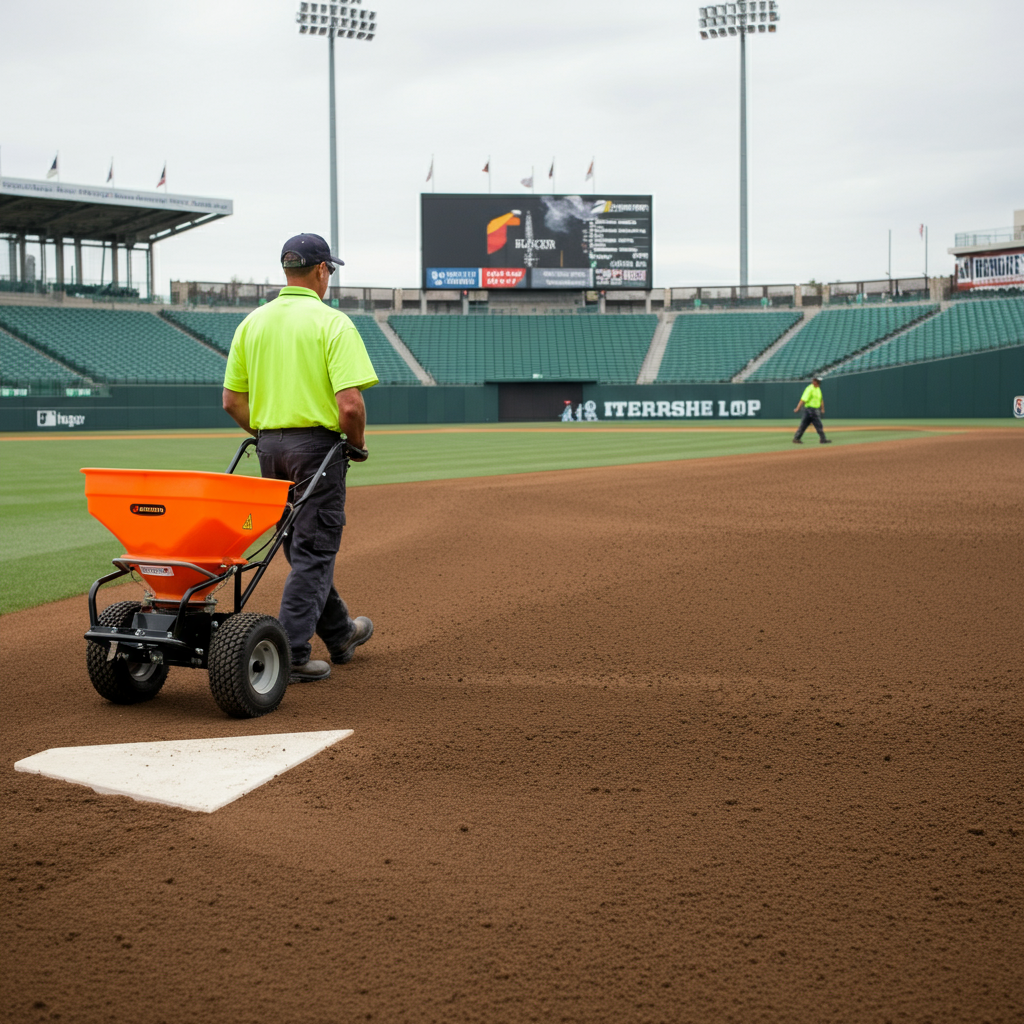
Step 6: Soil Conditioning
Applying a soil conditioner or infield mix is essential for improving the playability of the infield. These materials help to improve drainage, reduce compaction, and create a more consistent surface. Use a spreader to evenly distribute the conditioner across the infield, then work it into the soil with a rake or drag mat. Choose a soil conditioner that is appropriate for your specific soil type and climate. Consider adding amendments like calcined clay or diatomaceous earth to further improve drainage and reduce dust. Regularly replenish the soil conditioner to maintain optimal playing conditions, especially in high-wear areas.
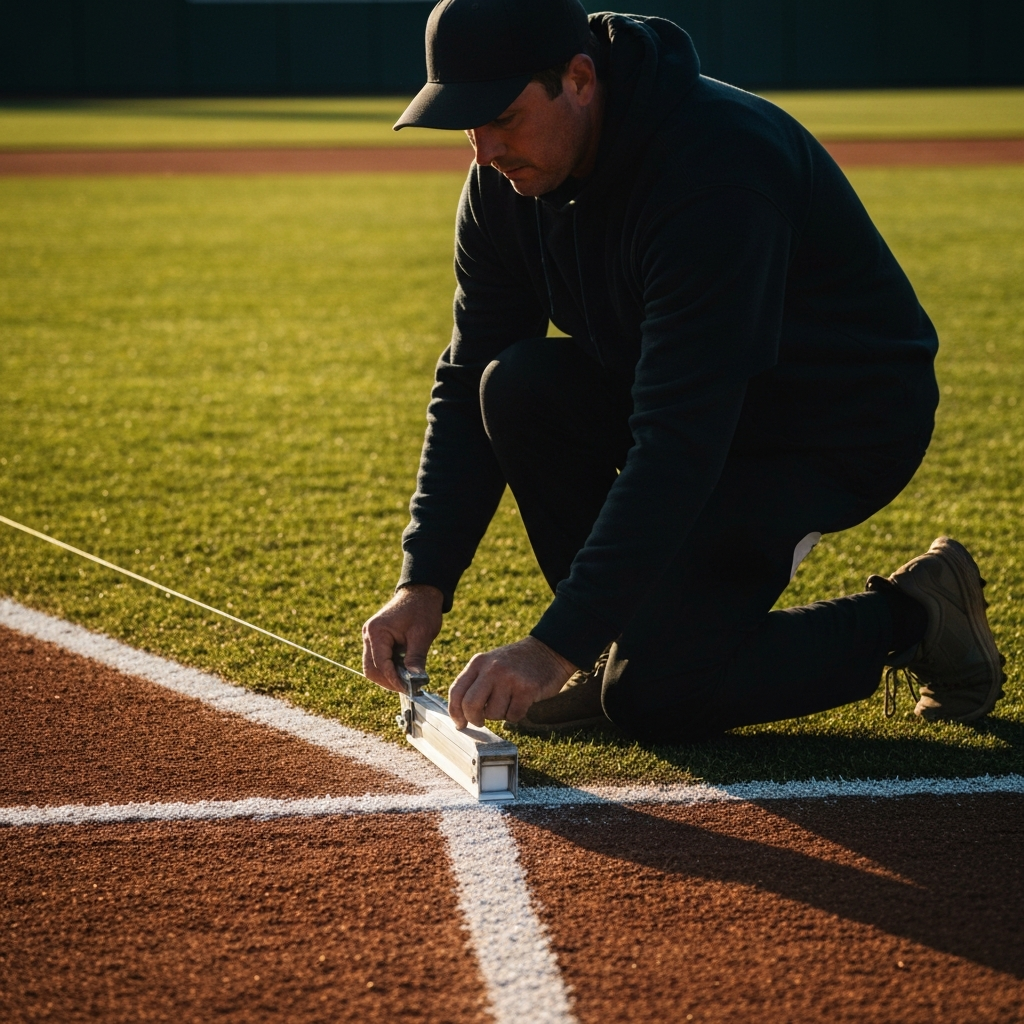
Step 7: Marking the Foul Lines
Accurately marking the foul lines is crucial for fair play. Use a chalk liner or field marking paint machine to create straight, crisp lines along the baselines. Measure carefully to ensure that the lines are the correct distance from home plate and that they are parallel to each other. Use a string line as a guide to ensure straightness, especially for long distances. Re-mark the foul lines before each game, as they can fade quickly with use and weather. Choose a high-quality chalk or field marking paint that is durable and resistant to fading.
Step 8: Marking the Batter's Box and Catcher's Box
The batter's box and catcher's box must be accurately marked according to official baseball rules. Use a chalk liner or templates to create clearly defined boxes on either side of home plate. Pay close attention to the dimensions and placement of the boxes, as incorrect markings can lead to disputes during games. Re-chalk the boxes frequently, especially in high-traffic areas. Ensure that the lines are thick and visible, even in dim lighting conditions.

Step 9: Maintaining the Outfield and Warning Track
The outfield and warning track require regular maintenance to ensure player safety and prevent injuries. Remove any debris, rocks, or other hazards from the outfield. Fill in any holes or divots with topsoil and re-seed as necessary. Keep the grass mowed to the appropriate height and fertilize regularly to promote healthy growth. The warning track should be clearly defined and free of obstructions. Rake the warning track regularly to maintain a consistent surface and prevent weed growth. Regularly inspect the perimeter fence for any damage or hazards.
Step 10: Watering the Field
Proper watering is essential for maintaining healthy turf and preventing dust. Water the field deeply and infrequently, rather than shallowly and frequently. This encourages deep root growth and helps the grass to withstand drought conditions. Water early in the morning to minimize evaporation and allow the grass to dry before nightfall, which can help to prevent fungal diseases. Pay attention to the infield, as it tends to dry out more quickly than the outfield. Adjust your watering schedule based on weather conditions and the specific needs of your turf.
Step 11: Final Inspection
Before each game, conduct a final inspection of the entire field. Walk the field, checking for any hazards, uneven surfaces, or other issues that may have arisen since the last preparation. Pay particular attention to high-traffic areas, such as the basepaths, pitcher's mound, and home plate area. Make any necessary adjustments or repairs to ensure that the field is safe and playable. Address any last-minute issues, such as loose bases or faded lines. This final inspection is crucial for ensuring a positive and safe experience for all players.
Step 12: Player Safety Check
Prioritize player safety by ensuring that all bases, the pitching rubber, and other equipment are securely anchored. Check for any potential trip hazards, such as exposed sprinkler heads or uneven surfaces. Make sure that all fences and barriers are in good repair and free of sharp edges or other hazards. Post warning signs in areas where there may be potential dangers, such as near dugouts or foul lines. Communicate any safety concerns to players and coaches before the game begins. This final safety check is the most important step in preparing a baseball field.
Tools or Materials Required
- Field mower
- Edger
- Infield drag mat or rake
- Soil conditioner applicator
- Tamper
- Chalk liner or field marking paint machine
- Measuring tape
- String line
- Bases
- Water hose with adjustable nozzle
- Infield mix
- Topdressing
- Chalk or field marking paint
Common Mistakes to Avoid
- Dragging the infield when it is too wet or too dry.
- Using dull mower blades.
- Overwatering or underwatering the field.
- Neglecting to repair divots and holes.
- Failing to properly mark the foul lines and batter's box.
- Ignoring potential safety hazards.
Safety Considerations
- Always wear appropriate safety gear, such as gloves, eye protection, and hearing protection.
- Be aware of your surroundings and watch out for other people.
- Never operate machinery without proper training.
- Store chemicals and other hazardous materials safely.
- Report any safety concerns to the appropriate authorities.
Pro Tips
- Develop a regular maintenance schedule and stick to it.
- Use high-quality materials and tools.
- Consult with experienced groundskeepers for advice.
- Pay attention to the weather and adjust your schedule accordingly.
- Involve volunteers to help with field maintenance.
FAQ Section
- How often should I drag the infield?
- Drag the infield at least once a week, and more often if necessary, to maintain a smooth and level surface.
- How often should I water the field?
- Water the field deeply and infrequently, typically once or twice a week, depending on weather conditions.
- What type of soil conditioner should I use?
- Choose a soil conditioner that is appropriate for your specific soil type and climate.
- How do I repair divots in the field?
- Fill the divots with topsoil and re-seed if necessary. Tamp the soil down firmly to match the surrounding grade.
Conclusion
Preparing a baseball field is a continuous process that demands attention to detail, consistent effort, and a commitment to player safety. By following the steps outlined in this guide, you can create a field that is not only visually appealing but also provides a safe and enjoyable playing experience for everyone involved. Remember to prioritize regular maintenance, address any issues promptly, and always keep player safety at the forefront of your efforts. A well-maintained baseball field is a testament to the dedication and passion of those who care for it, and it plays a vital role in fostering a love of the game.