That persistent rattle in your car can be more than just annoying; it can be a sign of a potentially serious problem. Ignoring it could lead to further damage and costly repairs down the road. But before you head to the mechanic, you can often pinpoint the source yourself. This guide will walk you through a systematic approach to diagnosing and, in some cases, even fixing that mysterious car rattle.
We'll start with simple visual inspections and gradually progress to more involved diagnostic techniques. Remember, safety is paramount, so always work in a well-lit and safe environment. If you're uncomfortable performing any of these steps, don't hesitate to consult a qualified mechanic.
The first step is to gather some information. When does the rattle occur? Is it at a specific speed, when turning, over bumps, or only when the engine is cold? Accurate observations are crucial for narrowing down the possibilities.
Step 1: Initial Assessment and Localization
Begin by carefully listening to the rattle while driving. Try to determine its general location: front, rear, left, right, or under the car. Pay attention to the circumstances that trigger the noise. Does it only happen when you accelerate, brake, or go over bumps? Does the rattle change with engine speed? Note all these details. Also, consider any recent work done on the car that could be related.

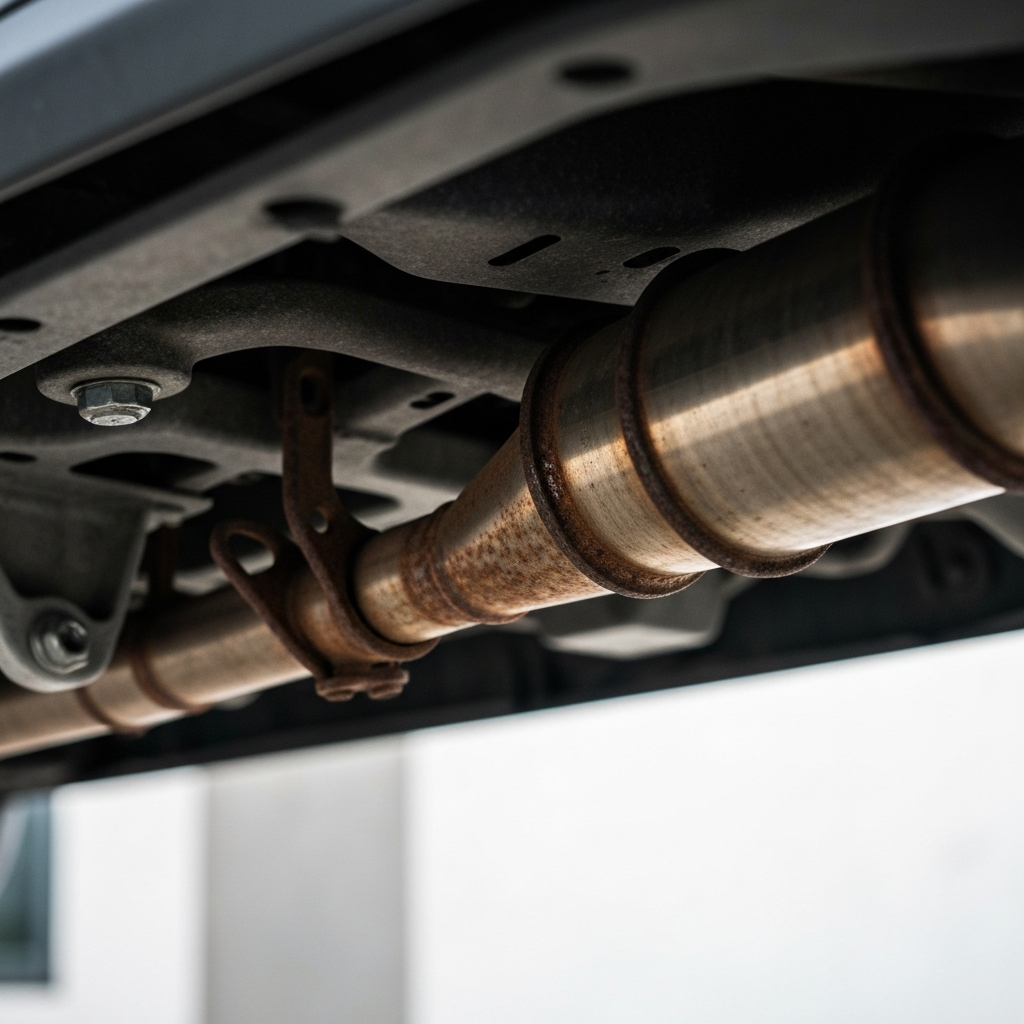
Step 2: Exhaust System Inspection
The exhaust system is a common culprit for rattles. Start by visually inspecting the entire exhaust system from the manifold to the tailpipe. Look for any signs of rust, damage, or loose hangers. Gently tap on the exhaust pipes with a rubber mallet (or the handle of a screwdriver) to listen for any unusual sounds. A loose heat shield is a very common cause of rattling. These thin metal shields protect the car's undercarriage from the intense heat of the exhaust. They are often attached with bolts or clips that can corrode and fail over time.
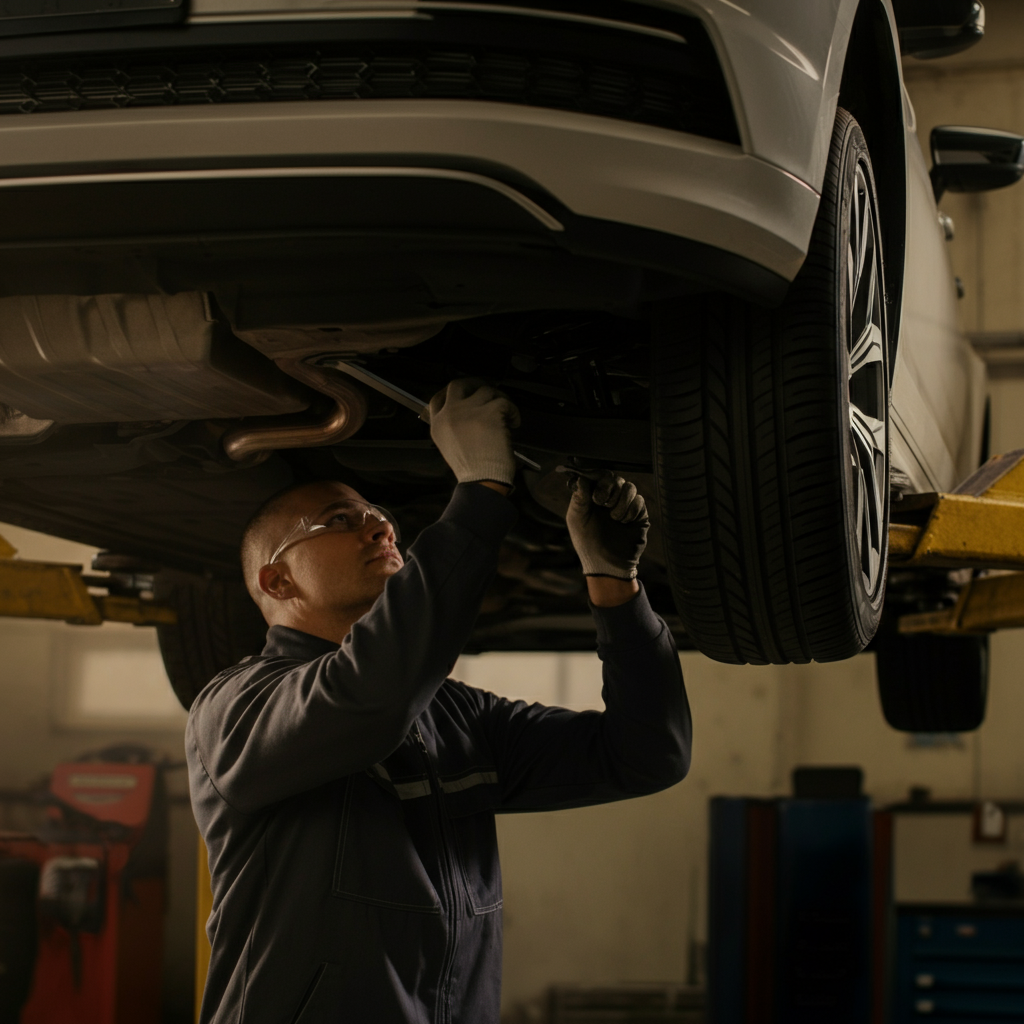
Step 3: Suspension Component Check
Suspension components like shocks, struts, sway bar links, and ball joints can also cause rattles, especially when going over bumps. A worn sway bar link, for example, can create a clunking or rattling sound as the suspension moves. To check these components, visually inspect them for any signs of wear, damage, or looseness. You may need to jack up the car to get a better view. Use a pry bar to gently check for play in the ball joints and tie rod ends. Any excessive play indicates a problem.
Step 4: Interior and Exterior Trim Inspection
Sometimes, the rattle isn't mechanical at all! It could be something as simple as a loose trim piece inside the car or an object rolling around in the glove compartment or center console. Check all interior and exterior trim pieces for looseness. Pay particular attention to door panels, dashboard components, and exterior moldings. Also, don't forget to check the spare tire and jack in the trunk to ensure they are properly secured. Many exterior trim pieces are held in place with plastic clips that can break over time, causing the trim to vibrate against the car's body.

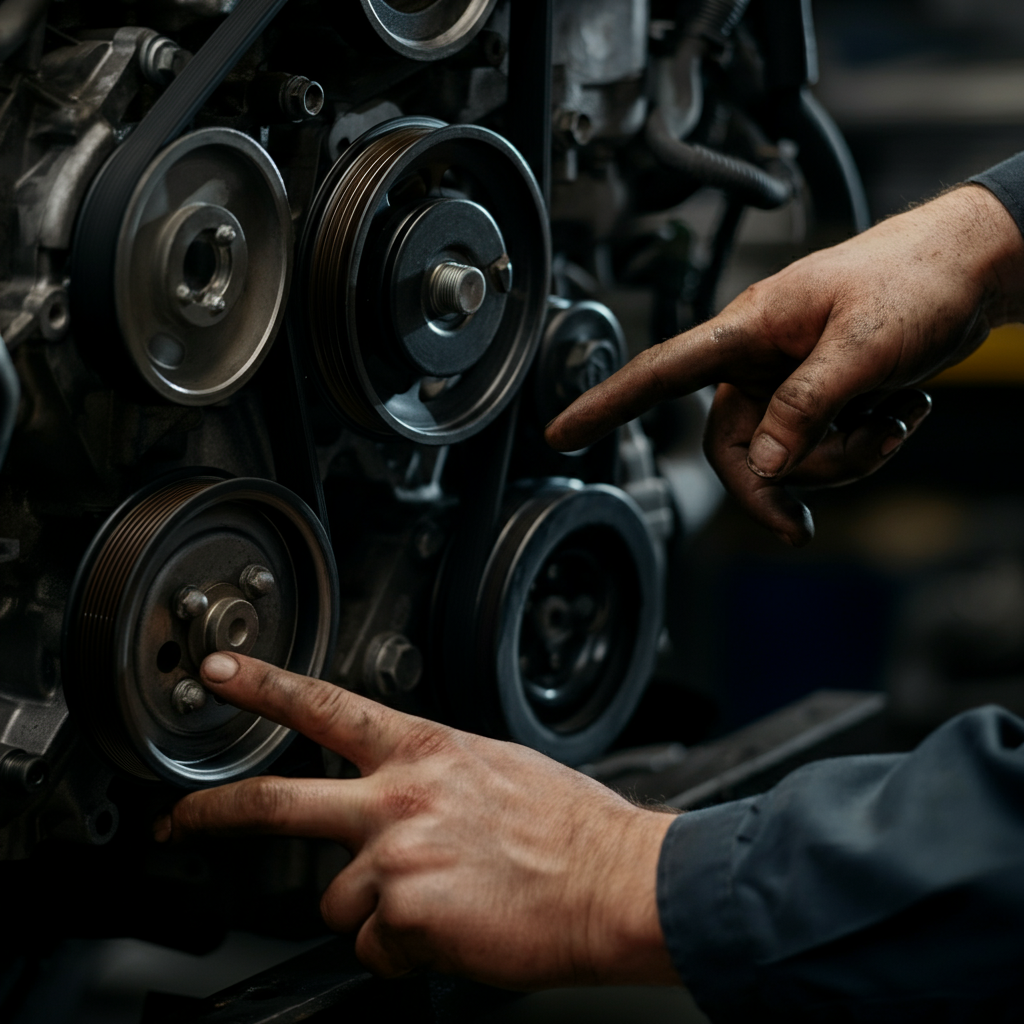
Step 5: Engine Compartment Inspection
The engine compartment is a complex area with many potential sources of rattles. Start by visually inspecting all the components, looking for anything that appears loose or out of place. Pay particular attention to the belts and pulleys, as a worn belt or a failing pulley bearing can create a rattling or squealing noise. Also, check the engine mounts for signs of wear or damage. Worn engine mounts can allow the engine to vibrate excessively, causing a rattle.
Tools or Materials Required
- Jack and jack stands
- Rubber mallet
- Pry bar
- Wrench set
- Screwdriver set
- Safety glasses
- Gloves
- Pen and paper for notes
Common Mistakes to Avoid
- Ignoring the rattle for too long, leading to further damage.
- Not properly securing the car when working underneath it.
- Replacing parts without properly diagnosing the problem.
- Over-tightening bolts, which can damage threads.
Safety Considerations
- Always wear safety glasses when working on your car.
- Use jack stands to support the car before working underneath it.
- Disconnect the negative battery cable before working on any electrical components.
- Work in a well-ventilated area, especially when using solvents or cleaners.
Pro Tips
- Use a mechanic's stethoscope to pinpoint the exact location of the rattle.
- Record the sound of the rattle on your phone to help diagnose the problem.
- Ask a friend to help you pinpoint the rattle while you drive.
FAQ Section
- Q: My car only rattles when it's cold. What could that be?
- A: This could be due to the exhaust system contracting in the cold, creating more play in the hangers. It could also be related to the engine oil not lubricating properly when cold, causing internal engine components to rattle until the oil warms up. Check your oil level and consider using a higher-quality oil.
- Q: The rattle sounds like it's coming from inside the dashboard. Is that hard to fix?
- A: Rattles from inside the dashboard can be tricky to diagnose and fix. It often involves removing trim pieces and securing any loose components. Consider consulting a professional mechanic for this type of repair.
- Q: I think the rattle is coming from the engine itself. What should I do?
- A: Engine rattles can indicate serious internal problems. Stop driving the car immediately and consult a qualified mechanic. Continuing to drive could cause further damage.
By following these steps, you should be able to diagnose the source of that annoying car rattle. Remember to be patient, methodical, and above all, safe. If you're unsure about any of these steps, don't hesitate to seek professional help. Accurate diagnosis is key to a successful and cost-effective repair.