Face painting is a fantastic way to add excitement and creativity to parties, festivals, Halloween, or any event where you want to spark joy and imagination. Whether you're a seasoned artist or a complete beginner, this guide provides a collection of fun and easy face paint ideas, complete with step-by-step instructions to help you create amazing designs.
From classic animal faces to whimsical characters and simple patterns, there's something for everyone to enjoy. Get ready to unleash your inner artist and transform ordinary faces into extraordinary works of art. Remember safety first – always use high-quality, non-toxic face paints!
This guide aims to empower you with the knowledge and techniques to confidently create beautiful face paint designs. So, gather your brushes, paints, and a little bit of inspiration, and let's get started!
Tools or Materials Required
- High-quality, non-toxic face paints
- A variety of paintbrushes (small, medium, and large)
- Sponges (for base coats and blending)
- Water container
- Paper towels or a clean cloth
- Mirror (for the person being painted)
- Optional: Stencils, glitter, face paint sealant
Safety Considerations
Always use face paints specifically designed for cosmetic use. Acrylic paints or other craft paints can cause skin irritation or allergic reactions. Perform a patch test on a small area of skin before applying paint to the entire face, especially for children with sensitive skin. Avoid painting near the eyes and mouth. Remove face paint gently with soap and water or a dedicated face paint remover.
Pro Tips
- Work in a well-lit area.
- Keep your brushes clean.
- Use a light touch when applying paint.
- Practice your designs beforehand.
- Don't be afraid to get creative and experiment!
1. Butterfly Face Paint
Step 1: Base Wings
Begin by using a sponge or a medium-sized brush to create the basic wing shapes above and below the eyes. The top wings should arch gracefully above the eyebrows, while the bottom wings curve beneath the eyes. Opt for vibrant colors like pink, purple, or blue for a classic butterfly look. Consider sketching the outline lightly with a white eyeliner pencil before painting if you're not confident in your freehand skills. This initial step sets the foundation for the butterfly's intricate design.
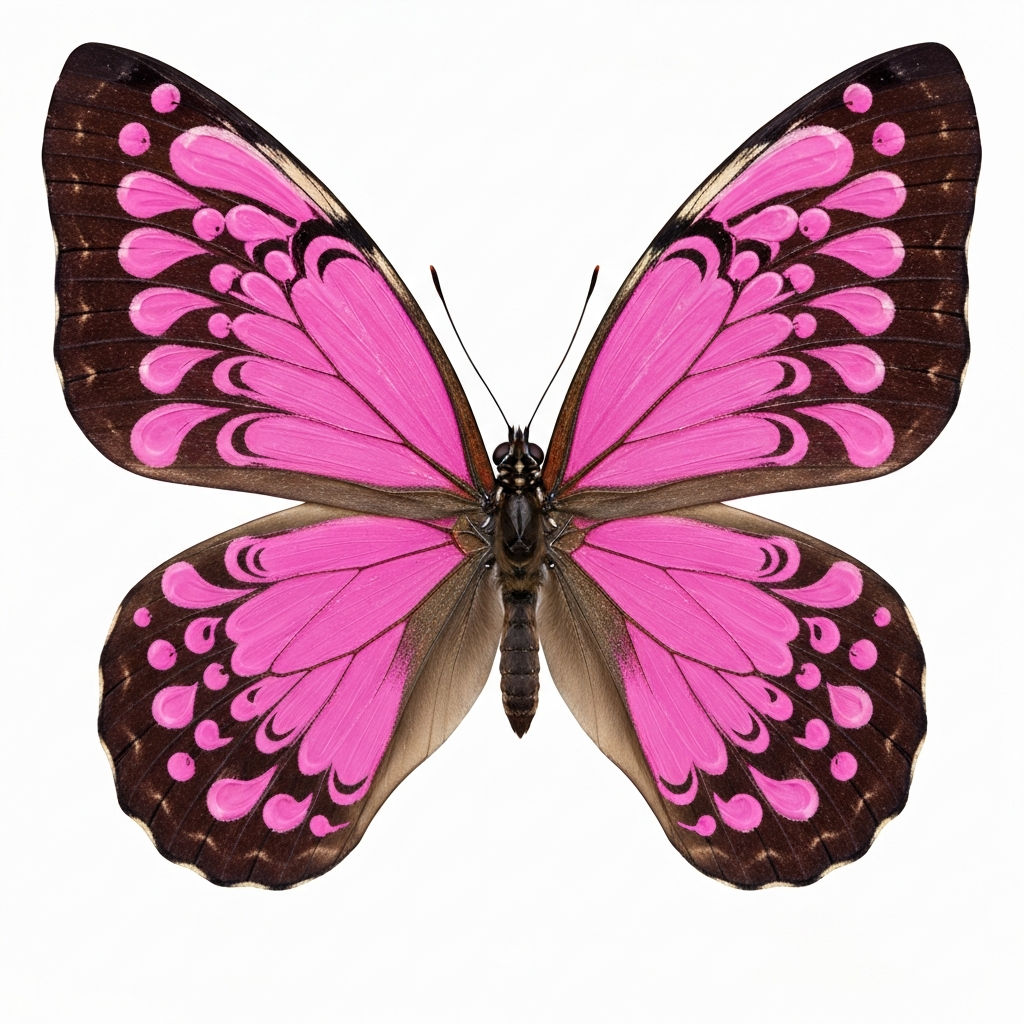
Step 2: Adding Color and Depth
Now, use a smaller brush to add details within the wing outlines. Introduce contrasting colors like black, white, or glittery shades to create patterns and textures. Think about adding spots, swirls, or geometric shapes to make each wing unique. Blending different hues together while the paint is still wet can add depth and dimension to the butterfly's wings. This step is where you can really let your creativity shine and personalize the design.
Step 3: Outlining and Antennae
With a fine-tipped brush and black face paint, carefully outline the entire butterfly wing shape. This will define the design and make the colors pop. Add delicate antennae extending from the forehead between the eyebrows, curving gently upwards. Consider adding small dots along the antennae for extra detail. The outlining process is crucial for achieving a polished and professional look. A slightly shaky hand here can ruin the symmetry, so brace your hand or use a table to rest your elbow.
2. Tiger Face Paint
Step 1: Base Coat and Muzzle
Apply a mix of yellow and orange face paint to the entire face using a sponge. This will serve as the tiger's base coat. Then, using white face paint, create the muzzle area by applying it around the mouth and chin. Extend the white paint slightly upwards towards the nose to define the tiger's snout. This step establishes the foundation for the tiger's distinctive features.
Step 2: Black Stripes
Using a fine-tipped brush and black face paint, begin adding the tiger's stripes. Start with the stripes on the forehead, drawing them in a V-shape between the eyebrows. Then, add stripes on the cheeks, chin, and around the eyes. Vary the thickness and length of the stripes to create a more realistic and dynamic look. Remember that tiger stripes are unique and irregular, so don't worry about making them perfectly symmetrical. Overlapping the white muzzle slightly with black paint creates a more integrated look.
Step 3: Nose and Whiskers
Paint the tip of the nose black, and draw a line extending downwards from the nose to the upper lip. Add small dots on either side of the nose, and then use white face paint to create whiskers extending outwards from the dots. Add a black outline around the white muzzle to further define the tiger's features. Consider using a sealant spray to prevent the design from smudging, especially in warm weather.
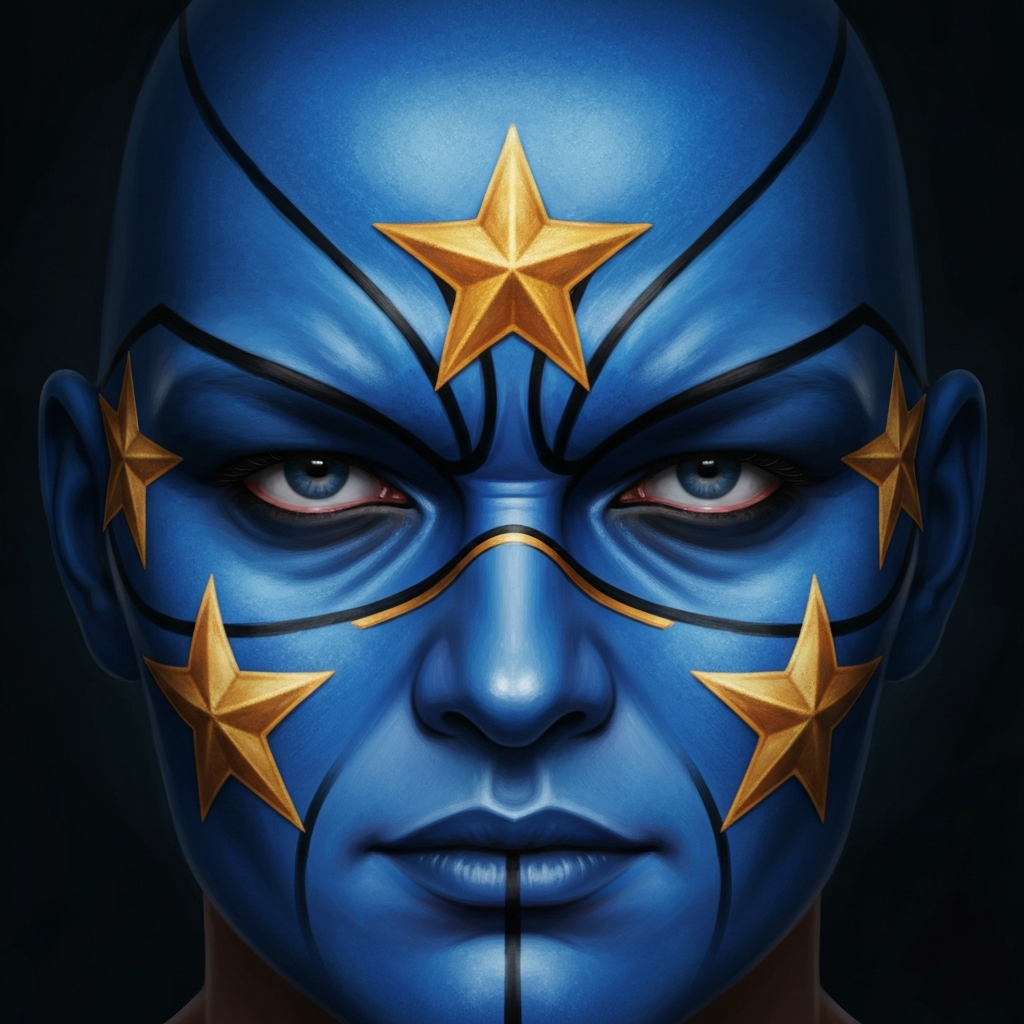
3. Superhero Mask Face Paint
Step 1: Mask Outline
Begin by sketching the outline of the superhero mask around the eyes using a white eyeliner pencil or a light-colored face paint. The mask should extend from above the eyebrows to the tops of the cheeks, covering the area around the eyes. Use a design that mimics classic superhero masks, like a slightly angular shape that ends in a point near the temples. Pre-planning your outline ensures symmetry and allows you to easily adjust the shape before applying the more vibrant colors.
Step 2: Fill in the Mask
Use a brush and your chosen superhero color (e.g., blue, red, or black) to fill in the mask outline. Apply the paint evenly, ensuring full coverage. Be careful not to get the paint in the eyes. Using a sponge for this step can result in a faster and more uniform base coat, but a brush will allow for sharper, cleaner edges.
Step 3: Adding Details
Once the base color is dry, use a fine-tipped brush and contrasting colors (e.g., gold, silver, or white) to add details to the mask. Consider adding stars, lightning bolts, or other superhero-inspired symbols. Outline the mask with black face paint to make it stand out. Glitter accents can enhance the look, adding a touch of sparkle and flair. Securely adhere the glitter with a cosmetic adhesive to avoid irritation.
4. Pirate Face Paint
Step 1: Eye Patch
Using black face paint and a medium-sized brush, create a patch over one eye. The patch should extend from the forehead to the cheek, covering the entire eye. A simple oval or rounded rectangle shape works well. Secure a thin elastic string or yarn to either side of the patch using face paint adhesive for a more realistic effect, especially for extended wear. This also keeps the patch from smearing.
Step 2: Scar
With red face paint and a fine-tipped brush, draw a jagged scar on the cheek. The scar should be thin and slightly curved, with a few small lines branching off from it. Add a touch of white face paint to one side of the scar to create a highlight and give it a more three-dimensional look. Consider sketching the scar lightly with a white eyeliner pencil before applying red paint for a more controlled and precise scar.
Step 3: Facial Hair (Optional)
Using black face paint, add a small goatee or mustache to complete the pirate look. Alternatively, draw a few stubble dots around the chin for a more rugged appearance. If using liquid eyeliner for the finer details, be sure it’s waterproof to prevent smudging caused by perspiration.
Common Mistakes to Avoid
- Using low-quality or non-toxic paints.
- Applying too much paint at once.
- Using dirty brushes.
- Forgetting to blend the colors properly.
- Not practicing the design beforehand.
FAQ Section
Q: What kind of face paint should I use?
A: Use high-quality, non-toxic face paints specifically designed for cosmetic use.
Q: How do I remove face paint?
A: Gently remove face paint with soap and water or a dedicated face paint remover.
Q: How can I make my face paint last longer?
A: Use a face paint sealant spray to prevent smudging and make the design last longer.
Conclusion
With a little practice and creativity, anyone can create stunning face paint designs. Remember to use high-quality, non-toxic face paints, follow the step-by-step instructions provided in this guide, and don't be afraid to experiment with different colors and patterns. Face painting is all about having fun and expressing your imagination. So, grab your brushes and paints, and get ready to transform ordinary faces into extraordinary works of art!