Ceramic coating offers exceptional protection for your car's paint, providing a durable, hydrophobic layer that resists scratches, UV damage, and chemical etching. Applying a ceramic coating yourself can save you money compared to professional application, but it requires careful preparation and attention to detail. This guide provides a step-by-step process to achieve a professional-quality ceramic coating at home.
The key to a successful ceramic coating lies in meticulous preparation. Failing to properly clean and decontaminate your car's paint will result in poor adhesion and a compromised finish. Take your time, follow each step carefully, and enjoy the satisfaction of a professionally protected vehicle.
This guide assumes a basic understanding of car detailing. If you're new to detailing, consider practicing on a less visible area first.
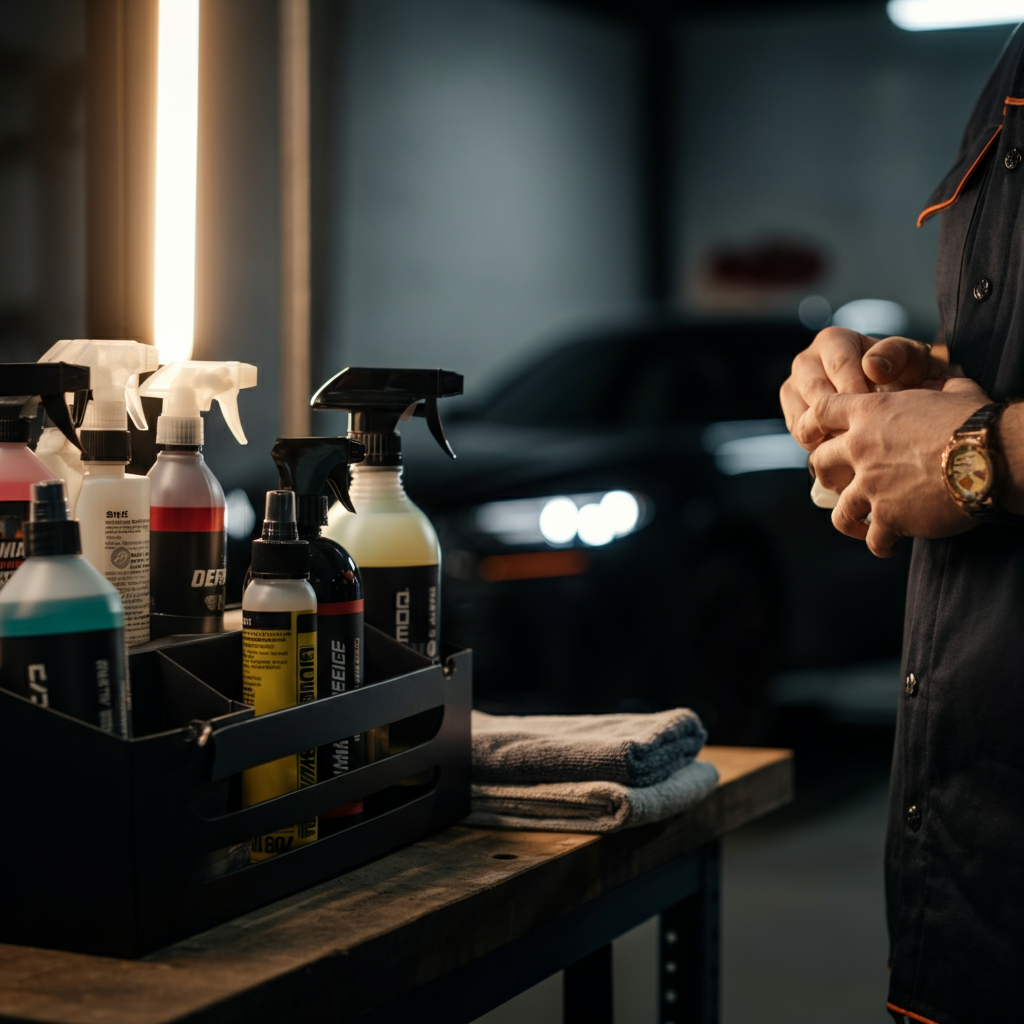
1. Gather Your Supplies
Before you even think about touching your car, make sure you have everything you need at your disposal. Running back and forth searching for items will not only waste time, but could also introduce contaminants. Having all your tools organized and ready is critical for a smooth application process.
Tools or Materials Required:
- Car wash soap (pH neutral)
- Two buckets (one for wash, one for rinse)
- Wash mitt (microfiber or wool)
- Decontamination mitt (clay mitt or clay bar)
- Iron remover spray
- Tar remover spray
- Polishing compound (optional, depending on paint condition)
- Polishing machine (optional, depending on paint condition)
- Isopropyl alcohol (IPA) or panel wipe
- Ceramic coating kit (includes coating, applicator, and microfiber towels)
- Nitrile gloves
- Good lighting (LED work lights are ideal)
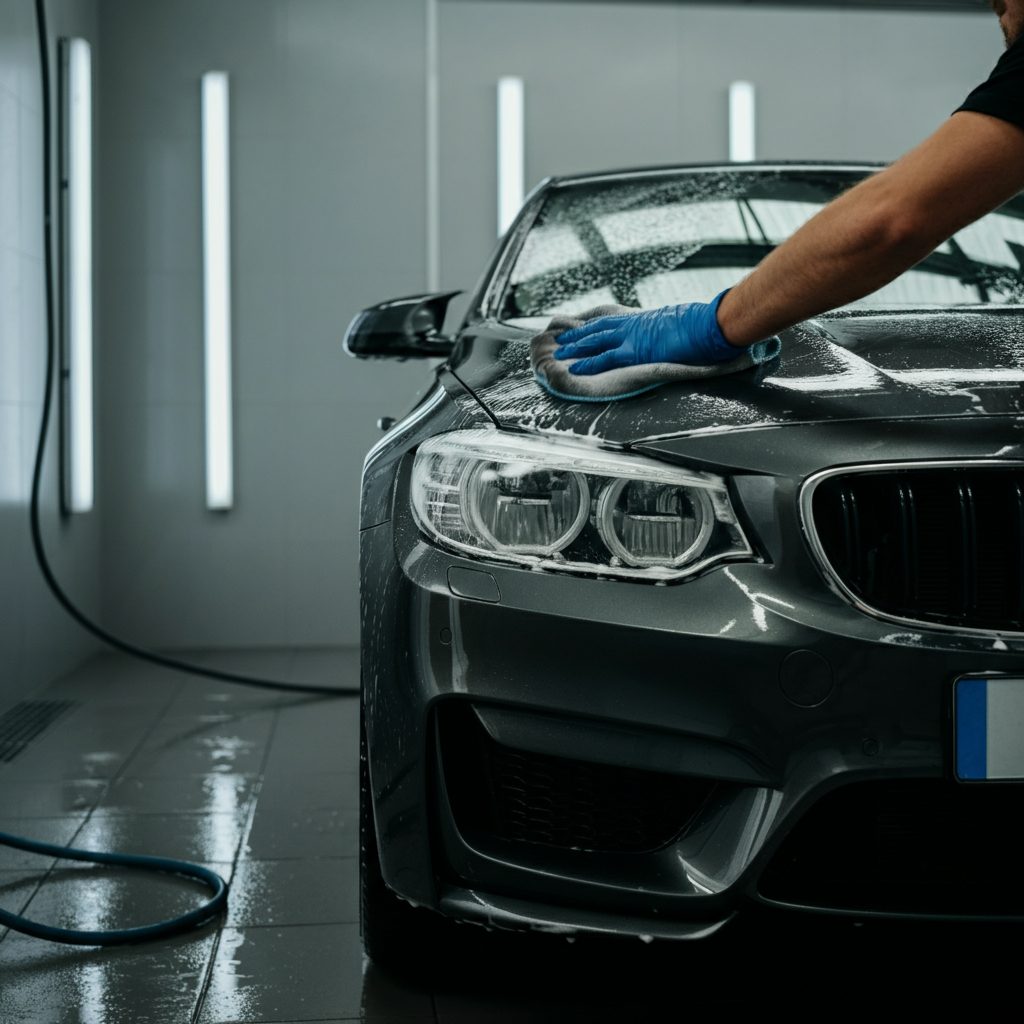
2. Wash and Decontaminate Your Car
The first step is a thorough wash. Use the two-bucket method with a pH-neutral car wash soap and a quality wash mitt. Rinse thoroughly. This removes loose dirt and grime, preparing the surface for decontamination. Next, use an iron remover spray to dissolve embedded iron particles from brake dust and industrial fallout. Rinse thoroughly again. Then, use a tar remover to dissolve any tar spots. Rinse. Finally, use a clay mitt or clay bar to remove any remaining bonded contaminants. Lubricate the surface well with a clay lubricant during this process to prevent scratching.
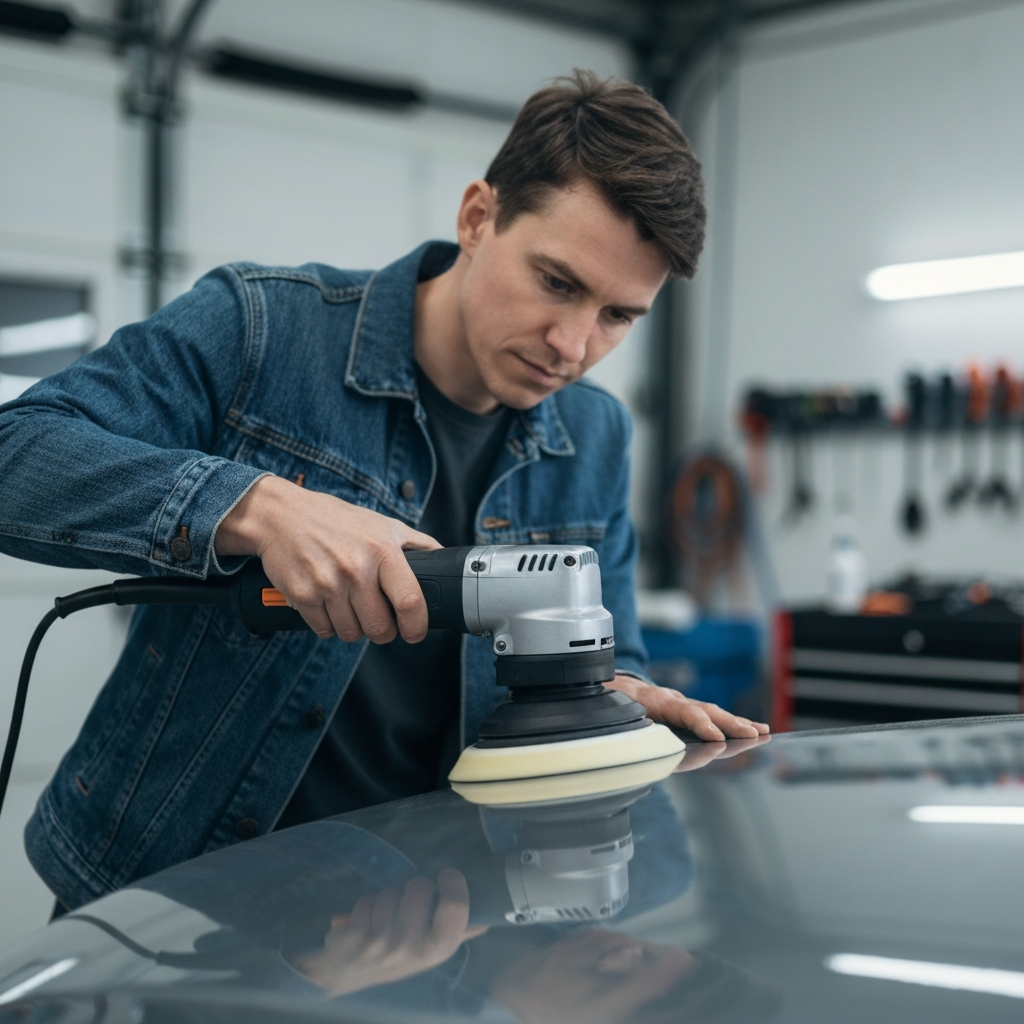
3. Paint Correction (If Necessary)
If your car's paint has swirl marks, scratches, or other imperfections, now is the time to correct them with a polishing compound and a polishing machine. This step is optional, but it will significantly improve the final appearance of the ceramic coating. Even minor imperfections will be amplified by the coating's reflective properties. Start with a less aggressive polish and pad combination and work your way up if necessary. Remove all polishing residue with a microfiber towel.
4. Panel Wipe
After polishing (or if you skipped polishing), you need to thoroughly clean the surface with isopropyl alcohol (IPA) or a dedicated panel wipe. This removes any remaining polishing oils or other residues that could interfere with the ceramic coating's adhesion. Use a clean microfiber towel and wipe down every surface that will be coated. Change the towel frequently to avoid re-depositing contaminants.
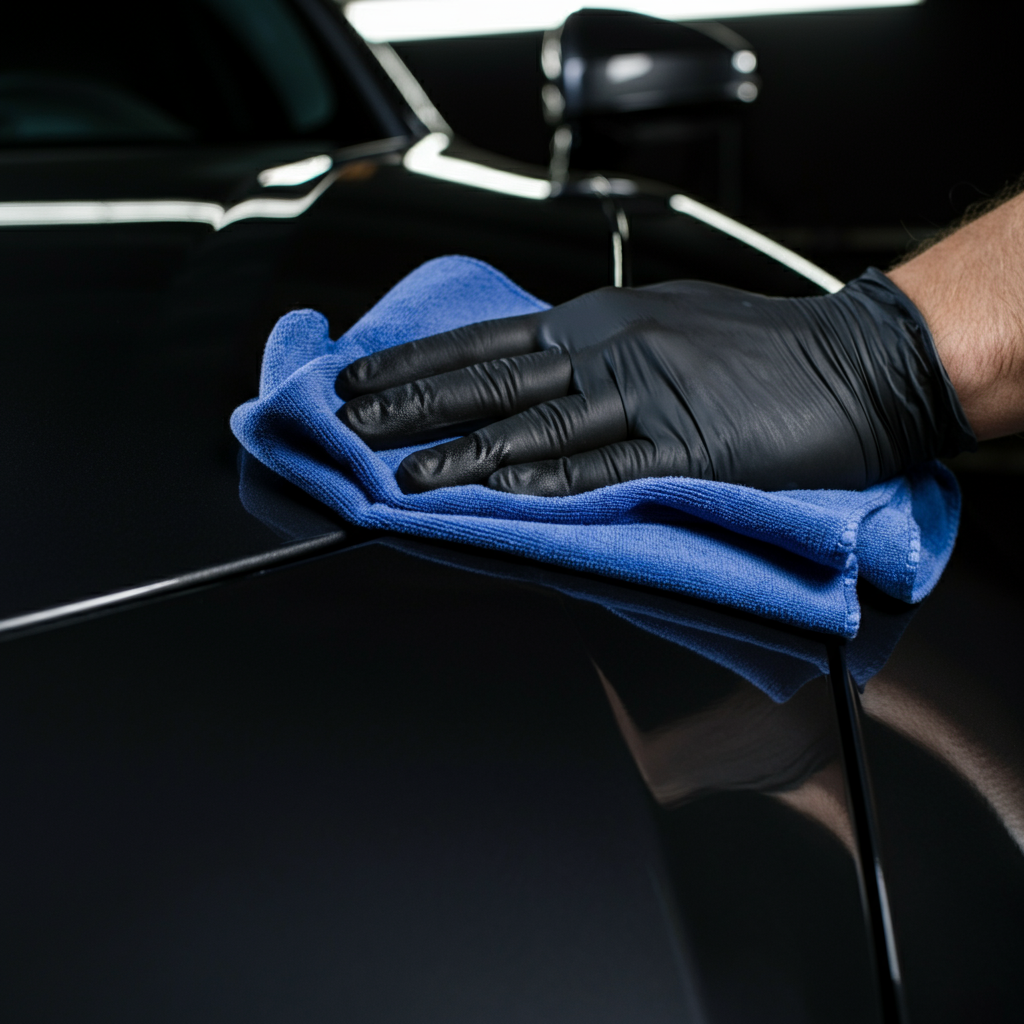
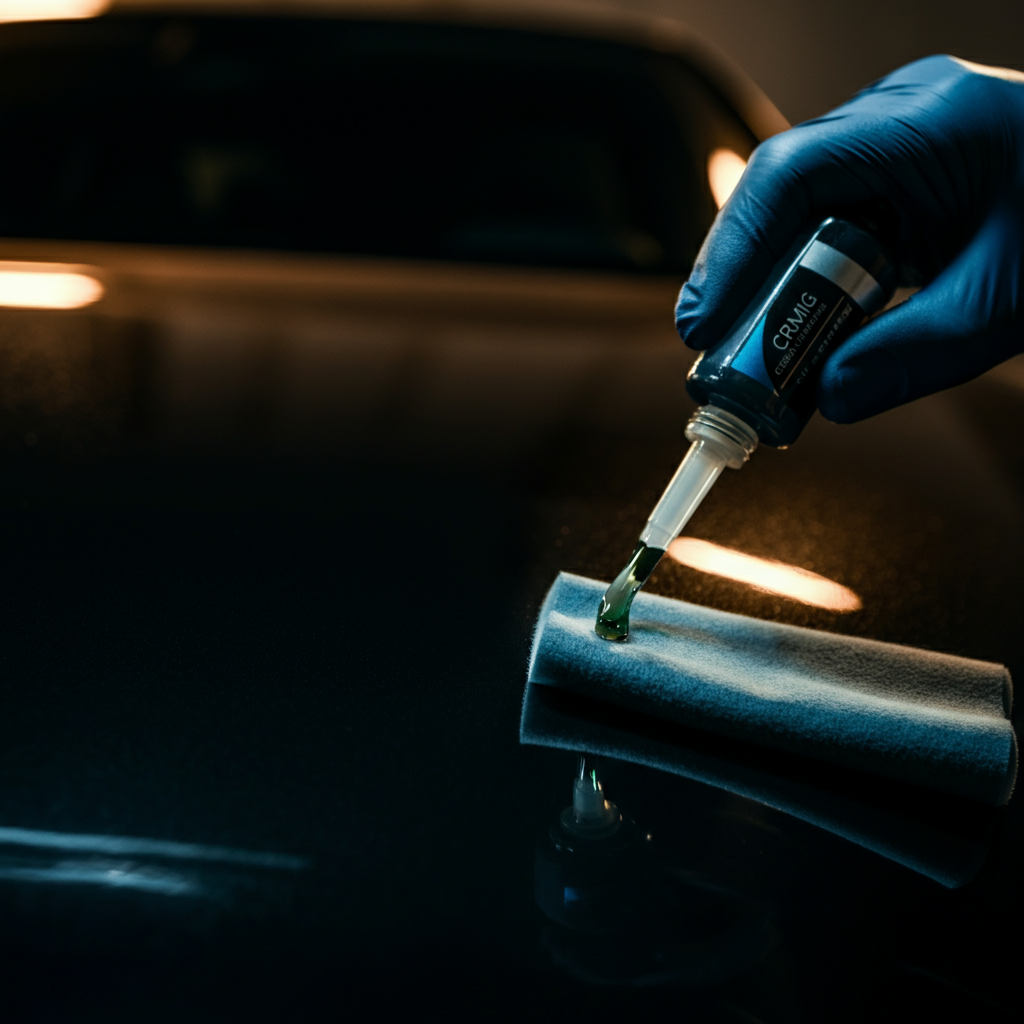
5. Apply the Ceramic Coating
Now for the main event! Put on nitrile gloves to protect your hands. Shake the ceramic coating bottle well. Apply a few drops (usually 5-7, but refer to your specific product instructions) of the coating onto the applicator pad. Work in small sections (approximately 2ft x 2ft). Apply the coating in a cross-hatch pattern to ensure even coverage. Don't apply too much coating, as this will make it difficult to remove and can lead to streaking.
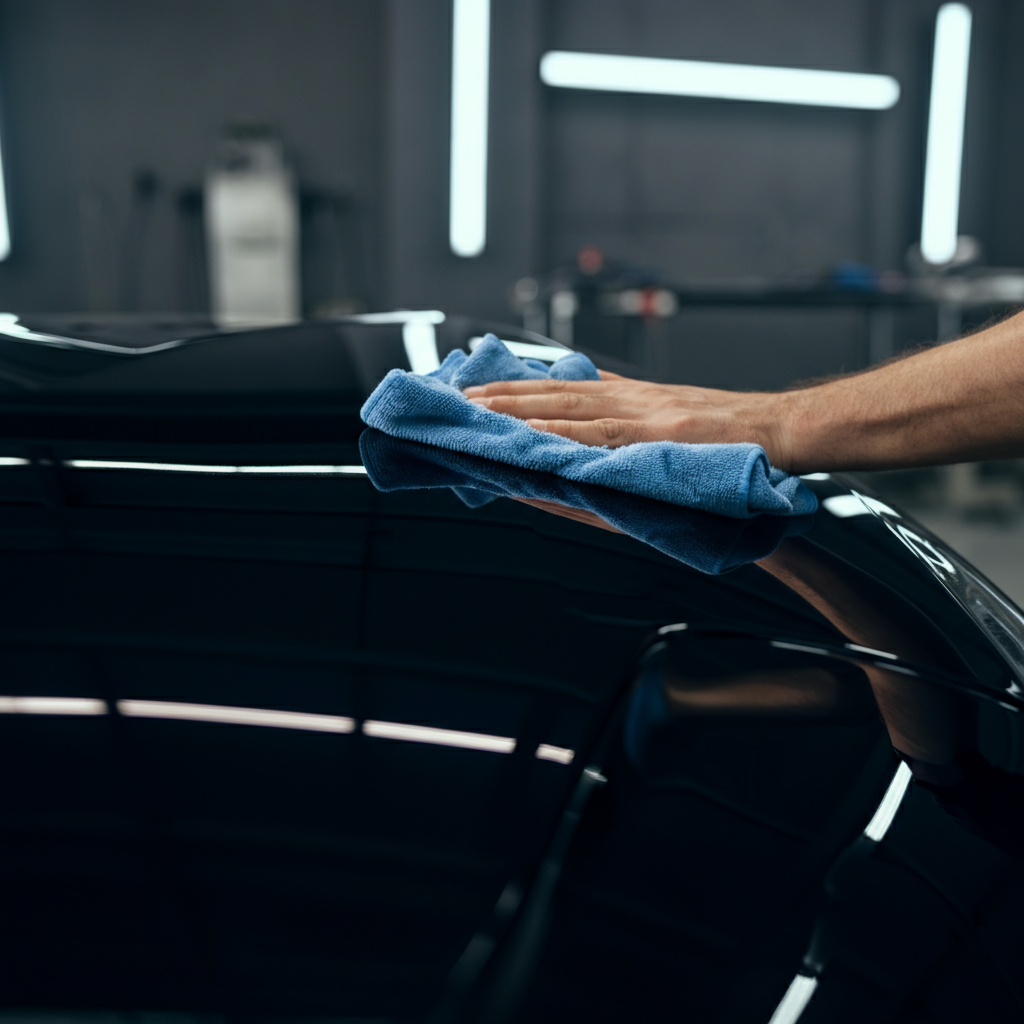
6. Level the Coating
After applying the coating, allow it to dwell for the recommended time (typically 1-5 minutes, but always refer to the manufacturer's instructions). Then, use a clean microfiber towel to level the coating. This involves gently wiping away any excess product. Use a fresh, clean microfiber towel for each section to avoid re-depositing excess coating. You'll likely need to use multiple towels per panel.
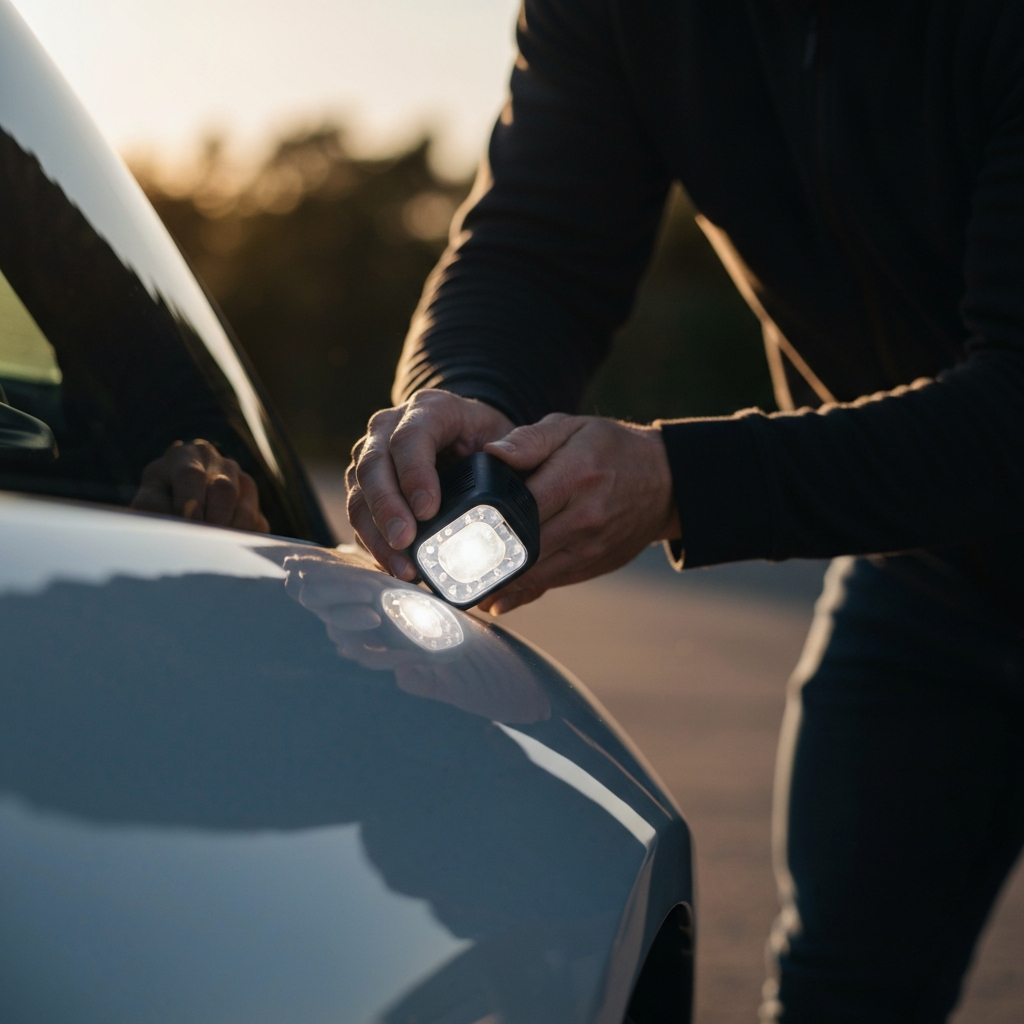
7. Final Inspection
After leveling each section, inspect the surface carefully for any high spots or streaks. Use a bright light to help you see any imperfections. If you find any, immediately wipe them away with a clean microfiber towel. The first 24 hours are crucial for correcting any mistakes.
8. Curing
Allow the ceramic coating to cure for the recommended time (typically 24-48 hours) in a clean, dry environment. Avoid washing the car during this time. Some coatings may require an IR lamp for faster curing.

Common Mistakes to Avoid
- Skipping proper preparation: As mentioned above, thorough cleaning and decontamination are essential.
- Applying too much coating: More isn't always better. Applying too much coating can make it difficult to level and can lead to streaking.
- Using dirty towels: Using dirty towels can re-introduce contaminants and scratch the paint.
- Applying in direct sunlight: Direct sunlight will cause the coating to cure too quickly, making it difficult to level.
- Not following manufacturer's instructions: Always read and follow the manufacturer's instructions for the specific ceramic coating you are using.
Safety Considerations
- Always wear nitrile gloves when handling ceramic coatings.
- Work in a well-ventilated area.
- Avoid contact with skin and eyes. If contact occurs, rinse immediately with water.
- Keep ceramic coating products out of reach of children.
FAQ Section
Q: How long does ceramic coating last?
A: Depending on the product and how well it's maintained, ceramic coating can last anywhere from 1 to 5 years.
Q: How do I maintain a ceramic coated car?
A: Wash your car regularly with a pH-neutral car wash soap. Avoid automatic car washes with harsh brushes. You can also use a ceramic coating maintenance spray to boost the coating's hydrophobic properties.
Q: Can I apply multiple layers of ceramic coating?
A: Some ceramic coatings are designed to be layered. Refer to the manufacturer's instructions for guidance.
Conclusion
Applying a ceramic coating to your car is a worthwhile investment that can provide years of protection and enhance its appearance. By following these steps carefully and paying attention to detail, you can achieve a professional-quality result at home. Remember that preparation is key, and patience is a virtue. With a little effort, you can enjoy the benefits of a beautifully protected vehicle.